Before doing this project make sure you already know the basics of making an LED fading effect. If you’re not sure how the fade effect works, you may want to read this article first: Become a Master of the Fade In Fade Out Effect (Arduino Style)
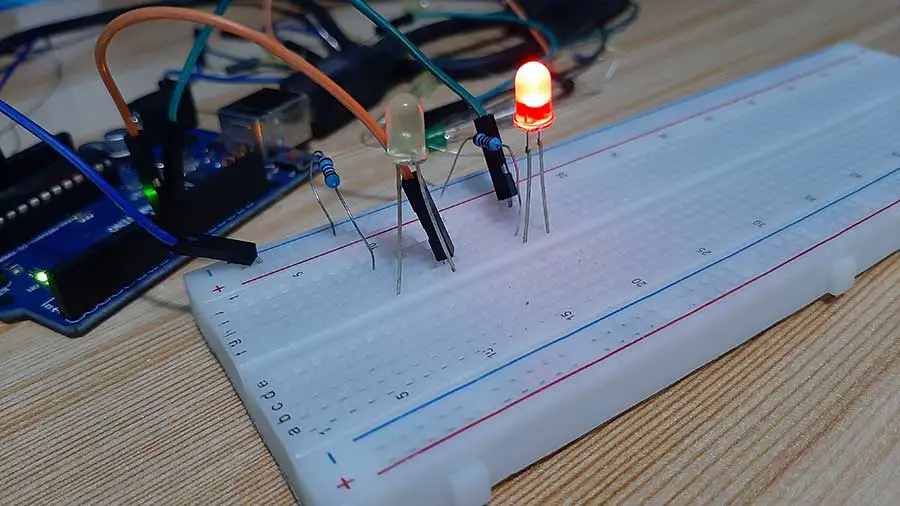
The way this project works is that there are 2 LEDs. Both LEDs are turned off at the start of the program. Then when the Arduino board is powered on, the first LED performs a fade-in effect and upon reaching its maximum brightness, it goes into a fade-out effect. Once this procedure is complete, the second LED does the same thing. First, it performs a fade-in effect, then followed by a fadeout. And basically, that’s it, just 2 LEDs having alternating fade-in and fade-out effects.
Here's the breadboard circuit:
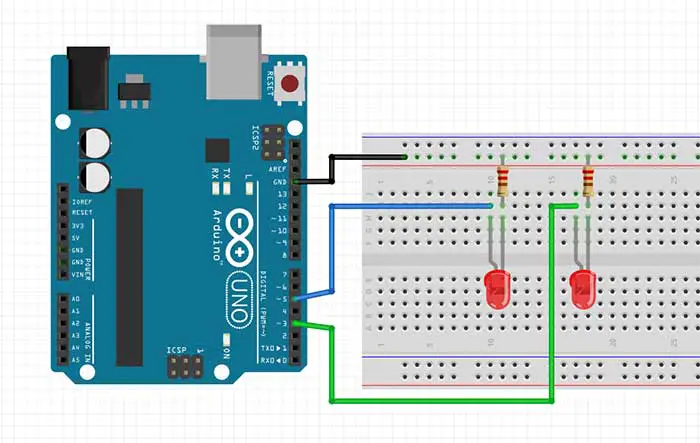
When connecting the LEDs, make sure that you are using PWM pins, or else it will not work. Ordinarily, digital pins will only let you turn on and turn off an LED. However, by using a PWM pin, you can control the time how long an LED stays on and how long it stays off.
Because this happens so fast, you can’t see the flickering effect, but instead, you’ll just see that the LED becomes brighter or dimmer. The nature of the PWM (Pulse-Width Modulation) is explained in detail here: Become a Master of the Fade In Fade Out Effect (Arduino Style)
Here's the code:
int ledPin = 5;
int ledPin2 = 3;

void setup() {
  pinMode(ledPin, OUTPUT);
  pinMode(ledPin2, OUTPUT);
}

void loop() {
  // fade in from min to max in increments of 5 points:
  for (int fadeValue = 0 ; fadeValue <= 255; fadeValue = fadeValue+5) {
    // sets the value (range from 0 to 255):
    analogWrite(ledPin, fadeValue);
    // wait for 30 milliseconds to see the dimming effect
    delay(30);
  }

  // fade out from max to min in increments of 5 points:
  for (int fadeValue = 255 ; fadeValue >= 0; fadeValue = fadeValue-5) {
    // sets the value (range from 0 to 255):
    analogWrite(ledPin, fadeValue);
    // wait for 30 milliseconds to see the dimming effect
    delay(30);
  }

  // fade in from min to max in increments of 5 points:
  for (int fadeValue = 0 ; fadeValue <= 255; fadeValue = fadeValue+5) {
    // sets the value (range from 0 to 255):
    analogWrite(ledPin2, fadeValue);
    // wait for 30 milliseconds to see the dimming effect
    delay(30);
  }

  // fade out from max to min in increments of 5 points:
  for (int fadeValue = 255 ; fadeValue >= 0; fadeValue = fadeValue-5) {
    // sets the value (range from 0 to 255):
    analogWrite(ledPin2, fadeValue);
    // wait for 30 milliseconds to see the dimming effect
    delay(30);
  }


}
If you have already read the article about the fade effect, then this could look familiar to you. What we did here is just to arrange the sequence of the for loop so that the 2 LEDs would fade alternately.
Sequence 1
The first LED fades in first using this code. Take note that we have named our first LED as ledpin.
  // fade in from min to max in increments of 5 points:
  for (int fadeValue = 0 ; fadeValue <= 255; fadeValue = fadeValue+5) {
    // sets the value (range from 0 to 255):
    analogWrite(ledPin, fadeValue);
    // wait for 30 milliseconds to see the dimming effect
    delay(30);
  }
Once the fadeValue variable reaches 255, it will then exit this loop because the condition fadeValue<=255 becomes false. At this point, Arduino will now proceed to the next part of the code which is in fact, another loop.
Sequence 2
The first LED fades out after reaching its maximum brightness (255) from Sequence 1.
// fade out from max to min in increments of 5 points:
  for (int fadeValue = 255 ; fadeValue >= 0; fadeValue = fadeValue-5) {
    // sets the value (range from 0 to 255):
    analogWrite(ledPin, fadeValue);
    // wait for 30 milliseconds to see the dimming effect
    delay(30);
  }
In the same manner in Sequence 1, Arduino exits this loop once the fadeValue variable becomes 0 because the condition fadeValue>=0 will now become false. It will now proceed to the next part of the code, which is again, another loop. But this loop will now control the second LED.
Sequence 3
The second LED fades in using this code. Take note that we have named our second LED ledpin2.
  // fade in from min to max in increments of 5 points:
  for (int fadeValue = 0 ; fadeValue <= 255; fadeValue = fadeValue+5) {
    // sets the value (range from 0 to 255):
    analogWrite(ledPin2, fadeValue);
    // wait for 30 milliseconds to see the dimming effect
    delay(30);
  }
Once the fadeValue reaches 255, it exits this loop, same as the previous loops, and proceeds to the last loop sequence of our code.
Sequence 4
The second LED fades out after reaching its maximum brightness (255) from Sequence 3.
  // fade out from max to min in increments of 5 points:
  for (int fadeValue = 255 ; fadeValue >= 0; fadeValue = fadeValue-5) {
    // sets the value (range from 0 to 255):
    analogWrite(ledPin2, fadeValue);
    // wait for 30 milliseconds to see the dimming effect
    delay(30);
  }
This is now the end of our code. After this, Arduino goes back to the very first line of void loop() function and starts over again, that is, going back to Sequence 1.


