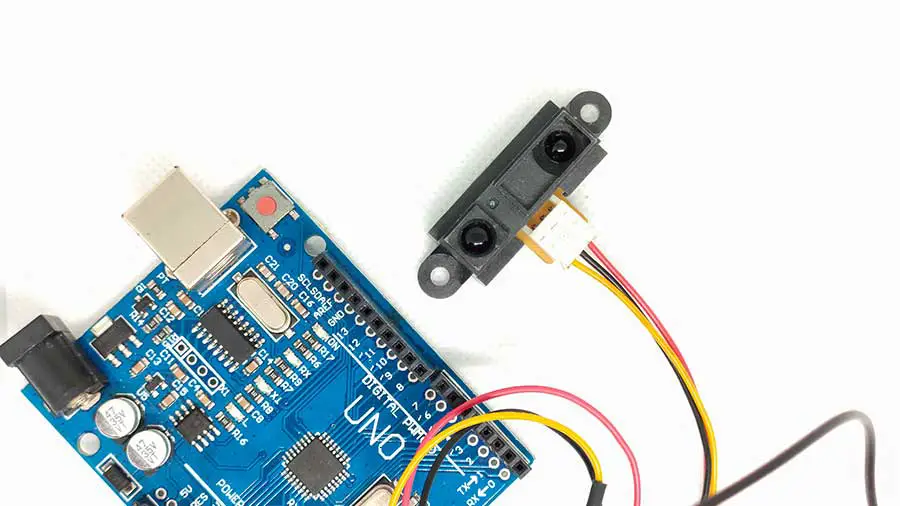
Are you looking to achieve precise distance measurements for your next Arduino project? If you're building a robot that avoids obstacles, creating a touchless control interface, or developing an automated door opener, the Sharp IR Infrared Distance Sensor GP2Y0A21YK0F can transform your project. In this guide, we’ll explain how to integrate this sensor with Arduino, look into its working principle, provide detailed step-by-step instructions, and share practical Arduino code. Even if you’re new to Arduino, this guide will make the process easy to follow.
What is the Sharp IR Infrared Distance Sensor GP2Y0A21YK0F?
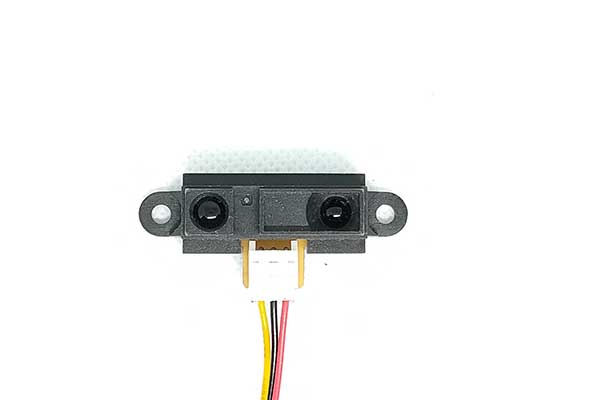
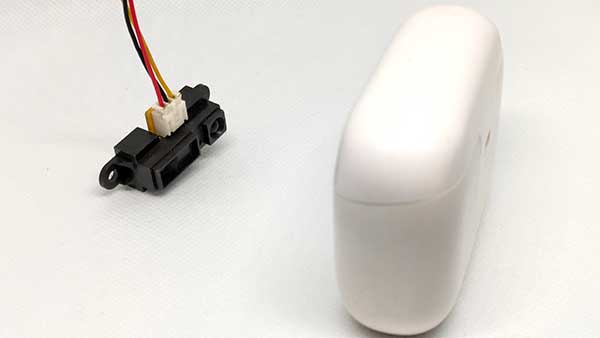
The Sharp IR GP2Y0A21YK0F is a popular infrared distance sensor capable of detecting objects within a range of 10 cm to 80 cm. It uses infrared light to measure the distance to an object and provides an analog output that corresponds to the distance. The sensor is compact, cost-effective, and suitable for various applications, such as:
- Obstacle detection in robots
- Non-contact distance measurement for industrial automation
- Proximity sensing in interactive devices
Why Use the Sharp IR Sensor with Arduino?
Arduino is a versatile platform for hobbyists and professionals alike, making it an ideal choice to interface with the Sharp IR sensor. With Arduino's ease of programming and extensive libraries, you can quickly get the sensor up and running to measure distances or control devices based on proximity.
How Does the Sharp IR Sensor Work?
The Sharp IR sensor emits infrared light from its emitter. When the light reflects off an object, it returns to the sensor's receiver. The sensor then calculates the angle of the reflected light to estimate the distance. The output is an analog voltage, which decreases as the distance increases.
Wiring the Sharp IR Sensor to Arduino
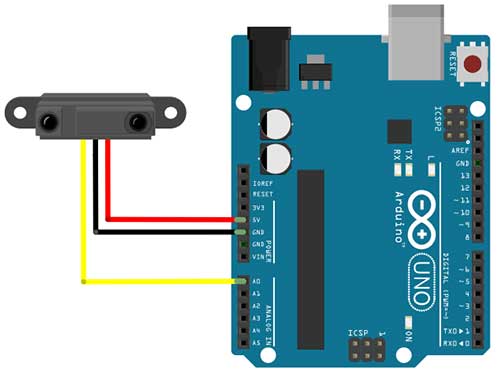
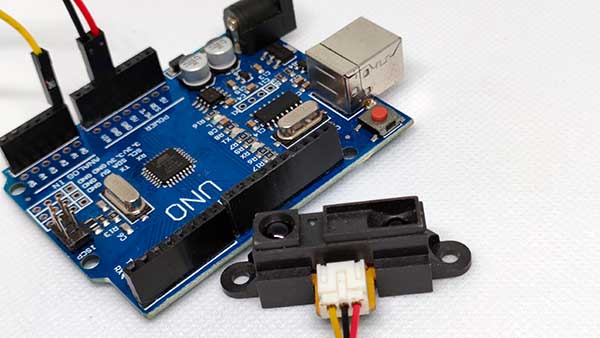
Follow these steps to connect the Sharp IR sensor to your Arduino:
- Connect the VCC Pin of the sensor to the 5V pin on the Arduino.
- Connect the GND Pin of the sensor to the GND pin on the Arduino.
- Connect the OUT Pin of the sensor to an analog input pin on the Arduino, e.g., A0.
Arduino Code for the Sharp IR Sensor
Below is the Arduino code to read distance data from the Sharp IR sensor and display it on the Serial Monitor.
// Sharp IR GP2Y0A21YK0F Sensor Example Code with Distance in Inches

const int irPin = A0;  // Analog pin connected to sensor OUT
float voltage, distanceCM, distanceInches;

void setup() {
  Serial.begin(9600); // Initialize Serial Monitor
}

void loop() {
  voltage = analogRead(irPin) * (5.0 / 1023.0); // Convert analog value to voltage
  distanceCM = 27.86 * pow(voltage, -1.15);     // Calculate distance in cm
  distanceInches = distanceCM * 0.393701;       // Convert cm to inches

  Serial.print("Voltage: ");
  Serial.print(voltage);
  Serial.print(" V, Distance: ");
  Serial.print(distanceCM);
  Serial.print(" cm, ");
  Serial.print(distanceInches);
  Serial.println(" inches");

  delay(500); // Wait 500ms before next reading
}
Detailed Explanation of the Code
This code shows the basic functionality of interfacing the Sharp IR GP2Y0A21YK0F Infrared Distance Sensor with Arduino by adding a feature to display the distance in inches and centimeters. Let’s break it down step by step.
1. Declaring Variables
const int irPin = A0;  // Analog pin connected to sensor OUT
float voltage, distance;
irPin: A constant integer variable assigned toA0. It specifies the analog pin where the sensor's output pin is connected.voltage: A floating-point variable to store the calculated voltage from the sensor's output.distance: A floating-point variable to store the calculated distance in centimeters.
2. Setting Up the Arduino
void setup() {
  Serial.begin(9600); // Initialize Serial Monitor
}
Serial.begin(9600): Initializes serial communication at a baud rate of 9600 bits per second, allowing data to be sent to the Serial Monitor for debugging or viewing output.
3. Main Loop
void loop() {
  voltage = analogRead(irPin) * (5.0 / 1023.0); // Convert analog value to voltage
  distance = 27.86 * pow(voltage, -1.15);       // Calculate distance (in cm)

  Serial.print("Voltage: ");
  Serial.print(voltage);
  Serial.print(" V, Distance: ");
  Serial.print(distance);
  Serial.println(" cm");

  delay(500); // Wait 500ms before next reading
}
3.1 Reading Analog Value
voltage = analogRead(irPin) * (5.0 / 1023.0);
analogRead(irPin): Reads the analog voltage from the sensor'sOUTpin. The function returns a value between 0 and 1023, corresponding to a voltage between 0V and 5V.5.0 / 1023.0: Converts the raw analog value into an actual voltage. Each increment of the analog reading corresponds to approximately 4.88 mV (5V ÷ 1023).
3.2 Calculating Distance
distance = 27.86 * pow(voltage, -1.15);
This formula calculates the distance (in centimeters) based on the sensor’s output voltage. The formula's constants (27.86 and -1.15) come from the sensor's datasheet or calibration data.
pow(voltage, -1.15): Raises the voltage to the power of-1.15, which inversely correlates with the distance. This reflects the sensor's non-linear output curve.
3.3 Displaying Results
Serial.print("Voltage: ");
Serial.print(voltage);
Serial.print(" V, Distance: ");
Serial.print(distance);
Serial.println(" cm");
Serial.print(): Sends data to the Serial Monitor for display.
- The sensor's output voltage and the calculated distance (in centimeters) are displayed in a readable format.
3.4 Adding a Delay
delay(500);
This introduces a 500-millisecond delay between sensor readings. It ensures that the Serial Monitor is not overwhelmed with too many readings and provides a stable interval for measurement updates.
How the Code Works Together
- The setup function initializes the Serial Monitor.
- In the loop function, the Arduino continuously:
-
- Reads the analog voltage from the sensor.
- Converts the raw value into an actual voltage.
- Uses the voltage to calculate the distance in centimeters.
- Outputs the voltage and calculated distance to the Serial Monitor.
- Waits 500 milliseconds before repeating the process.
Open the Serial Monitor (Tools->Serial Monitor) to view the output.
Practical Notes
-
Accuracy of Distance Calculation:
- The formula for distance calculation assumes ideal conditions. Factors like sensor alignment, surface reflectivity, and environmental interference may affect accuracy.
- If results are inconsistent, recalibration may be needed.
-
Sensor Range:
- The GP2Y0A21YK0F sensor is designed for distances between 10 cm and 80 cm. Measurements outside this range might be unreliable.
-
Environment Considerations:
-
Avoid using the sensor in environments with reflective or transparent surfaces, as they can interfere with the readings.
-
Practical Applications of the Sharp IR Sensor
Now that you know how to use the Sharp IR sensor with Arduino, consider these practical applications:
- Obstacle-Avoiding Robot: Use the sensor to detect objects in the robot's path and steer it away.
- Touchless Door Opener: Automate doors to open when a person or object is detected within a certain range.
- Liquid Level Detection: Place the sensor above a container to monitor the liquid level.
Frequently Asked Questions (FAQs)
1. Can I use the Sharp IR GP2Y0A21YK0F sensor for long-range measurements?
The GP2Y0A21YK0F model is designed for short-range distances (10–80 cm). For longer ranges, consider other Sharp IR models like GP2Y0A02YK0F.
2. How accurate is the Sharp IR sensor?
The sensor provides reliable results but may have slight inaccuracies due to environmental factors like lighting conditions or sensor placement. Using a capacitor can help stabilize readings.
3. Can I use multiple Sharp IR sensors with Arduino?
Yes, you can connect multiple sensors to different analog pins and read them sequentially. Ensure proper power distribution.
Conclusion
The Sharp IR GP2Y0A21YK0F Infrared Distance Sensor is a versatile and beginner-friendly tool for Arduino projects. With its ability to provide precise distance measurements, it opens up possibilities for countless applications. By following this guide, you’ll have the sensor operational in no time, ready to tackle real-world challenges.


