Made by Shandale Gulfan.
We learned about the basics of Arduino, how to code and program the LEDs, how to make breadboard connections—but why stop there? This quarter, we learned about sensors and how they work. It’s amazing how different kinds of sensors are used in our everyday lives. Take touch sensors as an example, your mobile phone is a great example of that! For this quarter, I made a mini-arcade game that uses two kinds of sensors: the infrared sensor and the light sensor.
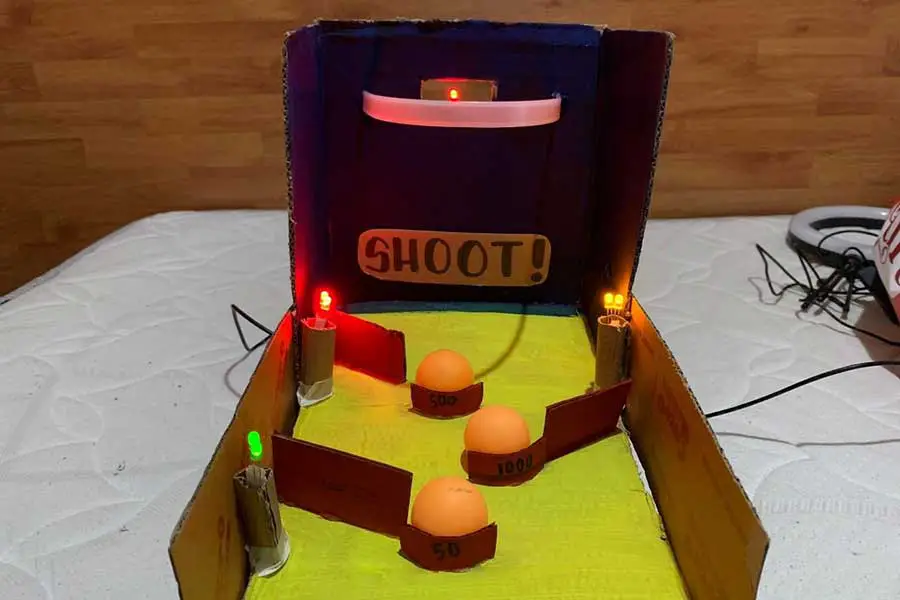
I made an entertaining and engaging game that would surely cure one’s boredom. We miss spending our time in arcades after school, so why not bring the arcade to you? This game will challenge your aim, your patience, and your game. Let’s play “SHOOT!” a mini-arcade game!
MATERIALS NEEDED

- Used boxes
- Scissors/Box cutter
- Glue gun
- Stick glue
- Acrylic paint (blue, yellow, red)
- Jumper wires
- Breadboard
- Arduino microcontroller
- Paint bucket handle
- 3 Light-dependent resistors
- IR sensor
- LEDs (2 yellow, 2 green, 3 red)
- 10k ohm resistor
- 220-ohm resistor
- Piezo buzzer
- Masking tape
- Paintbrush
- Ping pong balls
STEP BY STEP PROCEDURE
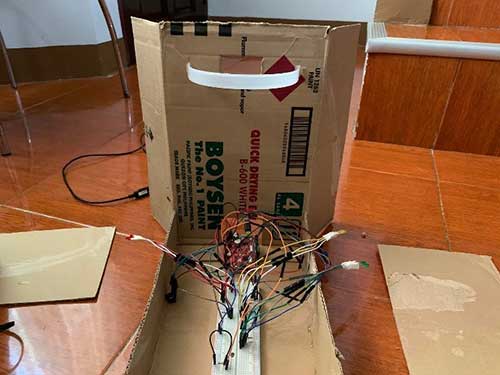
STEP 1. I started by making a breadboard connection to connect the wires, LEDs, sensors, and resistors from the breadboard to the Arduino board. It was a hectic process of trial-and-error. Always make sure that the sensors are connected properly as they are very sensitive to connectivity mishaps.
Here is what my breadboard looks like:
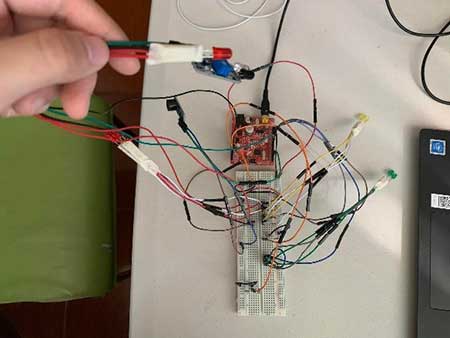
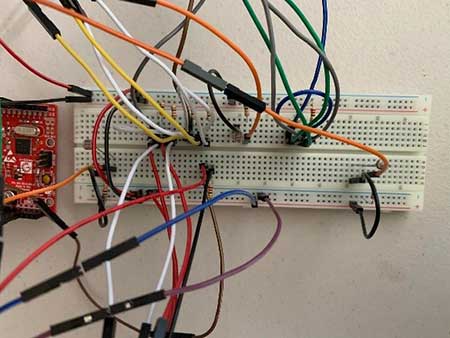
I used 6 LEDs to be the score indicator and 1 as the cue for the game. I used the 2 LEDs 1 Pin method that I learned in the first quarter. I used 3 LDRs or Light Dependent Resistors and used 10k ohm resistors for each. I also made use of an IR sensor as the “start signal” together with a piezo buzzer. I triple-checked each connection before plugging in the microcontroller to avoid damages.
This is the code used:
  int pinLDR1=A0;
  int pinLDR2=A1;
  int pinLDR3=A2;
  int pinled1=10;
  int pinled2=11;
  int pinled3=12;
  int buzzer=2;
  int ir=9;
  int irled=8;
  int val=0;

  void setup(){
    pinMode(pinled1,OUTPUT);
    pinMode(pinled2,OUTPUT);
    pinMode(pinled3,OUTPUT);
    pinMode(buzzer,OUTPUT);
   pinMode(ir,INPUT);
   pinMode(irled,OUTPUT);
  }

  void loop(){

    val= analogRead(pinLDR1);

    if (val >830){
      digitalWrite(pinled1,HIGH);

    }
    else{
      digitalWrite(pinled1,LOW);
    }
    val = analogRead(pinLDR2);

    if (val >900){
      digitalWrite(pinled2,HIGH);

    }
    else{
      digitalWrite(pinled2,LOW);
    }
    val = analogRead(pinLDR3);

    if (val >800){
      digitalWrite(pinled3,HIGH);

    }
    else{
      digitalWrite(pinled3,LOW);
    }
    if(digitalRead(ir) == 0)
    {
      digitalWrite(irled, HIGH);
      delay(250);
      tone(buzzer,400,250);
     delay(500);
     digitalWrite(irled, LOW);
      delay(250);
      digitalWrite(irled, HIGH);
      delay(250);
     tone(buzzer,600,250);
     delay(500);
     digitalWrite(irled, LOW);
      delay(250);
      digitalWrite(irled, HIGH);
      delay(250);
     tone(buzzer,800,250);
     delay(500);
     digitalWrite(irled, LOW);
      delay(250);
      digitalWrite(irled, HIGH);
      delay(500);
     tone(buzzer,1000,500);
     delay(1000);
     digitalWrite(irled, LOW);
      delay(500);

    }
    else
    {
      digitalWrite(irled, LOW);
    }
}
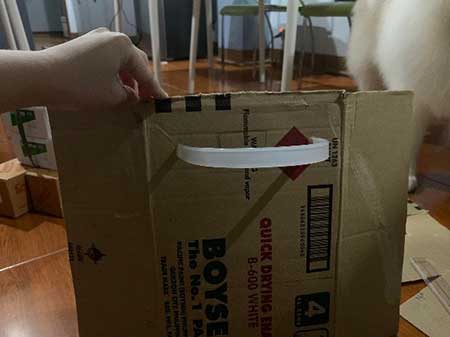
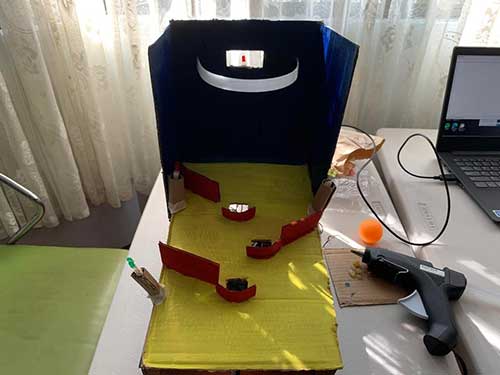
STEP 2. Cut one side of the box, keep the two flaps intact because we will need them later on. Then, attach the paint bucket handle, making it as a make-shift ring for the balls to go through. This will be our stand.
STEP 3. We need to build a “floor” or a place to put the breadboard in. Cut another side of the box and glue it to the bottom part of the stand. With the breadboard, this is how it will look like:
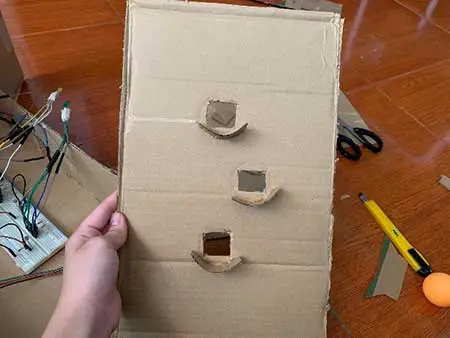
STEP 4. Using another side of the cut-up box, make 3 holes. Make sure that the holes are aligned to the Light Dependent Resistors. This is where the ping pong balls are going to go. Do make sure that the hole is smaller than the ping pong ball so that the ping pong ball will not fall into the hole. Add stoppers and mini slides as well. This will be the “base”.
It will then look like this:
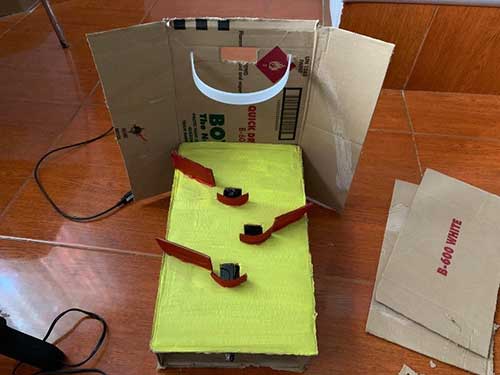
STEP 5. Paint the base yellow and attach it to the stand in a slightly slanted manner for it to be some kind of slide. The stoppers and the small slides will be painted red.
STEP 6. Get a small portion of the box and tape the IR sensor to it. Make sure that the IR sensor does not protrude because it might get hit. Attach it to the bottom of the base.
STEP 7. Make cylinder shapes to put the LEDs in with extra pieces of the cut-up box. This will stabilize the LEDs and prevent them from moving around.

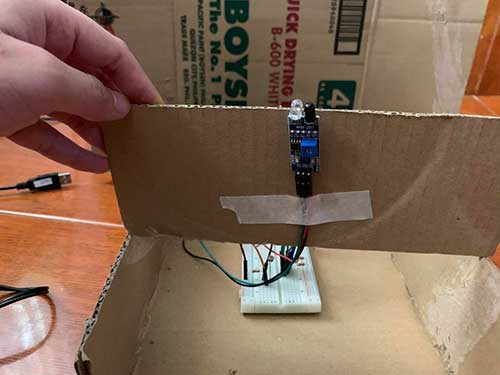
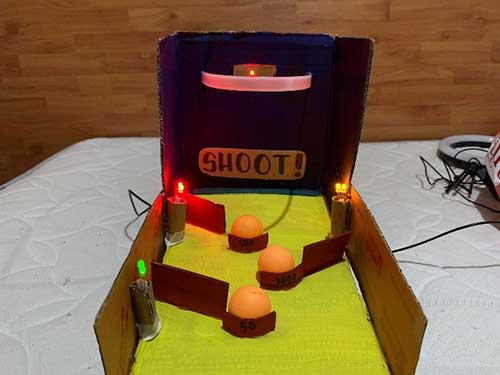
STEP 8. Paint the stand blue. Then at the back, tape the single red LED. This will be our cue light.
STEP 9. Put decorations and final polishes. For me, I put the word “SHOOT!” as it is the name I have for this game. And there you have it!
Compared to the last quarter, this exit product was easier to make. Although the concepts in this quarter were harder and more complex, I got the hang of it pretty quickly because I know how things work already. It’s very fulfilling to finish an exit product especially with all the effort you put in it. It was a very worthwhile experience. The relief I felt when the code worked, the tears shed due to stress, the rush, the continuous checking of the connections—it’s an experience that I would not trade for anything.
I’m glad that I got to apply what I’ve learned last quarter to this quarter’s exit product, it just goes to show that I’ve retained some information somehow. Once you get the hang of things, everything will go smoothly, I realized that with all the activities I’ve done in Computer this quarter. I honestly thought that I would not pull this exit product off because it was intimidating at first, but I got it figured out. I’m looking forward to more activities and products I can make as I continue to learn about different concepts in this subject.


Sorry, I don't have it, but you can see the breadboard circuit for the LDR with LED here: https://www.arduinointro.com/articles/projects/light-sensor-how-to-make-your-robots-react-to-light