Made by Janelle Asuncion.
Since I wanted something that is related to our environment and also sea life, I decided to make a project based on saving the fishes by properly disposing of our trash.
The goal of this game is to save the fishes by collecting the trash from the pond and being able to collect the most trash within the time limit. You can compete against family members and friends. You can add punishments to have more stakes and add excitement to the game. The game should be played by taking turns. The most trash collected within the time limit wins!
Materials You Need:
BASICS:
- Arduino board
- breadboard
- 14 male and 12 female jumper wire
- 6 220 Ohm resistor
- Infrared(IR) sensor(HW-201 IR obstacle sensor)
- touch sensor(TTP223B capacitive touch)
- 9 male to female jumper wires
DECORATION MATERIALS:
- 30 popsicle sticks(for extra use)
- rock decoration(can use crumpled paper for substitution)
- 6 LED lights
- paints specifically:
Shades of blue
Shades of green
Any color you want
- small box-can be any size however the size below is what I used.
- Height:4.5 inch
- Width:2.5 inch
- scissors
- glue gun and glue sticks
- tape
- coloring materials
- used illustration board
- bond paper
- yarn
- pencil and ballpen-sketching of design
- bobby pin(trash picker for this game)
- wet wipes(for clean ups)
Know How To Make It:
Step 1: Create the code
I would usually start with the code and review it later on when I have set the pins to my Arduino board. These are codes for the piezo buzzer, IR sensor, LEDs, and touch sensor.
//Control 2 LEDs using a touch sensor and ir sensor

  int touchsensor = 4;
  int ir = 2;
  int led9=9, led10 = 10,led8=8,led7=7,led6=6,led11=11;
  int buzzer=5;
  void setup()
  {
    pinMode(touchsensor, INPUT);
    pinMode(ir, INPUT);
    pinMode(led10, OUTPUT);
    pinMode(led9, OUTPUT);
    pinMode(led11, OUTPUT);
    pinMode(led8, OUTPUT);
    pinMode(led7, OUTPUT);
    pinMode(led6, OUTPUT);
    pinMode(buzzer, OUTPUT);
  }
  void loop()
  {
    if(digitalRead(touchsensor) == HIGH)
    {
       digitalWrite(led6, HIGH);
       digitalWrite(led7, LOW);
       tone(buzzer,250,500);
       delay(800);
       digitalWrite(led6, LOW);
       digitalWrite(led7, HIGH);
       tone(buzzer,250,500);
       delay(800);

       digitalWrite(led6, HIGH);
       digitalWrite(led7, HIGH);
       digitalWrite(led8, HIGH);
       digitalWrite(led9, HIGH);
       digitalWrite(led10, HIGH);
       digitalWrite(led11, HIGH);
       tone(buzzer,1000,700);
       delay(500);
    }
    else
    {
      digitalWrite(led6, LOW);
      digitalWrite(led7, LOW);
      digitalWrite(led8, LOW);
      digitalWrite(led9, LOW);
      digitalWrite(led10, LOW);
      digitalWrite(led11, LOW);
    }
    {
    if(digitalRead(ir) == LOW)
    {
      digitalWrite(led11,LOW );
      digitalWrite(led6, HIGH);
      tone(buzzer,250,500);
      delay(500);

      digitalWrite(led6, LOW);
      digitalWrite(led7, HIGH);
      tone(buzzer,500,500);
      delay(500);

      digitalWrite(led7, LOW);
      digitalWrite(led8, HIGH);
      tone(buzzer,1000,500);
      delay(500);

      digitalWrite(led8, LOW);
      digitalWrite(led9, HIGH);
      tone(buzzer,750,500);
      delay(500);

      digitalWrite(led9, LOW);
      digitalWrite(led10, HIGH);
      tone(buzzer,1300,500);
      delay(500);

      digitalWrite(led10, LOW);
      digitalWrite(led11, HIGH);
      tone(buzzer,1000,500);
      delay(500);
    }
    else
    {

      digitalWrite(led6, LOW);
      digitalWrite(led7, LOW);
      digitalWrite(led8, LOW);
      digitalWrite(led9, LOW);
      digitalWrite(led10, LOW);
      digitalWrite(led11, LOW);

    }}}
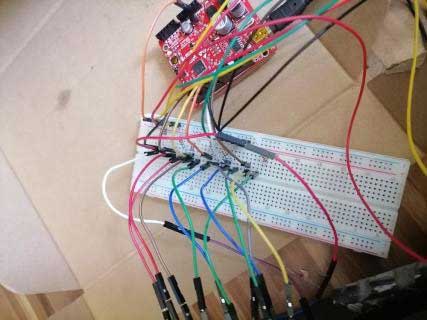
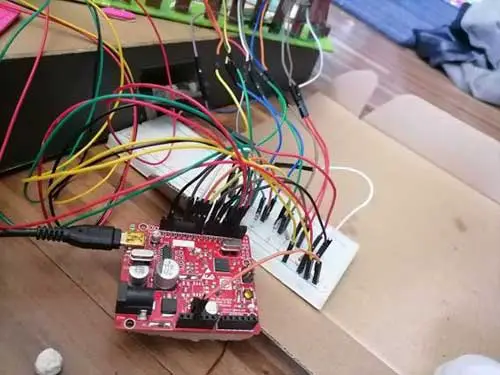
Step 2: Setting up the Arduino board.
IMPORTANT FOR SAFETY!
-make sure to double-check the pins that you are plugging
-remove the cable attached to your Arduino to a certain device when there is a smell of smoke or smoke coming out of your board. DO NOT RUN, immediately remove the cable
INFRARED SENSOR PINS:
GND is connected to GND
OUT is connected to any digital pin except for 0 and 1
VCC is connected to 5V
TOUCH SENSOR PINS:
GND is connected to GND
I/O is connected to any digital pin except for 0 and 1
VCC is connected to 5V
PIEZO BUZZER PINS:
GND is connected to GND
I/O is connected to any digital pin except for 0 and 1
VCC is connected to 5V

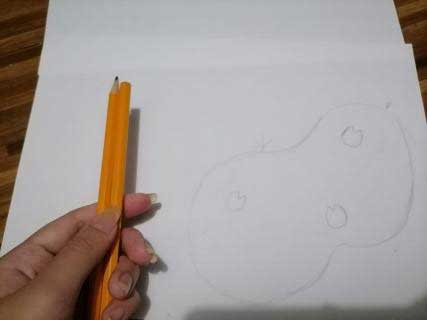
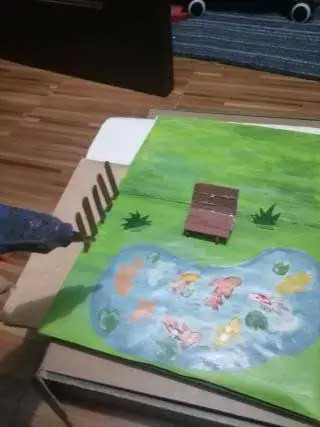
Step 3: Create the design of the project!
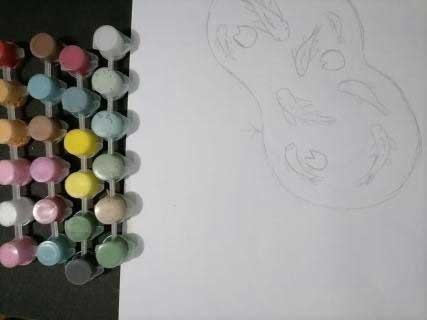
I wanted something that is related to our environment and also sea life(MY DESIGN IDEA). I wanted it to look unique, so I decided on a design that would have a pond, lily pads, and koi fishes. Sketch out your design, and choose something that you are passionate about!

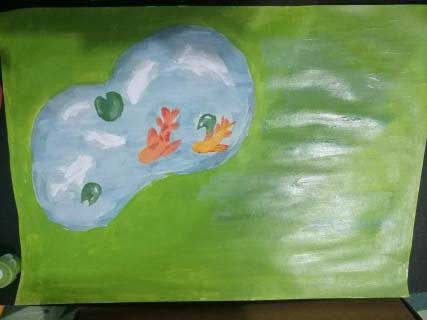
Step 4: Start coloring your design and enjoy!
Use coloring materials that you think are best and easier for you to use. I used leftover paints from my paint by number paintings, so you can use any paint or materials you want. Make your design come to life!
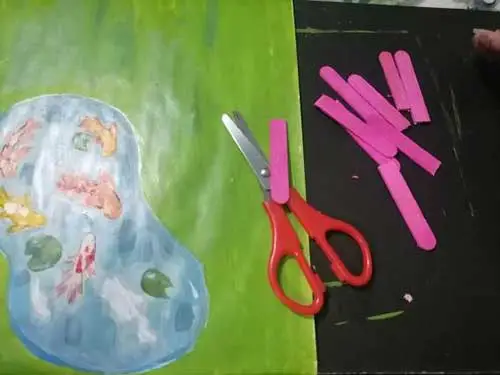
Step 5: Decor
Start cutting your popsicle sticks in half, at least enough for you to make a fence. Leave some popsicle sticks for the foundation of the house. Start painting the popsicle stick fence. I used brown paint for my fence. Use used paper, and paint it green, cut it for a grass shape.

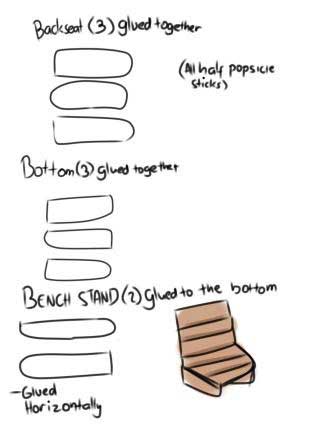
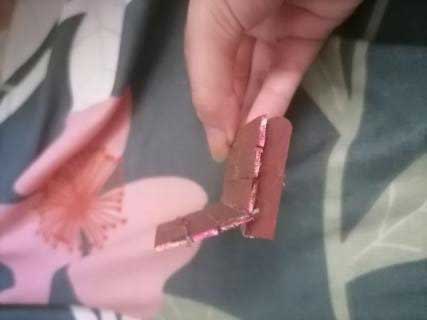
Step 6: Create the bench.
Here's the guide for it to be easier for you to make. Use your colored half popsicle sticks to make your bench. Use a glue gun and glue stick to glue the pieces together.
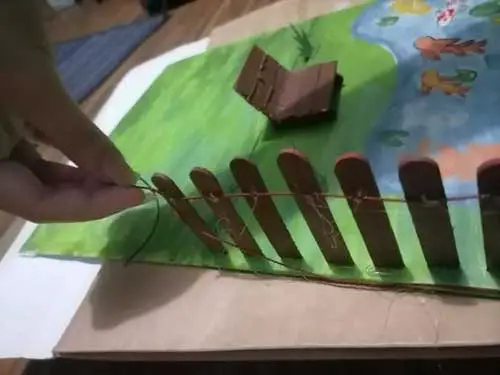
Step 7: Adding your fence.
Start placing your fence by gluing your half and colored popsicle sticks in the area where you want it to be. Add yarn 0.5 inches above and below the popsicle sticks. Use your glue gun when gluing.
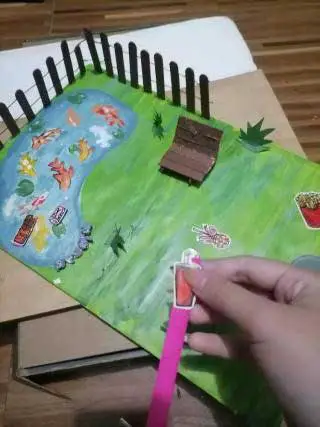
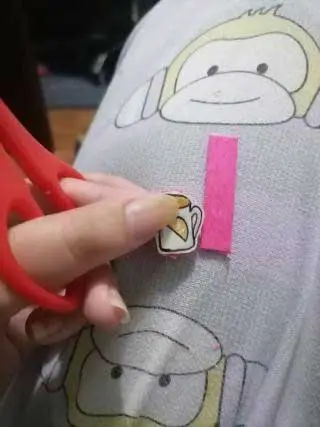
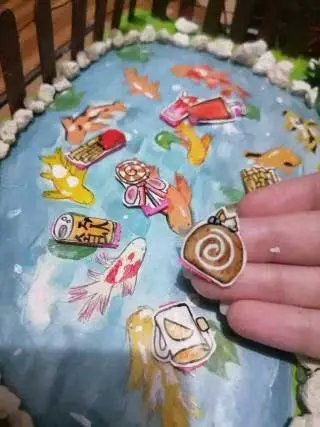
Step 8: Make the trash.
I used old sticker drawings I did a while back. Just draw any small food or trash designs. I used food drawings instead, to add more colors to my project. Paste it in a popsicle stick so that it will be easier to pick up by the bobby pin. Cut your popsicle stick in the size of your drawing.
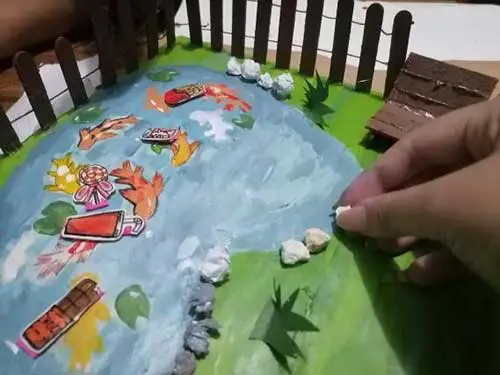
Step 9: Rocks and grass.
Paste and glue the rocks around the pond. I used tiny rocks(rocks that are often placed in cactus).However, if there are no available rocks, you can use small crumpled paper and color it gray. Glue the grass that you painted.
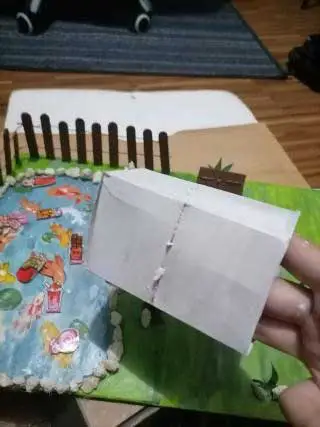
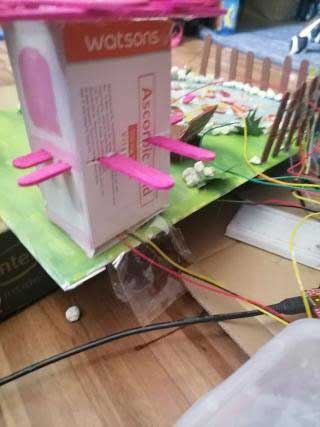
Step 10: Build your house.
Cut the side and front of the box. It should be able to hold the IR sensor and it should not detect the popsicles. Creating this structure will help the IR sensor detect the items that are being dropped.
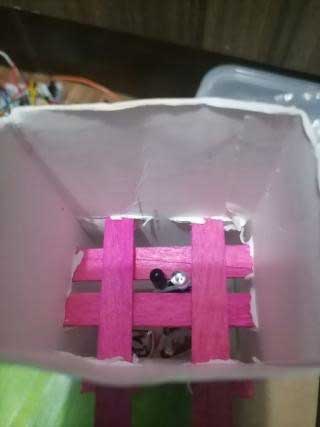
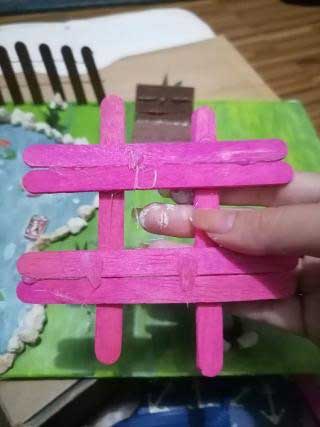
Step 11: The roof.
Glue the popsicle sticks like the one below You need to glue 2 sticks vertically and 4 sticks horizontally. I made the roof so that whatever item that falls from the top will automatically go on top of the sensor. When there is no roof or structure on top of the house, the items might fall into the sides, which the sensor is not able to detect.
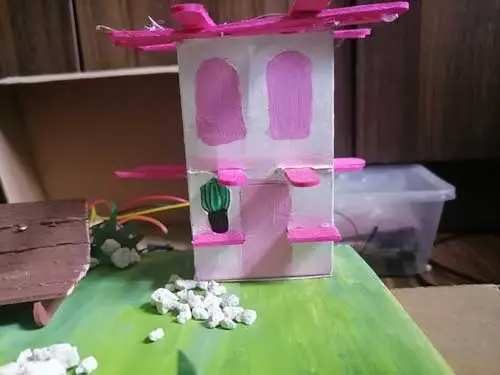
Step 12: Decorate the house.
This is what I wanted my design to be. I added a sticker that I made before. I added small shelves (0.5 inches) at the bottom, to add more character. Design your house depending on your theme or depending on what you want.
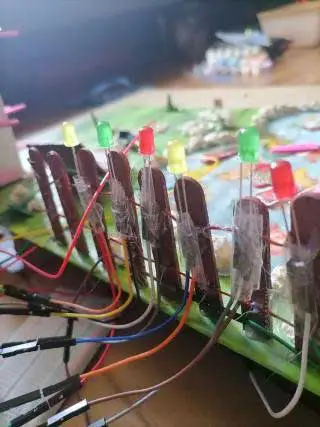
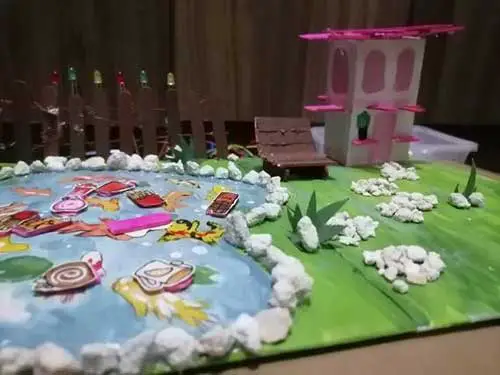
Step 13: LEDs
Properly tape the two legs(short and long leg) to the female jumper wire, make sure its tight enough for the LED not to move around or fall. After taping, glue(glue gun and glue stick) the tip of the female jumper into the fence.
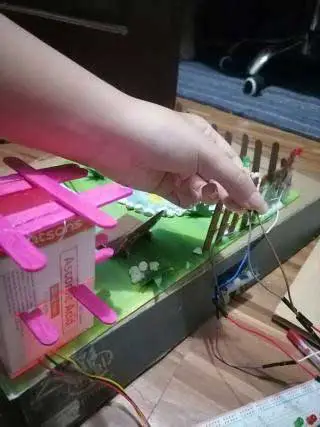
Step 14: House wires
I used a medicine box for the house, so it made it easier for the wire to be connected to the Arduino board. I added more tape to put the wires in place. Try reviewing the code if it works! You can add a small piece of paper on the top(beside the IR sensor) so that whenever an item drops, the music will continue to play until you remove the item on top of the sensor. However in my case, the music will only turn on when an item is being dropped and the music will stop, it will turn on again when you place another item.
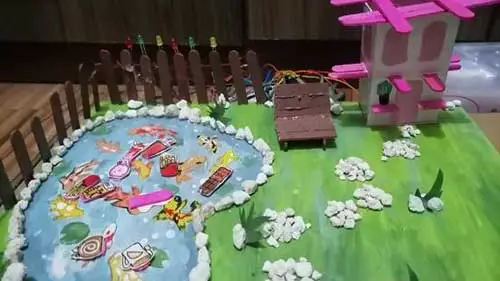
Step 15:FINISH PRODUCT!
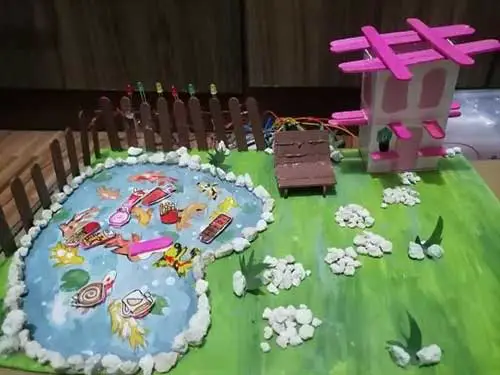
This was an easy yet challenging project, it was something that I really dedicated my creativity to make my ideas come true. I could have made an easier project, but I wanted to take risks and also try enjoying the project I made by applying my ideas and also incorporating a deeper meaning. I decided and committed to doing the idea of removing trash from water which symbolizes the trash that is found in the sea, which is harming the sea creatures.
I wanted to expand on the idea and use it for a game and it was perfect for this project. I think the easiest part of doing this is probably coding and setting up the Arduino board. The decorating is what took so long to do. Overall, this was a really fun experience even if there were some parts that were frustrating to do. I realized that I got worried for no reason, and I should take risks.


