In the realm of electronics and DIY projects, Arduino has established itself as a versatile platform for experimentation and innovation. One common application area is environmental sensing, where sensors like the DHT11 play a crucial role. In this article, we delve into the integration of the DHT11 sensor with Arduino to measure temperature and humidity, offering insights into its setup, programming, and potential applications.
Understanding the DHT11 Sensor
The DHT11 sensor is an affordable and widely used sensor capable of measuring temperature and humidity. It operates on the principle of capacitive humidity sensing and utilizes a thermistor for temperature measurement. With its simplicity and accuracy within a certain range, it's an excellent choice for various projects ranging from weather stations to smart home automation.
Hardware Setup
To get started, you'll need the following components:
- Arduino board (such as Arduino Uno)
- DHT11 sensor module
- Breadboard and jumper wires
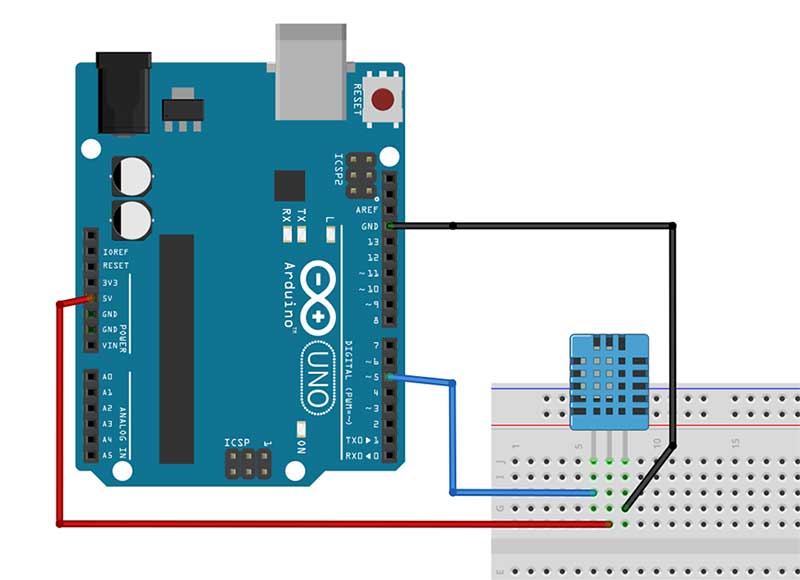
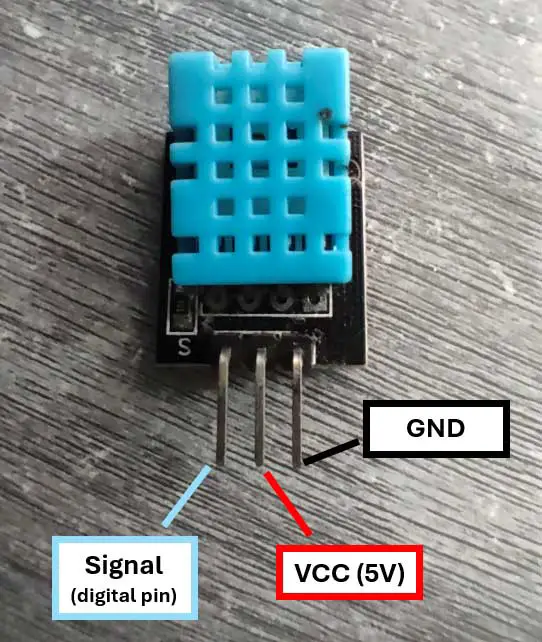
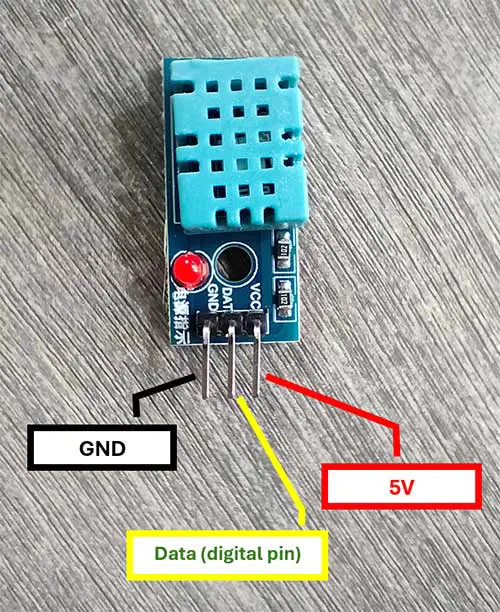
The DHT11 sensor typically comes as a module with three pins: VCC, Signal, and Ground. Connect the VCC pin to the 5V pin on the Arduino, the Signal pin to any digital pin (e.g., pin 5), and the Ground pin to the ground (GND) pin on the Arduino. Use a breadboard and jumper wires for convenient connections.
Installing the DHT11 Library
Before interfacing the DHT11 sensor with Arduino, ensure you have the necessary library installed. The "DHT.h" library simplifies communication with the sensor.
Libraries are ready-mode codes that you need to include in your Arduino sketch for a certain device to work. After many trials, I was able to make the sensor work using the DHTlib library. You can download the file at the bottom of this page.
If you haven't installed it yet, here's the procedure to install it.
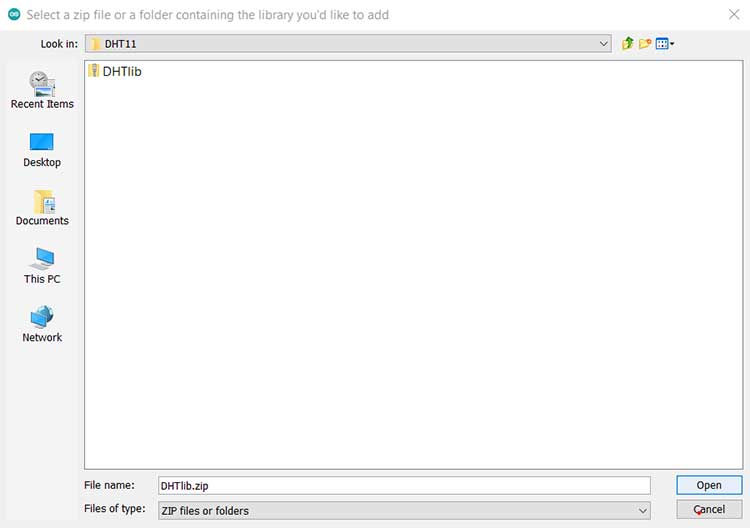
Step 1. First, download the DHTlib zip file found at the end of this article.
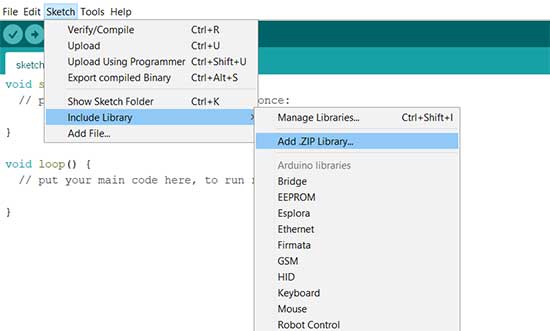
Step 2. Open your Arduino IDE and from the menu bar, go to Sketch->Include Library->Add .ZIP Library..
Step 3. Browse to where you saved the zip file and select it, then click Open.
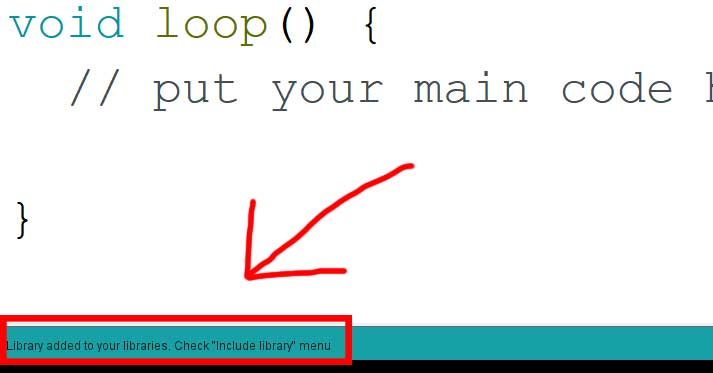
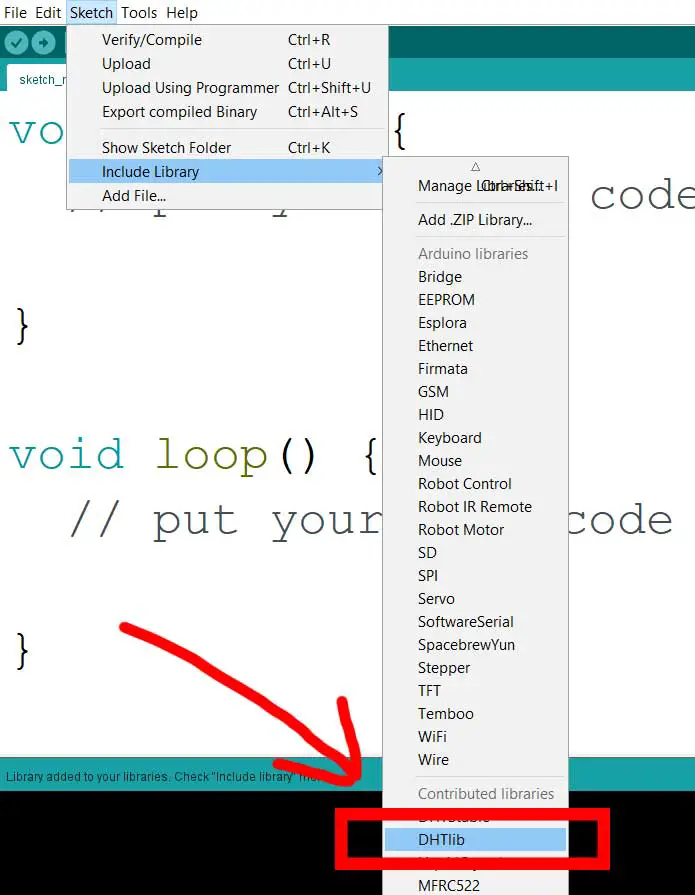
After clicking Open, the library is now installed as shown in this illustration. You can now proceed to write the code for the DHT11.
Programming Arduino for DHT11
PROJECT: DHT11 Temperature and Humidity Reading
Before interfacing the DHT11 sensor with Arduino, ensure you have the necessary library installed. The "DHT.h" library simplifies communication with the sensor.
Here's a basic code snippet to read temperature and humidity values from the DHT11 sensor:
#include <dht.h>

dht DHT11;

#define DHT11_PIN 5

void setup(){
  Serial.begin(9600);
}

void loop()
{
  float chk = DHT11.read11(DHT11_PIN);
  Serial.print("Temperature = ");
  Serial.println(DHT11.temperature);
  Serial.print("Humidity = ");
  Serial.println(DHT11.humidity);
  delay(2000);
}
Interpreting Results
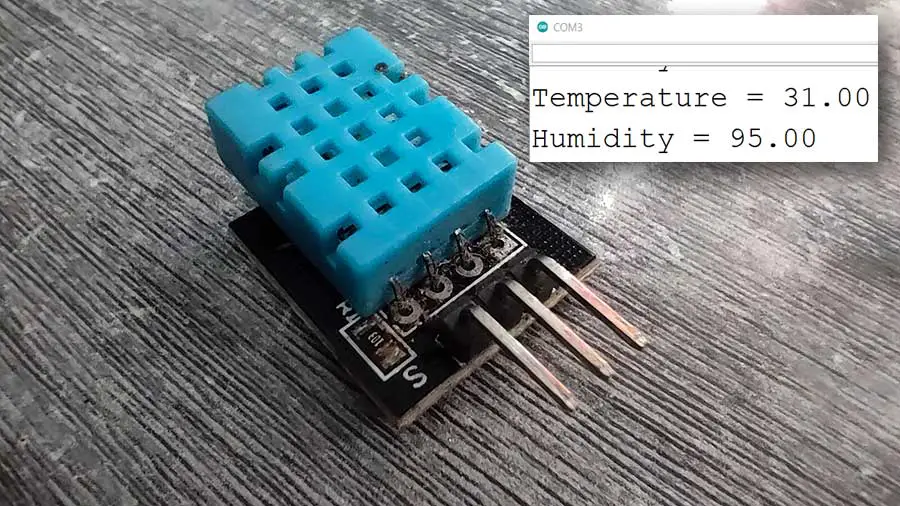
Once the code is uploaded to the Arduino board, open the Serial Monitor (Tools > Serial Monitor) in the Arduino IDE. You'll see the temperature and humidity readings displayed in real time. These values can be further processed or used to trigger specific actions based on your project requirements.
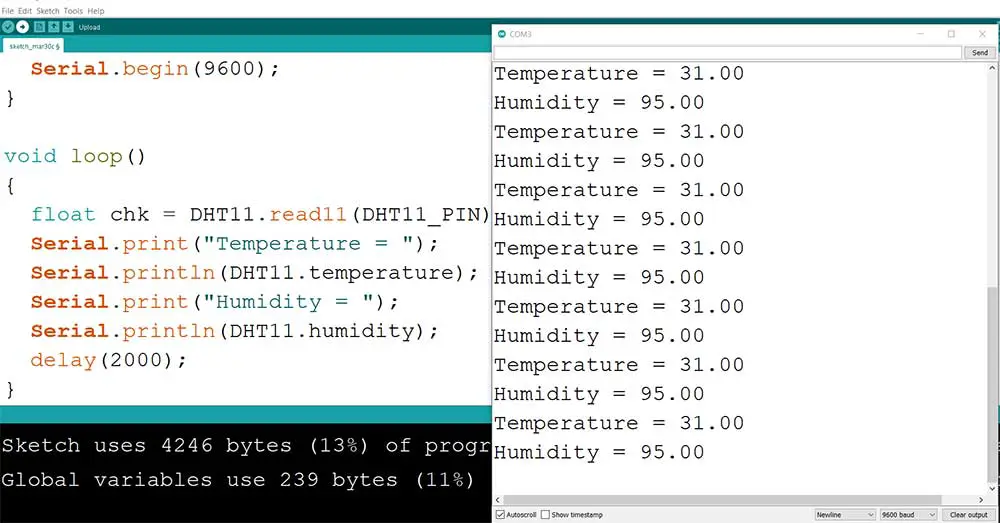
This code continuously loops, reading temperature and humidity values from the sensor every 2 seconds and displaying them on the serial monitor for monitoring and debugging purposes.
Watch the official video:
Let's break down the provided Arduino code step by step:
#include <dht.h>
This line includes the DHT library, which is commonly used for interacting with DHT series sensors like the DHT11.
dht DHT11;
This line declares an object named DHT11 of type dht. This object will be used to interact with the DHT11 sensor.
#define DHT11_PIN 5
This line defines a constant named DHT11_PIN with a value of 5. It specifies the pin to which the signal wire of the DHT11 sensor is connected. Pin 5 is used in this case.
Serial.begin(9600);
This line initializes the serial communication at a baud rate of 9600 bits per second. This enables communication between the Arduino board and the computer via the USB cable.
float chk = DHT11.read11(DHT11_PIN);
This line reads the temperature and humidity values from the DHT11 sensor connected to the pin defined earlier (DHT11_PIN). It calls the read11() function of the DHT11 object to perform this task and stores the returned value in a variable chk.
Serial.print("Temperature = ");
This line prints the text "Temperature = " to the serial monitor. The print() function is used to send data to the serial monitor without adding a new line.
Serial.println(DHT11.temperature);
This line prints the temperature value obtained from the DHT11 sensor. The temperature property of the DHT11 object is accessed and printed to the serial monitor. The println() function is used, which adds a new line after printing.
Serial.print("Humidity = ");
This line prints the text "Humidity = " to the serial monitor.
Serial.println(DHT11.humidity);
This line prints the humidity value obtained from the DHT11 sensor. The humidity property of the DHT11 object is accessed and printed to the serial monitor.
delay(2000);
This line causes the Arduino to pause or wait for 2000 milliseconds (2 seconds) before starting the loop again, effectively creating a delay between successive readings from the sensor.
That's the breakdown of the provided Arduino code. It reads temperature and humidity from a DHT11 sensor connected to pin 5 and prints the values to the serial monitor every 2 seconds.
Applications
The integration of the DHT11 sensor with Arduino opens up numerous possibilities for practical applications, including:
-
Home Automation Systems for Climate Control:
- Example: A smart thermostat system that uses the DHT11 sensor to monitor indoor temperature and humidity levels. Based on the readings, the system can automatically adjust the heating or cooling settings to maintain a comfortable indoor environment.
-
Weather Monitoring Stations:
- Example: Building a portable weather monitoring station using an Arduino and the DHT11 sensor. The station can measure temperature and humidity outdoors and display the data on an LCD screen. It can also log the data to an SD card for further analysis or transmit it wirelessly to a computer for real-time monitoring.
-
Agricultural Monitoring Systems:
- Example: Creating an automated greenhouse system with the DHT11 sensor to monitor temperature and humidity levels inside the greenhouse. The system can control irrigation systems based on the sensor readings to ensure optimal growing conditions for crops.
-
Industrial Humidity and Temperature Control Systems:
- Example: Implementing a humidity and temperature control system in a manufacturing facility using the DHT11 sensor. The system can monitor environmental conditions in sensitive areas such as storage rooms or production floors and activate ventilation systems or air conditioners as needed to maintain optimal conditions for equipment and materials.
Known Limitations of the DHT11 Sensor
While the DHT11 sensor is a popular choice for temperature and humidity sensing in Arduino projects due to its low cost and ease of use, it does have some known disadvantages. Here are a few:
-
Accuracy: The DHT11 sensor's accuracy is relatively low compared to more expensive sensors like the DHT22 or SHT series sensors. It has a temperature accuracy of ±2°C and a humidity accuracy of ±5%. This level of accuracy may not be suitable for applications that require precise measurements.
-
Limited Range: The DHT11 sensor has a limited measurement range. It can measure temperatures from 0°C to 50°C and humidity from 20% to 90%. If your application requires measurements outside of this range, you'll need to choose a different sensor.
-
Slow Response Time: The DHT11 sensor has a relatively slow response time, especially when compared to other sensors. It can take up to 2 seconds to provide a reading, which may not be suitable for applications that require real-time data.
-
Noisy Readings: The DHT11 sensor may produce noisy readings, especially in environments with rapid changes in temperature or humidity. This noise can make it challenging to obtain accurate and consistent measurements.
-
Limited Longevity: The DHT11 sensor is not known for its durability, especially in harsh environmental conditions. It may degrade over time, leading to inaccurate readings or sensor failure.
Despite these disadvantages, the DHT11 sensor remains a popular choice for many Arduino projects due to its affordability and simplicity. However, it's essential to consider these limitations and evaluate whether the sensor meets the requirements of your specific application. If accuracy, speed, or reliability are critical factors, you may need to invest in a more advanced sensor.
Conclusion
In this article, we've explored the utilization of the DHT11 temperature and humidity sensor with Arduino. By understanding its setup, programming, and potential applications, you can embark on various projects involving environmental sensing and climate control. Experiment, innovate, and discover the endless possibilities with Arduino and the DHT11 sensor. Happy tinkering!


