Made by Jvhonne Tabaniag.
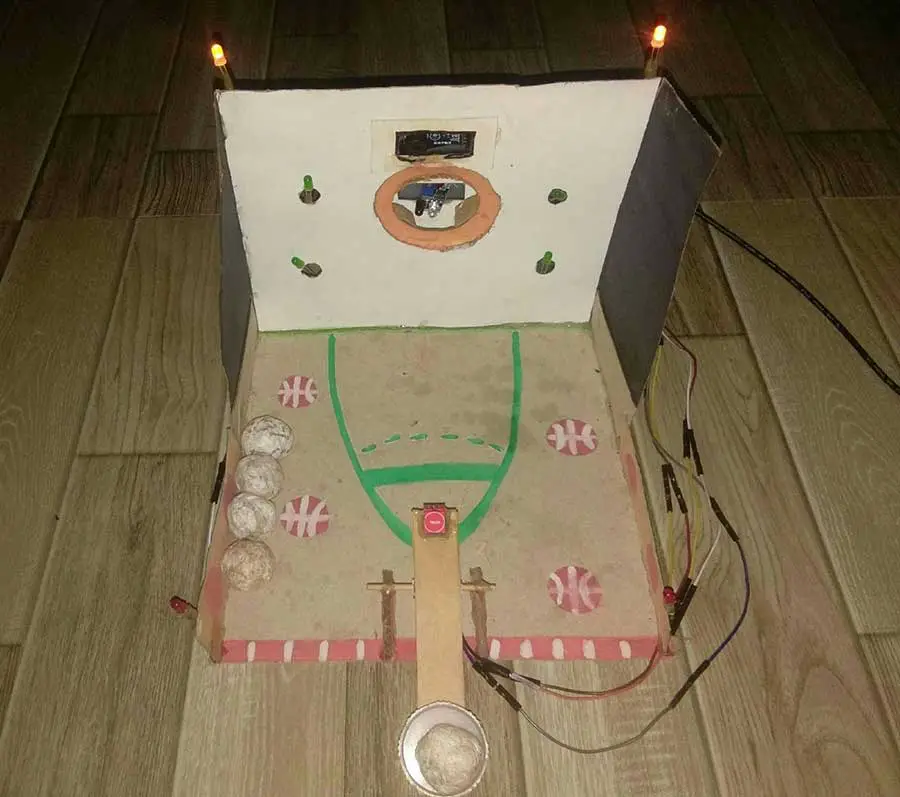
Technology improves over time, and people use it in their daily lives. Sensors are important to make a robot or any technology that we use every day be automated. Without them, they cannot do extraordinary things. A sensor is a type of technology that detects something so that it can be controlled. My exit product for the second quarter is a DIY Mini Basketball Game. This game includes sensors, particularly infrared and touch sensors.
To play this game, you will simply put a paper ball into the lid that is placed on the catapult. Then you will touch the touch sensor on the catapult to flick the paper ball out of the lid to shoot the paper ball into the ring/hoop. You can touch it varying the force applied. The catapult can move from left to right and vice versa so that you get angles to shoot the paper ball.
When you get a score, all 4 green LEDs from the wall will light up with a sound from the piezo buzzer. And when you touch the touch sensor from the catapult, attempting to shoot the paper ball into the ring/hoops, 2 red LEDs from each side next to the catapult will light up and there will be sound from the piezo buzzer.
Materials Needed
For the lights:
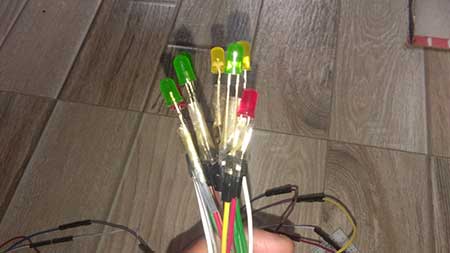
- 8 LEDs
- Arduino Board
- USB cable
- Breadboard
- Jumper Wires
- 220-Ohm Resistors
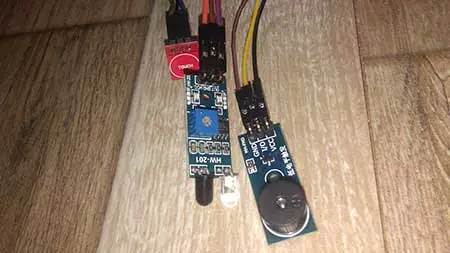
- Infrared Sensor
- Touch Sensor
- Piezo Buzzer
For the game itself:
- Paper Bag
- Pizza Box
- Barbeque Stick
- Paint and Paintbrush
- Glue
- Glue Gun and Glue Stick
- Scissors and Cutter
- Papers
- Milk Bottle and Lid
- Small cardboard
Step-by-Step Process
For the game:
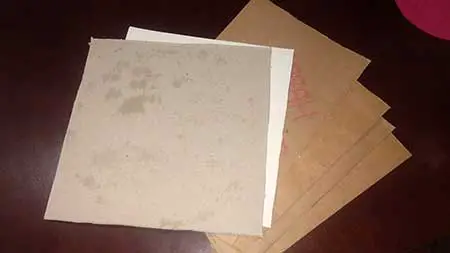
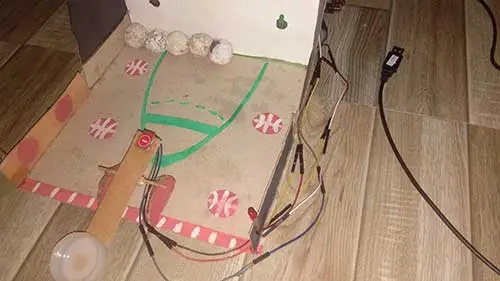
Step 1: Cut the paper bag and pizza box (grey) to form 4 sided shapes.
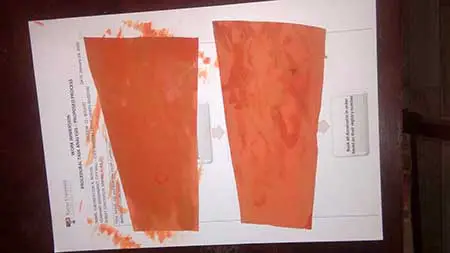
Step 2: I cut out this shape from the paper bag and painted it orange and black at the back to put it beside the wall of my mini basketball game.
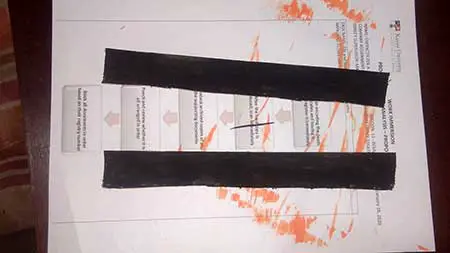
And I cut out this strip, also from the paper bag, and painted it black and brown with 2 circles at the back to put it on both sides of the base.
Step 3: I placed all the shapes that I cut out on the base (pizza box). I also tried to paint the base to look like a basketball court.
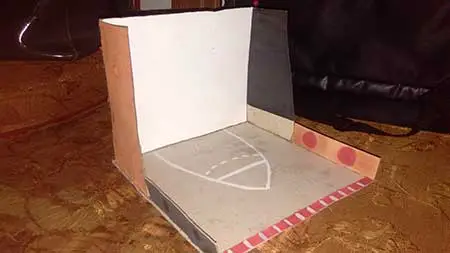
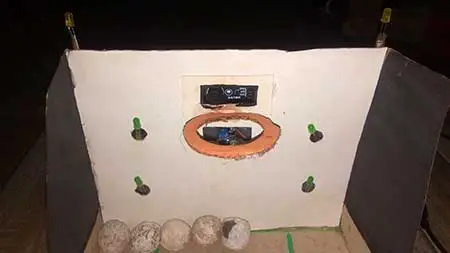
Step 4: I cut out a hole in the wall and put some orange-colored circled cardboard which will be used as the ring/hoop.
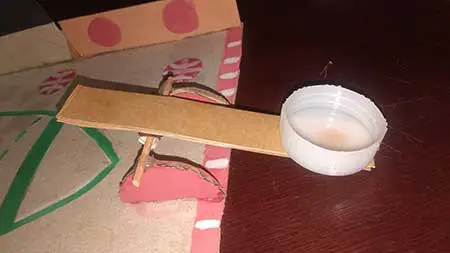
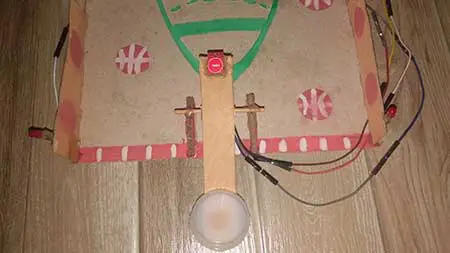
Step 5: To shoot a ball to the ring/hoop, I made a mini catapult. I used a bit of cardboard as its leg. I put a barbeque stick with rolled paper on the inside. I cut and put several rectangle-shaped paper bags on top of each other on the rolled paper. On top of the rectangle, I placed a milk bottle lid. This catapult can move left to right.
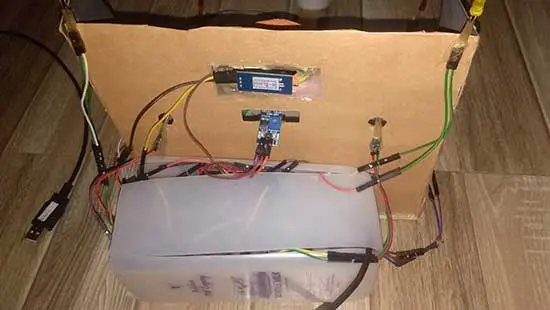
Step 6: I began doing my breadboard circuits. I had to do a lot of trial and error. I placed first the LEDs with the resistors and then the infrared and touch sensors and piezo buzzer. And I connected them to their respected pins and extended them with more jumper wires.
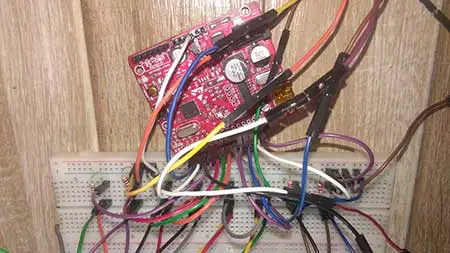
This is what my final setup/circuit looks like:

My Arduino Sketch:
//Control 8 LEDs using a touch sensor and ir sensor with buzzer

  int touchsensor = 4;
  int ir = 3;
  int led1=5, led2 =6, led3=7, led4=8, led5=9, led6=10, led7=11, led8=12;
  int buzzer = 2;
  int val=0;

  void setup()
  {
    pinMode(touchsensor, INPUT);
    pinMode(ir, INPUT);
    pinMode(led1, OUTPUT);
    pinMode(led2, OUTPUT);
    pinMode(led3, OUTPUT);
    pinMode(led4, OUTPUT);
    pinMode(led5, OUTPUT);
    pinMode(led6, OUTPUT);
    pinMode(led7, OUTPUT);
    pinMode(led8, OUTPUT);
    pinMode(buzzer, OUTPUT);

  }

  void loop()
{
    if(digitalRead(touchsensor) == 1)
    {
      digitalWrite(led7, HIGH);
      digitalWrite(led8, HIGH);
      tone(buzzer,300,100);
    delay(50);
    }
    else
    {
      digitalWrite(led7, LOW);
      digitalWrite(led8, LOW);
    }
    if(digitalRead(ir) == 0)
    {
      digitalWrite(led3, HIGH);
      digitalWrite(led4, HIGH);
      digitalWrite(led5, HIGH);
      digitalWrite(led6, HIGH);
      tone(buzzer,100,100);
    delay(50);
    }
    else
    {
      digitalWrite(led3, LOW);
      digitalWrite(led4, LOW);
      digitalWrite(led5, LOW);
      digitalWrite(led6, LOW);
      }
    {
      digitalWrite(led1, HIGH);
      digitalWrite(led2, HIGH);
      delay(100);
  }
}
Step 7: I placed my breadboard circuit inside a milk bottle. And I tried to hide most of the jumper wires in it to look neat.
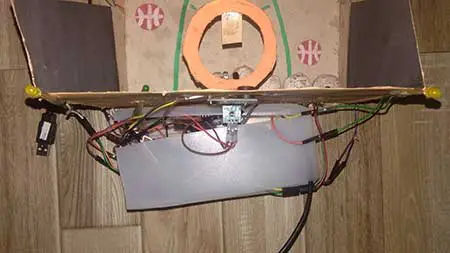
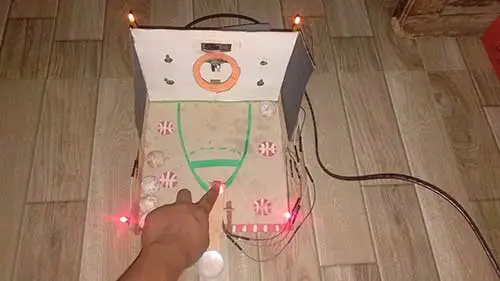
Step 8: I placed the touch sensor on the catapult where you will flick the paper ball out of the lid to shoot the ball into the ring/hoop. As you can see, there are jumper wires present on the side. I also revised the paintings on my base.
I put up 2 red LEDs on the side because when you touch the touch sensor, they will light up and sound will come out from the piezo buzzer.
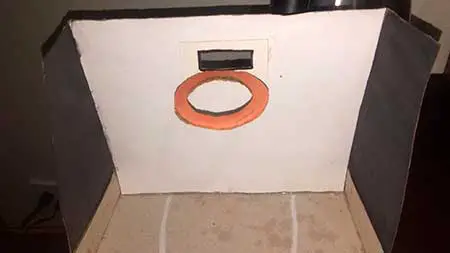
Step 9: I put more holes on the wall, which are from the bottom of the ring/hoop, 2 from the left side, and 2 from the right side. And I placed the piezo buzzer on top of the ring/hoop, the infrared sensor from the bottom, and 4 green LEDs from the left and right side of the wall. The 4 green LEDs will light if the infrared sensor senses the paper ball when it is near, or in other words, if you can shoot the paper ball into the ring/hoop, the 4 green LEDs will light up. I also put 2 yellow LEDs from the top of each side of the wall, they are constantly on.
This is the back part of my mini basketball game:
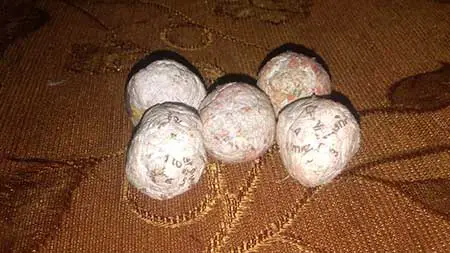
Step 10: Crumple the papers and dip them into the water. Squeeze them and make a sphere. And then I let them dry out of the sunlight for many hours.
Step 11: Test out the product! Try shooting the paper ball into the ring/hoop. It is to be expected that as you play, all LEDs are functioning well and the sound from the piezo buzzer can be heard. Everything should completely work as you desired.
I am very proud of my game project, and I love it. I enjoyed trying it out and I enjoyed playing my game project. It was very interactive, the type that you want to play for a long time just to get several scores. I am glad that I trusted the process of doing this DIY Mini Basketball Game. It was hard to make, especially in making my frame and sketch since it needed lots of experimenting. It was not easy, but I am glad that I created it successfully.
The experience was overwhelming. I kept on revising things because I did not thoroughly plan my game project, I was just like going with the flow. Overall, it was exciting to see the results after doing the hard work and not getting enough rest. My realizations after making my game project are that you just need to trust the process to acquire great results in everything that you do. Despite all the challenges, we should not give up on something worth acquiring.
Just enjoy what you do and work hard for it. Just think that we can do it. Motivate yourself. Let God guide and help you in everything that you do.


