Made by Paolo Tuquib.
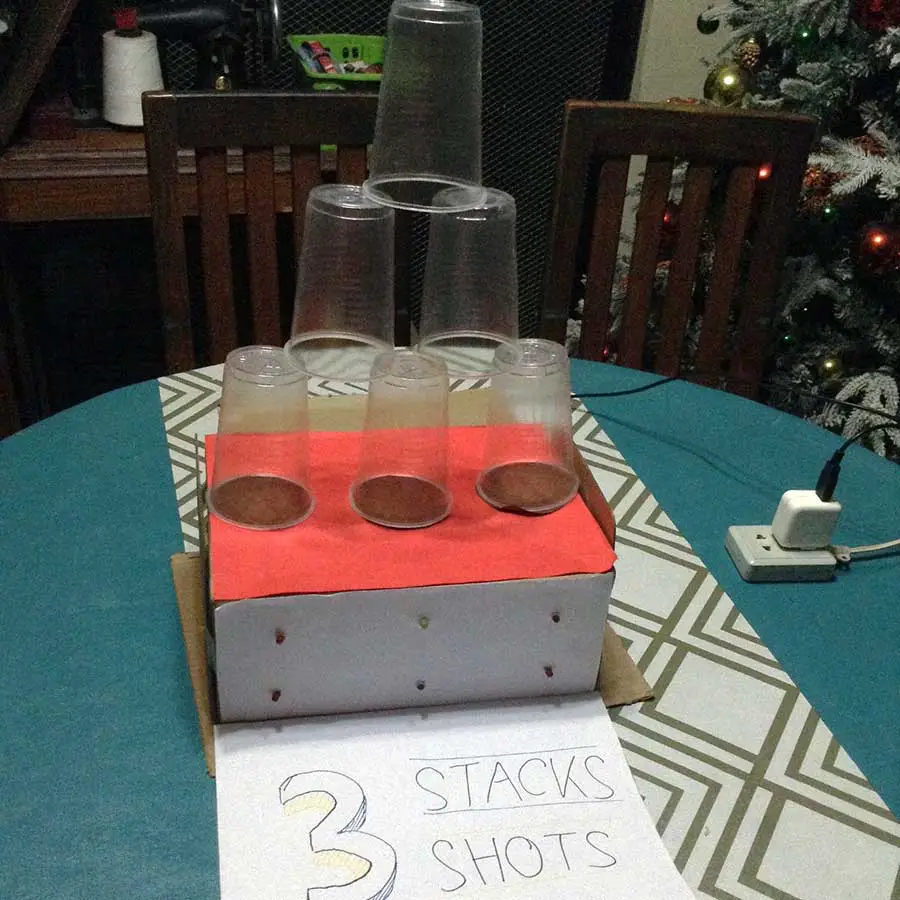
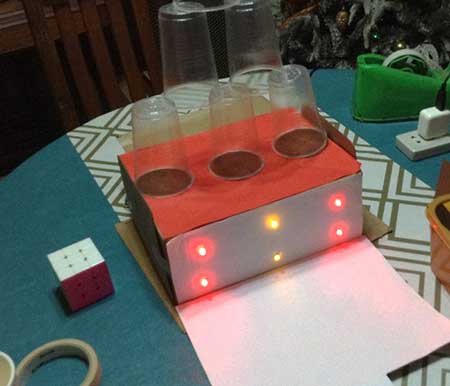
My Exit Product for this 2nd QTR. is a prototype game called 3 stacks, 3 shots. This game comprises 3 stacks of plastic cups placed on top of a sensor box. The goal of the game is to shoot down all the cups with only 3 bullets from a nerf gun or 3 tennis balls in your hand. I had initially an idea to just simply put down 3 cups spread away from each other, but then I remembered that cups can be stacked together to create a satisfying domino effect whenever the bottom cups are shot down. These 3 bottom cups have sensors below them hidden inside the box that detects whether they are there or not. When all 3 of them are taken down, a victory sound effect would be played by the piezo buzzer found behind the box.
MATERIALS:
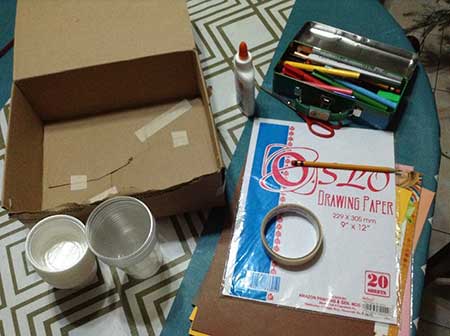
- Cardboard box
- Colored construction paper
- Oslo Paper
- Scissors
- Plastic cups
- Masking tape
- Glue
- Markers
- Ruler
- Tapioca cups
- 4 red LEDs
- 2 yellow LEDs
- Breadboard
- gizDuino UNO-SE
- 220-ohm resistors
- infrared sensor
- light sensor
- ultrasonic sensor
- Male and female jumper wires
STEP-BY-STEP PROCESS:
Step 1.
The code I made was designed to have all 3 sensors (Light sensor, Ultrasonic sensor, and Infrared sensor) detect if their own respective cups have been taken down, and this will cause their respective LEDs to turn off. After all the LEDs have been turned off, the Final Fantasy victory sound effect will play.
int pinled1A = 3;
int pinled1B = 4;
int pinled2A = 5;
int pinled2B = 6;
int pinled3A = 11;
int pinled3B = 12;
int buzzer = 2;
int ls = 7;
const int trigger = 9;
const int echo = 8;
int irs = 10;
float distance;
float dist_inches;
int val=0;

void setup() {
  // put your setup code here, to run once:
Serial.begin(9600);
  pinMode(ls, INPUT);
  pinMode(irs, INPUT);
  pinMode(trigger, OUTPUT);
  pinMode(echo, INPUT);
  pinMode(pinled1A, OUTPUT);
  pinMode(pinled1B, OUTPUT);
  pinMode(pinled2A, OUTPUT);
  pinMode(pinled2B, OUTPUT);
  pinMode(pinled3A, OUTPUT);
  pinMode(pinled3B, OUTPUT);
  pinMode(buzzer, OUTPUT);

}

void loop() {
  // put your main code here, to run repeatedly:
 digitalWrite(trigger,LOW);
  delayMicroseconds(5);

  digitalWrite(trigger,HIGH);
    delayMicroseconds(10);
    digitalWrite(trigger,LOW);

    distance=pulseIn(echo,HIGH);
    distance=distance*0.0001657;
    dist_inches=distance*39.37;

if (digitalRead(ls) == 1 && (dist_inches < 5) && (digitalRead(irs) == 0))
{
  digitalWrite(pinled1A,HIGH);
  digitalWrite(pinled1B,HIGH);
  digitalWrite(pinled2A,HIGH);
  digitalWrite(pinled2B,HIGH);
  digitalWrite(pinled3A,HIGH);
  digitalWrite(pinled3B,HIGH);
}
else if (digitalRead(ls) == 0 && (dist_inches < 5) && (digitalRead(irs) == 0))
{
  digitalWrite(pinled1A,LOW);
  digitalWrite(pinled1B,LOW);
  digitalWrite(pinled2A,HIGH);
  digitalWrite(pinled2B,HIGH);
  digitalWrite(pinled3A,HIGH);
  digitalWrite(pinled3B,HIGH);
}
else if (digitalRead(ls) == 1 && (dist_inches > 5) && (digitalRead(irs) == 0))
{
  digitalWrite(pinled1A,HIGH);
  digitalWrite(pinled1B,HIGH);
  digitalWrite(pinled2A,LOW);
  digitalWrite(pinled2B,LOW);
  digitalWrite(pinled3A,HIGH);
  digitalWrite(pinled3B,HIGH);
}
else if (digitalRead(ls) == 1 && (dist_inches < 5) && (digitalRead(irs) == 1))
{
  digitalWrite(pinled1A,HIGH);
  digitalWrite(pinled1B,HIGH);
  digitalWrite(pinled2A,HIGH);
  digitalWrite(pinled2B,HIGH);
  digitalWrite(pinled3A,LOW);
  digitalWrite(pinled3B,LOW);
}
else if (digitalRead(ls) == 0 && (dist_inches > 5) && (digitalRead(irs) == 0))
{
  digitalWrite(pinled1A,LOW);
  digitalWrite(pinled1B,LOW);
  digitalWrite(pinled2A,LOW);
  digitalWrite(pinled2B,LOW);
  digitalWrite(pinled3A,HIGH);
  digitalWrite(pinled3B,HIGH);
}
else if (digitalRead(ls) == 1 && (dist_inches > 5) && (digitalRead(irs) == 1))
{
  digitalWrite(pinled1A,HIGH);
  digitalWrite(pinled1B,HIGH);
  digitalWrite(pinled2A,LOW);
  digitalWrite(pinled2B,LOW);
  digitalWrite(pinled3A,LOW);
  digitalWrite(pinled3B,LOW);
}
else if (digitalRead(ls) == 0 && (dist_inches < 5) && (digitalRead(irs) == 1))
{
  digitalWrite(pinled1A,LOW);
  digitalWrite(pinled1B,LOW);
  digitalWrite(pinled2A,HIGH);
  digitalWrite(pinled2B,HIGH);
  digitalWrite(pinled3A,LOW);
  digitalWrite(pinled3B,LOW);
}
else if (digitalRead(ls) == 0 && (dist_inches > 5) && (digitalRead(irs) == 1))
{
  digitalWrite(pinled1A,LOW);
  digitalWrite(pinled1B,LOW);
  digitalWrite(pinled2A,LOW);
  digitalWrite(pinled2B,LOW);
  digitalWrite(pinled3A,LOW);
  digitalWrite(pinled3B,LOW);
   tone(buzzer,300,100);
   delay(250);
   tone(buzzer,300,100);
   delay(200);
   tone(buzzer,300,100);
   delay(200);
   tone(buzzer,300,500);
   delay(600);
   tone(buzzer,240,500);
   delay(600);
    tone(buzzer,270,500);
   delay(600);
   tone(buzzer,300,100);
   delay(400);
   tone(buzzer,270,100);
   delay(200);
   tone(buzzer,300,900);
   delay(10000);
}
}
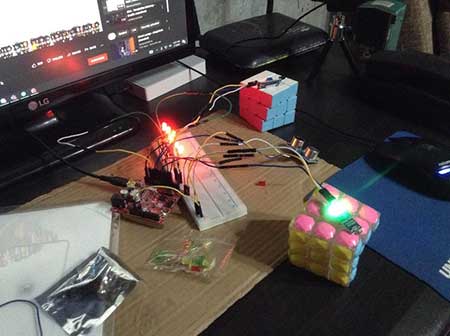
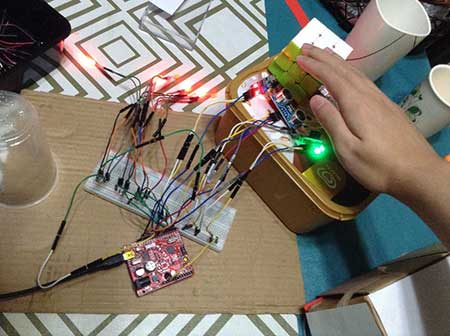
Working on the hardware (with uploaded code):
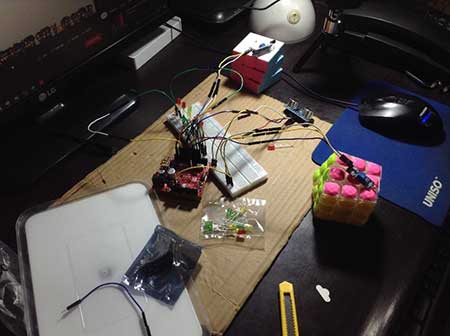
For the breadboard circuit, you may refer to the following articles:
Using the HC-SR04 Ultrasonic Sensor to Detect Objects
Detecting Objects Using the Infrared(IR) Obstacle Sensor
Combining the Infrared Sensor and Touch Sensor in 1 Arduino Project (with Circuit and Sketch)
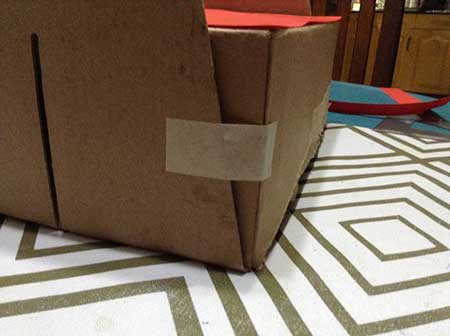
Step 2.
Tape on the covers and sides of the box to avoid it from opening.
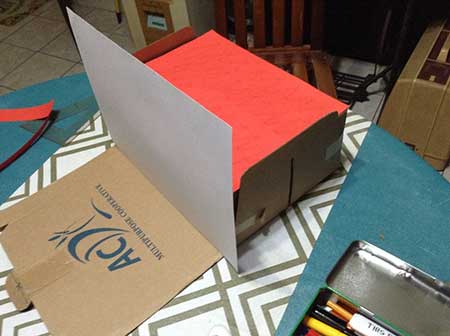
Step 3.
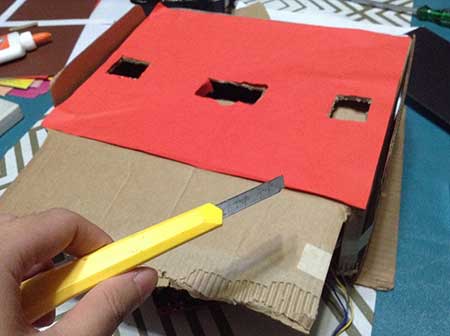
Glue on the top of the box with red construction paper, and the front with Oslo paper.
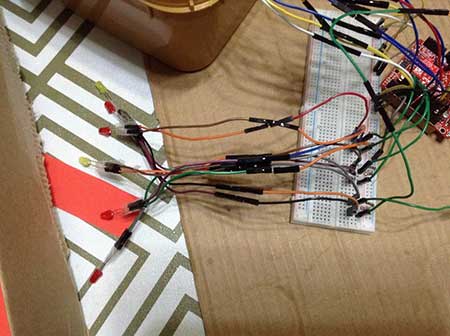
Step 4.
Transfer the hardware to the workplace and extend the LEDs with more jumper wires.
Step 5.
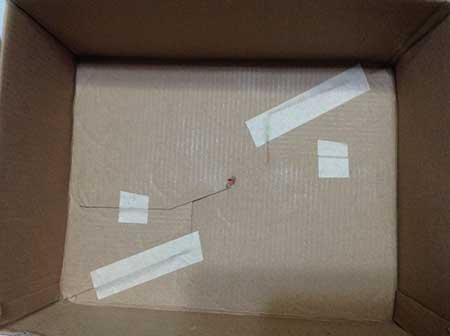
Punch through 6 holes in line with where the bottom cups will be placed, 2 holes for each cup.

Step 6.
Cut out 3 small square holes on top of the box for the sensors to detect the cups.
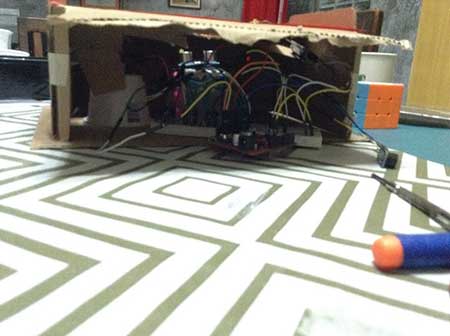
Step 7.
Insert the hardware (with uploaded code) under the box, using the tapioca cups to place the sensors in a stable spot. The LEDs should be inserted through the small holes.
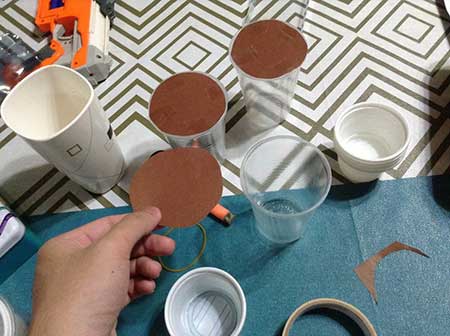
Step 8.
Tape on 3 construction paper of any color (preferably dark) to 3 cups, this will be the bottom cups that the sensors will detect.
Step 9.
Design the front with the title of the game: “3 Stacks, 3 Shots”.
In the process of making the product, I was simply focused and eager to finish the project because I was curious about how the game would play out. I also felt anxious because I was not sure if the sensors would hold out, especially since I could potentially hit one of them with the bullets. I felt very relieved because I had the exact number of materials I essentially needed for the prototype game to work. 6 plastic cups, 1 big box, and the right amount of Arduino hardware for the code to perform.
My overall experience of this 2-day Exit Product making was time-consuming, hard, but fun, entertaining, and worth it. There have been a couple of errors in the coding that I had to change, especially on how I could implement the buzzer to play when all the LEDs have been shut off. Frankly, I might have spent too much time playing with it. I made sure that this quarter’s output would be easier to create to avoid too much time consumption.


