
Made by Crich Ociones.
For this project, we will be making a PINBALL MACHINE. Pinball is an arcade entertainment machine in which a ball careens around the machine's interior, hitting various lights, bumpers, ramps, and other targets depending on its design.
Materials:
- Carton Box
- Scissors
- Popsicle Sticks
- Pencil
- Glue Gun
- Sanrio Hair Tie
- Marble
- Skewer
- Toothpick
For the electronics:
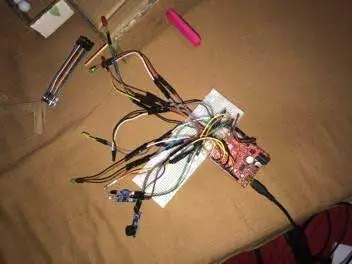
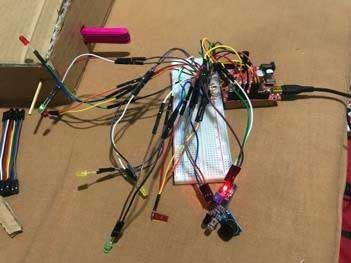
- Arduino board
- touch sensor
- infrared sensor
- piezo buzzer
- LEDs
- breadboard
- jumper wires
Procedure:
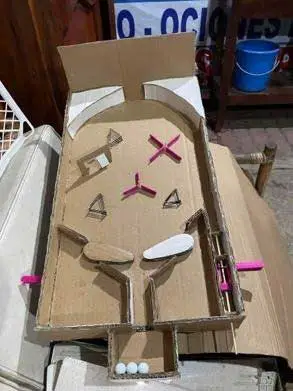
Step 1. Make the parts of the pinball machine
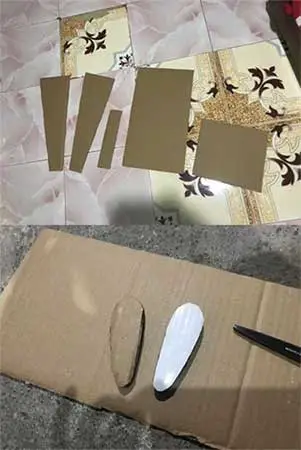
cardboard box cut-outs:
- base: 50cm (length) x 28 cm (width)
- side support: 50cm (length) x 17cm (upper width) x 6cm (lower width)
- back cover: 28cm (length) x 28cm (width)
- front cover: 6cm (length) x 28cm (width)
- flipper: 9cm (length) x 3cm (upper width) x 2cm (lower width)
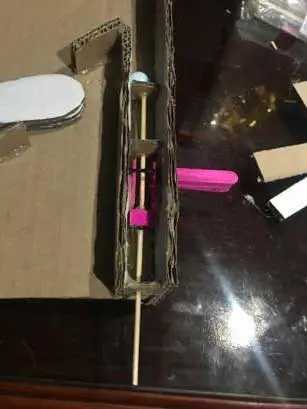
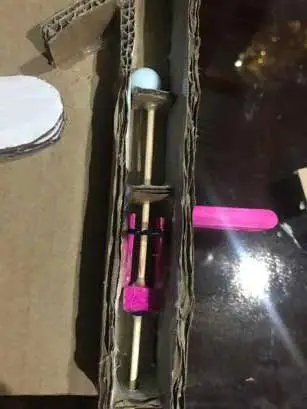
Step 2. Make the flipper buttons. Make a hole near the end of 10 popsicle sticks, then stack 5 of them together using a toothpick.
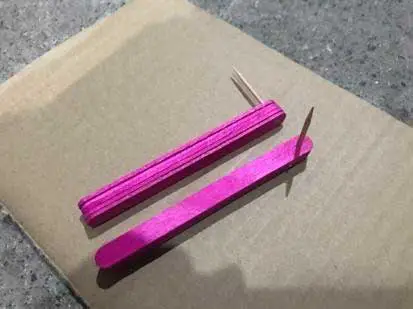
Step 3. Make the support of the flipper button. Cut small parts of the carton box that will be enough to cover/support half of the flipper buttons.
Step 4. Connect the flipper to the flipper button. Make a hole on the flipper, just enough to make a skewer fit in it.
Connect the flipper to the flipper button using a piece of carton box, cut 5cm (length) x 3cm (width), then cover one side with a 5cm popsicle stick.
Make two holes on the connector, one for the flipper and one to connect the flipper to the flipper button.
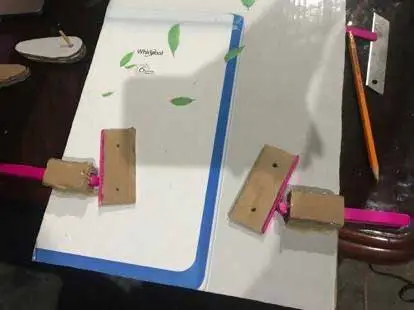
The last step to make the flipper move is to use sanrio hair ties.
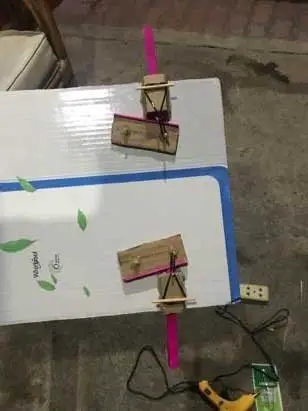
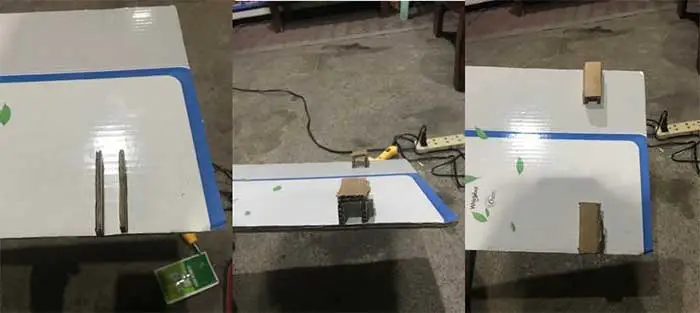
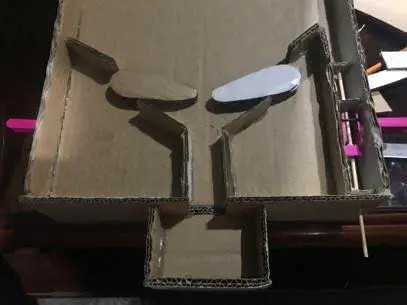
Step 5. Assemble the parts of the pinball machine. Using the carton box that we cut out in the first step we can now assemble the pinball. Cut pieces of cardboard boxes to make restrictions for the marble.
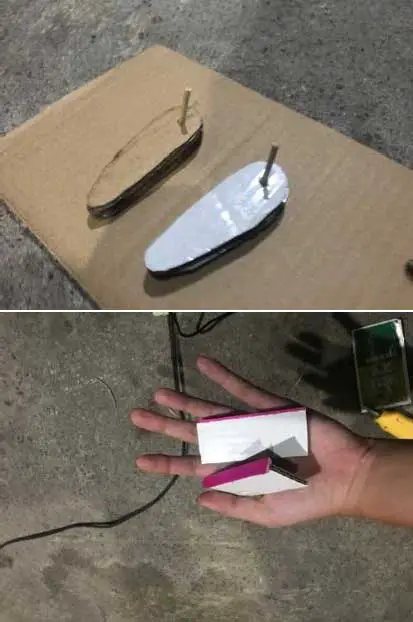
Step 6. Make the marble launcher
(I forgot to take pictures of some parts, but it is easy to make)
- Cut small pieces of carton box to serve as stoppers for the launcher
- Use small pieces of the popsicle stick to serve as a support for the sanrio hair ties
- Use a skewer as a guide for the At the end of the skewer stick a small piece of carton box to use as the head of the launcher
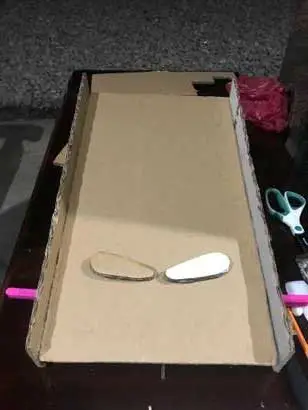
Step 7. Make the marble catcher. Cut pieces of the carton box to create a marble catcher.
Step 8. Write the code.
int ts = 4;
int is = 2;
int y = 8, r = 9, g = 10; int zz = 6;
int mode = 0;

void setup()
{
pinMode(ts, INPUT);
pinMode(is, INPUT);
pinMode(y, OUTPUT);
pinMode(r, OUTPUT);
pinMode(g, OUTPUT);
pinMode(zz, OUTPUT);


}

void loop()
{
if (digitalRead(ts) == 1 && digitalRead(is) == 1)
{
digitalWrite(r, LOW);
digitalWrite(y, LOW);
digitalWrite(g, LOW);
digitalWrite(r, HIGH);
tone(zz, 500, 250);
delay(500);
digitalWrite(y, HIGH);
tone(zz, 450, 250);
delay(500);
digitalWrite(g, HIGH);
tone(zz, 400, 250);
delay(500);
digitalWrite(r, LOW);
tone(zz, 350, 250);
delay(500);
digitalWrite(y, LOW);
tone(zz, 300, 250);
delay(500);
digitalWrite(g, LOW);
tone(zz, 250, 250);
delay(500);
digitalWrite(r, HIGH);
tone(zz, 200, 250);
delay(500);
digitalWrite(y, HIGH);
tone(zz, 150, 250);
delay(500);
digitalWrite(g, HIGH);
tone(zz, 100, 250);
delay(500);
}
else if (digitalRead(ts) == 0 && digitalRead(is) == 0)
{
digitalWrite(r, LOW);
digitalWrite(y, LOW);
digitalWrite(g, LOW);
digitalWrite(r, HIGH);
tone(zz, 1000, 250);
delay(500);

digitalWrite(y, HIGH);
tone(zz, 1500, 250);
delay(500);
digitalWrite(g, HIGH);
tone(zz, 2000, 250);
delay(500);
}
else if (digitalRead(ts) == 0 && digitalRead(is) == 1)
{
digitalWrite(r, LOW);
digitalWrite(y, LOW);
digitalWrite(g, LOW);
digitalWrite(g, LOW);
digitalWrite(r, HIGH);
delay(150);
digitalWrite(r, LOW);
digitalWrite(y, HIGH);
delay(150);
digitalWrite(y, LOW);
digitalWrite(g, HIGH);
delay(150);
}
}
Breadboard:
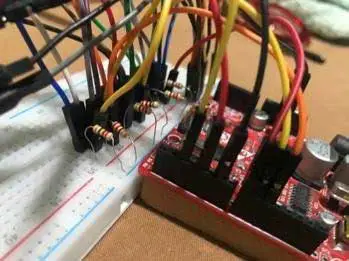
For the breadboard circuit, you may refer to the following articles:
Using the HC-SR04 Ultrasonic Sensor to Detect Objects
Detecting Objects Using the Infrared(IR) Obstacle Sensor
Combining the Infrared Sensor and Touch Sensor in 1 Arduino Project (with Circuit and Sketch)
Adding Sound to Arduino Using the MH-FMD Piezo Buzzer Module
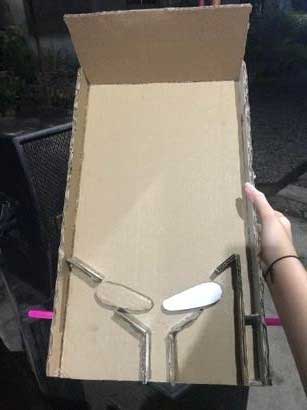
Step 9. Make obstacles.
- Cut the popsicle stick to create a DIY mini propeller
- Use 3 toothpicks to serve as support, then put 3 sanrio hair ties
- Make a mini door using a piece of carton box
Step 10. Finalize, then place the sensors and LED Lights.
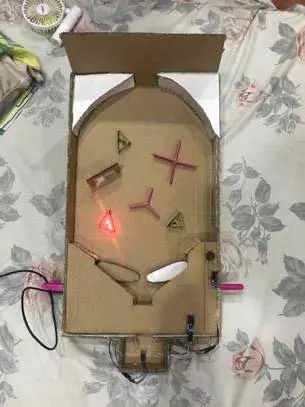
As I made this project, I discovered new things about robotics. The new things that I have discovered made me become more interested in robotics. While making this project I encountered a few problems, like the code not working and the lacking materials. Despite all these problems I was able to make a game prototype that I am proud of. Overall, making this project made me discover new things about robotics and I had fun while making this project.


