Made by Jerhen Martinez.
In this day of a pandemic, most of us are still required to stay at home most of the time. Even if vaccinated, we should still take care of our health. For most people, however, it may be boring to stay at home all the time. It can increase the desire to go experience different activities outside. With my learnings on this week’s subject, I created a mini-game that can entertain people when faced with boredom at home.
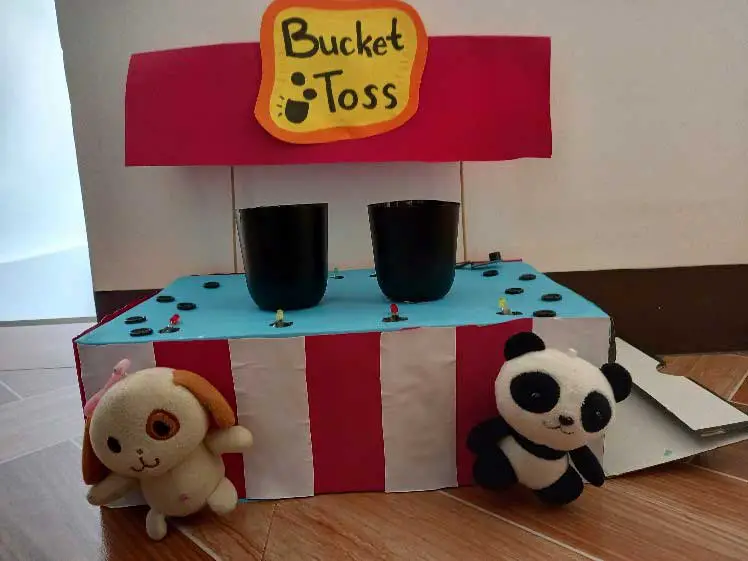
The objective of this game is to toss to win. There are two buckets, and two balls present in the game. The player must toss a ball in each bucket. If a ball was tossed in the bucket, a light would be activated meaning that a point is made. The same goes for the other bucket. If both buckets have a ball in them, more lights would be activated around the game stand, and a sound of victory would be played.
Materials:
To create this game, you will need:
- Shoebox
- Plastic cups
- Acrylic paint
- Paint Brush
- Cutter
- Scissors
- Permanent marker (black)
- Glue gun
- Glue stick
- Cartolinas
- Construction paper
- Elmer’s glue
- BBQ sticks
- Buttons (Décor)
- Stuffed toys (Décor)
- Tape
Electronic Components:
- Arduino Microcontroller with USB wire
- Breadboard
- Resistors (220 ohm)
- Jumper wires (Male and Female)
- 6 LEDs
- HW-201 Infrared obstacle sensor
- TTP223 Capacitive touch sensor
- Pre-Assembled MH-FMD Piezo Buzzer
Step-by-Step Process
Step 1: Before I started creating the structure of my game, I first constructed the jumper wires in the breadboard and Arduino Microcontroller for the LEDs and sensors to work as planned. I experienced trial and error in this part, but it is not as bad as I expected.
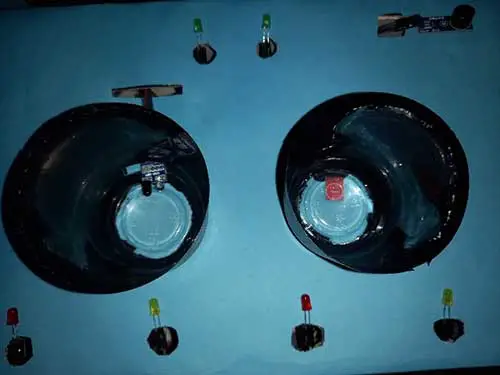
Here is the structure of my breadboard:
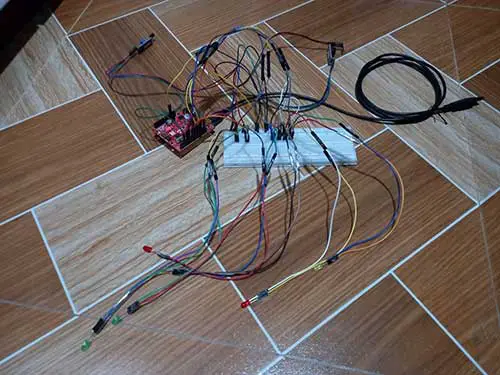
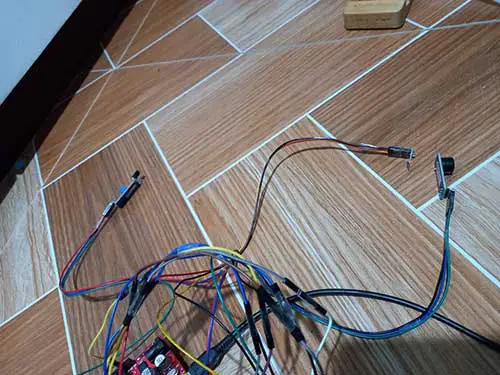
Based on the first image, the LEDs are organized at the bottom, while the sensors are organized on top. The sensors are the HW-201 Infrared obstacle sensor, TTP223 Capacitive touch sensor, and Pre-Assembled MH-FMD piezo buzzer (second image from left to right). I used tape to neatly arrange the wires and avoid possible tangles and confusion as much as possible.
I also tested the code I created to make sure I arranged the wires in the breadboard structure right. Here is the code:
int touchsensor=4;
int ir=2;
int led7=7, led8=8, led9=9, led10=10, led11=11, led12=12;
int buzzer=5;

void setup() {
  pinMode(touchsensor,INPUT);
  pinMode(ir, INPUT);
  pinMode(led7, OUTPUT);
  pinMode(led8, OUTPUT);
  pinMode(led9, OUTPUT);
  pinMode(led10, OUTPUT);
  pinMode(led11, OUTPUT);
  pinMode(led12, OUTPUT);

}

void loop() {
  if (digitalRead(touchsensor) == 1 && digitalRead(ir) == 1)
  {
    digitalWrite(led8, LOW);
    digitalWrite(led7, HIGH);
  }
  else if (digitalRead(touchsensor) == 1 && digitalRead(ir) == 0)
  {
    digitalWrite(led12, HIGH);
    digitalWrite(led11, HIGH);
    digitalWrite(led10, HIGH);
    digitalWrite(led9, HIGH);
    digitalWrite(led8, HIGH);
    digitalWrite(led7, HIGH);
    delay(300);
    digitalWrite(led12, LOW);
    digitalWrite(led11, LOW);
    digitalWrite(led10, LOW);
    digitalWrite(led9, LOW);
    tone(buzzer,262,150);
    delay(300);
    tone(buzzer,196,150);
    delay(300);
    tone(buzzer,196,150);
    delay(300);
    tone(buzzer,247,150);
    delay(300);
    tone(buzzer,262,150);
    delay(300);
  }

  else if(digitalRead(touchsensor) == 0 && digitalRead(ir) == 1)
  {
    digitalWrite(led8,LOW);
    digitalWrite(led7,LOW);
  }

}
Step 2: After finishing my breadboard and being satisfied with how it works using the code I made, I then start creating the structure of the game. I took a random shoe box found at home and placed a blue cartolina over it. I only glued the top and one side of the box with the cartolina so that I can still open the box.
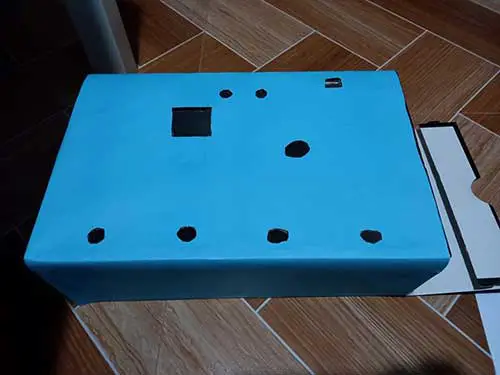
The same goes for detaching a small side of the box (right side in the image), for me to place and activate the breadboard structure I created earlier. I also created holes above to place the LEDs and sensors easier.
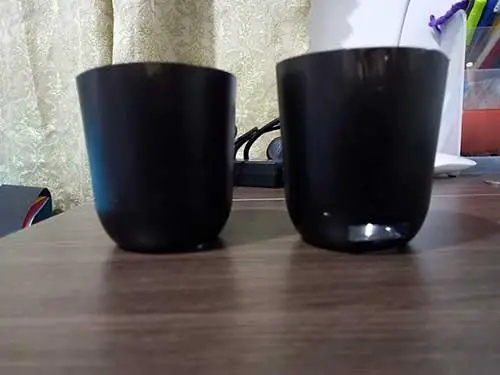
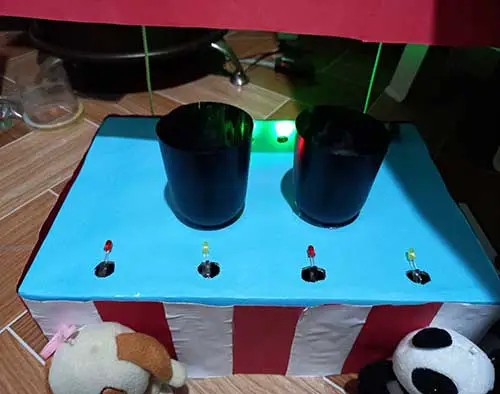
Step 3: To create the bucket for the game, I cut out half of the two plastic cups I have since they were big. I then painted both using black acrylic paint. After the paint is dried, I placed a hole on the bottom of one cup, and a hole on the side on the other. It is so that the sensors can easily spot the ball when tossed.
Step 4: At this point, it is now ready to place the breadboard structure inside the shoebox creation that was made earlier. I taped the breadboard inside the box to avoid it from falling, the same goes for the jumper wires when I placed the LEDs, buzzer, and sensors on the holes created above. Here is what my project is looking like so far:
In the image, I haven’t yet placed a hole on the bottom of the right cup since I was estimating how big the hole I should make be back then.
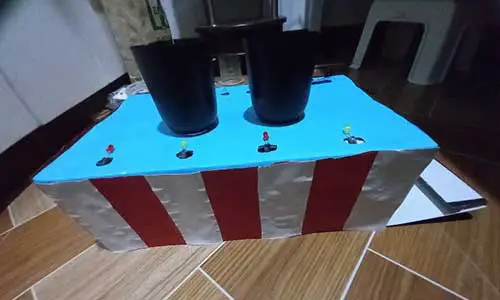
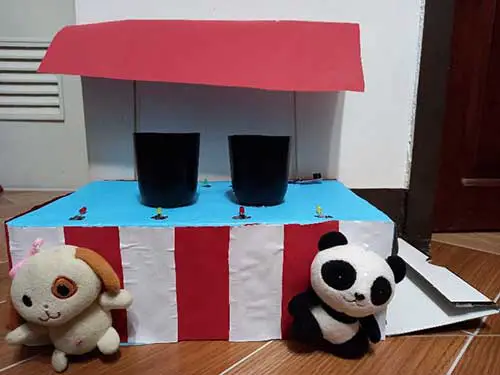
Step 5: Next, I then started with my decorations. I wrapped the box with a red and white striped pattern on the side of the box. It gives off a vintage carnival theme to my project.
Step 6: Before moving on with more decorations, I always must check if my LEDs, sensors, and buzzer is still functioning well.
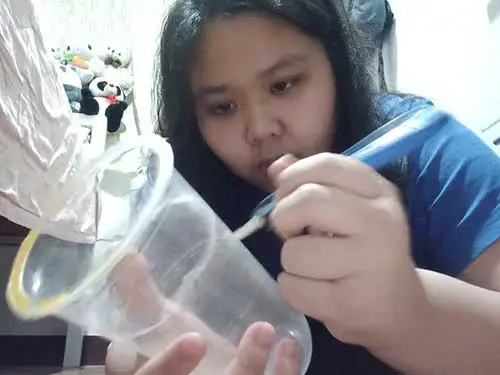
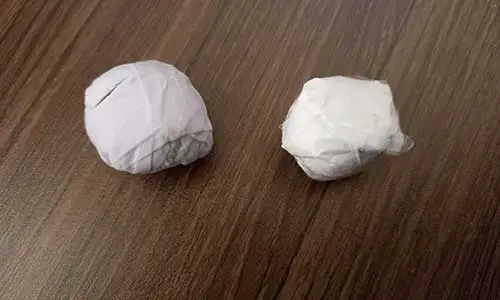
Step 7: To make my game product more colorful and eye-catching, I added a red roof using red cartolina and two BBQ sticks taped on the back of the box. Then, I glued two of my stuffed animals on my project to be reminded of the different prizes that can be earned when won in a game. I also made the two balls at this time; I crumpled some scratch paper and dip it in a mixture of glue and water and let it dry. I taped some parts of the other ball because it wasn’t sticking that much than expected.
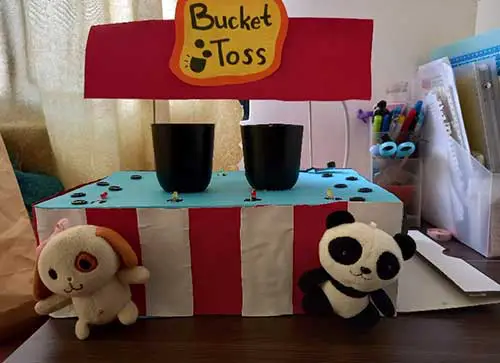
Step 8: Now for the final touches, I added the name of the game at the roof of the product. It says the name of the game “bucket toss” with slight doodles. I also added black buttons on top of the box so that it can take up available space. And now we are done!
Based on my experience in creating my product, I felt proud that I was able to create something that is visually nice, and it has a lot going on. In comparison to last quarter, my final product was too simple, and I was struggling a lot since it was my first time with Arduino. In this quarter, I took note of what I need to work more on from last quarter so that my final product would be better.
Even with the improvement, I have achieved from this quarter, there are still struggles that I have faced when I was in the process of creating the product. I struggled with the sensors at times. When the ball went in the bucket, there are times that the sensors, specifically the capacitive touch sensor, wouldn’t sense the ball which can’t light up the LEDs. It was frustrating alright. But I still tried my best to make it work.
Time management was also an issue for me. There was a struggle for me to balance academics with my personal life. I was too occupied with a lot of things, especially on Friday. To make up for the many things I did that day, I sacrificed my sleep to continue doing my work. Personally, if I don’t get enough sleep, I get cranky, and it makes me in a bad mood. But surprisingly, I haven’t felt sleepy that night. I even got surprised that the sun was rising and realized that I spent the whole night for this output. I guess I was too determined to finish my task on time and wanted to have a good output.
My realization when finishing my product is that there is always room for improvement. It was clear that I have improved from last quarter. but there are still slight imperfections with my output in this quarter too. That is why I should not be afraid of seeing mistakes in the things I created because I can still improve it next time.


