Made by: Jerhen Martinez.
For the past quarters, I have learned a lot of things about Arduino. I learned about Lighting up LEDs, using sensors, creating sounds from a piezo buzzer, and more. For this quarter, I learned all about more sensors such as potentiometers and actuators like servo motors. Potentiometers are used to activate other parts of the Arduino project such as LEDs. Servo motors are used to bring movement to your Arduino project. It can give the illusion that the project created has muscles to move on its own. With the new discovery of servo motors, I included them in my project.
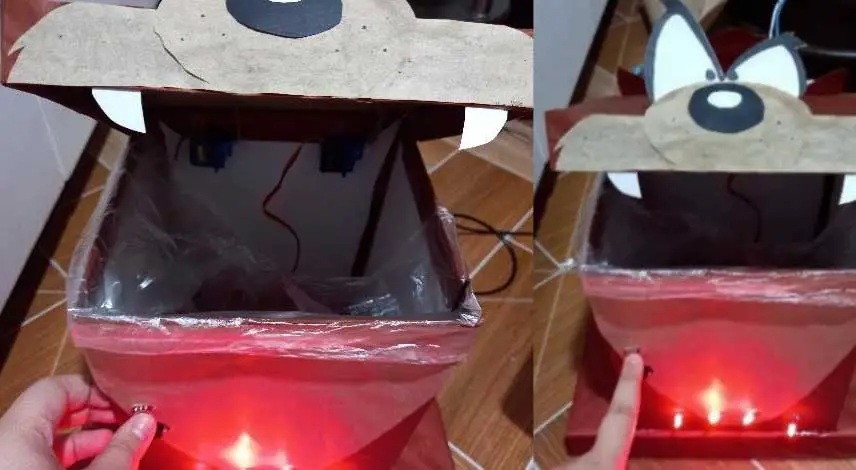
My project is a DIY trash bin. The trash bin is no ordinary bin, the bin is designed to look like a character from the show Looney Tunes, named Taz. Taz is a Tasmanian devil that has a huge appetite. In the show, he devours everything in sight such as trees, boulders, shrubs, and many more. His character goes well for my trash bin, and I made it look like Taz would eat the trash if one placed it inside the bin or in his mouth.
The project has a touch sensor. When pressed, the lid of the trash bin would lift itself up because of the servo motors being activated. Other than the lid opening, 4 LED lights would turn on while noise from the piezo buzzer would be created at the same time. This makes the experience of throwing trash more fun and interesting.
Materials:
To create this DIY project, you will need:
- ¼ illustration board
- Brown Kraft paper
- Japanese paper (Brown)
- Manila paper
- Construction Paper (Black and White)
- Old Box
- Ruler
- Glue
- Glue Stick
- Glue gun
- Tape
- Cutter
- Scissors
Electronic Components:
- Arduino Microcontroller with USB wire
- Breadboard
- Resistors (220 ohms)
- Jumper wires (Male and Female)
- 4 LEDs (Red)
- TTP223 Capacitive touch sensor
- Pre-Assembled MH-FMD Piezo Buzzer
- Servo Motors with servo horn
Step-by-Step Process
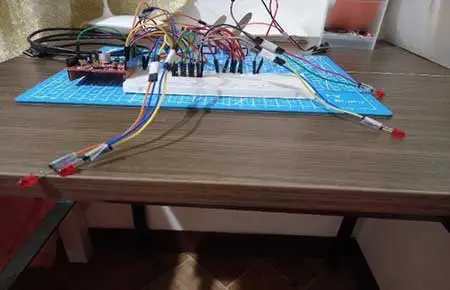
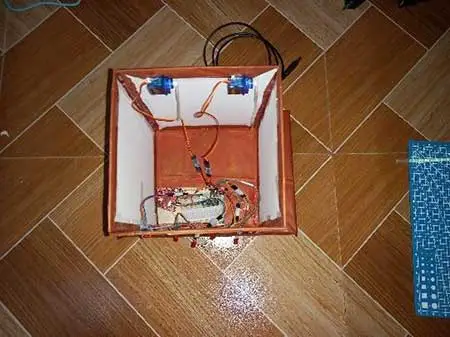
Step 1: Before I created my project, I first constructed all the LEDs, piezo buzzer, servo motor, and touch sensor. I placed them on the breadboard and connected them to the Arduino Microcontroller using the jumper wires.
Here is the structure of my breadboard:
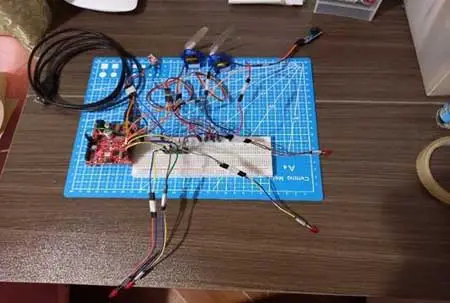
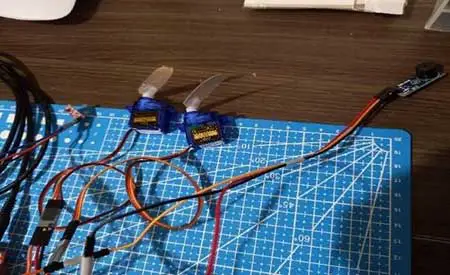
I organized the LEDs on the bottom (3rd pic) while the other servo motors, touch sensor, and piezo buzzer would be on top (2nd pic). It is to help me make sure if the wires are arranged properly and not tangled if I would add them to my project later. For the servo horns from the servo motors to reach the lid from the trash bin and lift it up, I taped some longer strips of kraft paper to the horns.
I then tested the code that I created to make sure the sensors, LEDs, and other parts. It worked well. Here is the code:
#include <Servo.h>
Servo Serv1;
Servo Serv2;

int touchsensor=5;
int pinServo1=6;
int pinServo2=7;
int pinLED1=1;
int pinLED2=2;
int pinLED3=3;
int pinLED4=4;
int buzzer=8;
int val=0;

void setup(){
  Serv1.attach(pinServo1);
  Serv2.attach(pinServo2);
  pinMode(pinLED1,OUTPUT);
  pinMode(pinLED2,OUTPUT);
  pinMode(pinLED3,OUTPUT);
  pinMode(pinLED4,OUTPUT);
  pinMode(buzzer,OUTPUT);
}

void loop(){
  val=digitalRead(touchsensor);

  if (val==1){
    Serv1.write(10);
    Serv2.write(10);
    digitalWrite(pinLED1,HIGH);
    digitalWrite(pinLED2,HIGH);
    digitalWrite(pinLED3,HIGH);
    digitalWrite(pinLED4,HIGH);
    tone(buzzer,262,100);
    delay(300);
    tone(buzzer,196,100);
    delay(300);
    tone(buzzer,196,100);
    delay(300);
  }
  else{
    Serv1.write(150);
    Serv2.write(150);
    digitalWrite(pinLED1,LOW);
    digitalWrite(pinLED2,LOW);
    digitalWrite(pinLED3,LOW);
    digitalWrite(pinLED4,LOW);
  }
}
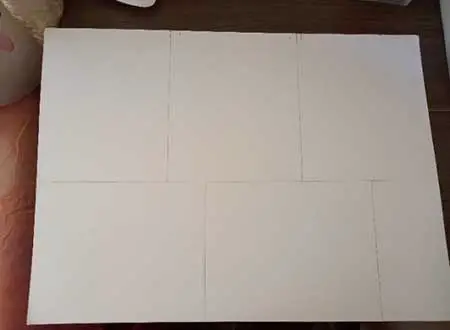
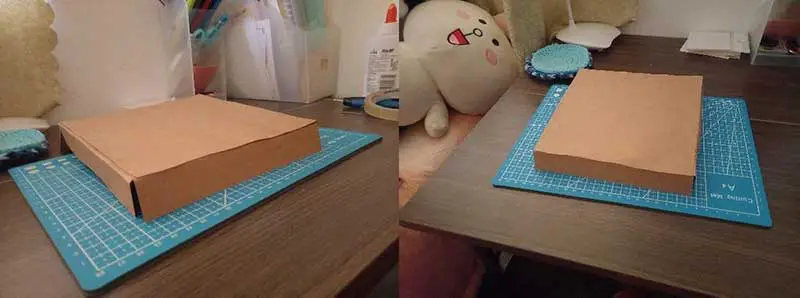
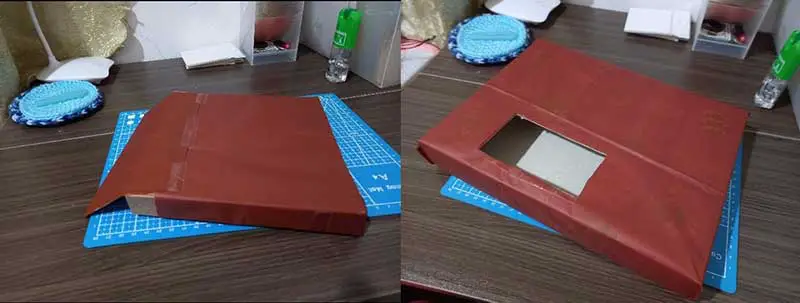
Step 2: Now that I finished arranging my breadboard and the code that I tested out worked, I would now move on to the making of the actual garbage bin. First, on the ¼ illustration board, I measured and marked out 4 rectangles that are 6.5 inches by width and 8 inches by height. I then cut them after. These would be the body of the trash bin.
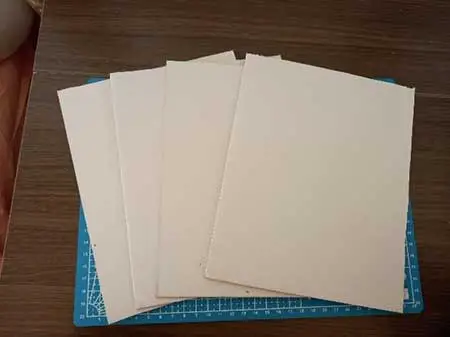
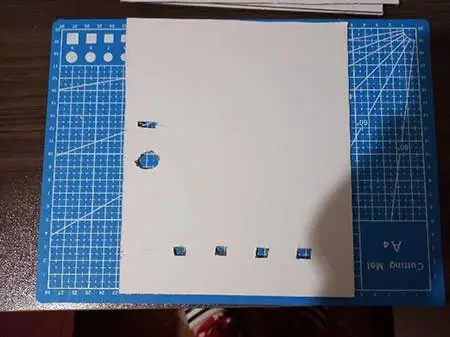
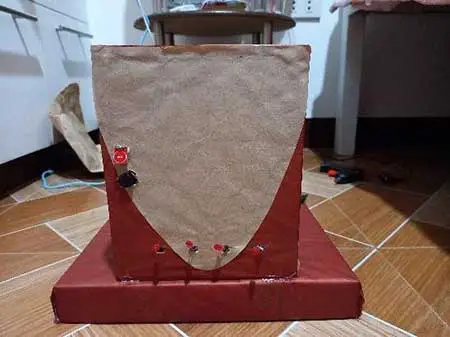
Having four rectangles, I took one of the pieces and created some holes. This serves as the front part of my project since the holes are for the LEDs, buzzer, and touch sensor to stick out from the project. The 4 holes on the bottom are for the LEDs, while the two holes from the upper left are for the sensor and buzzer.
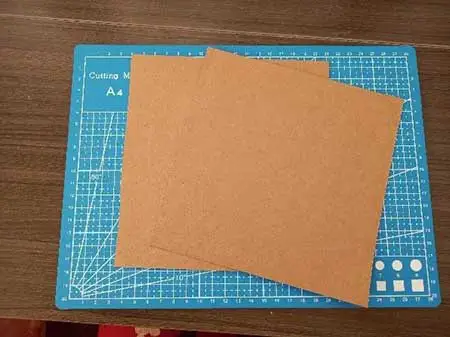
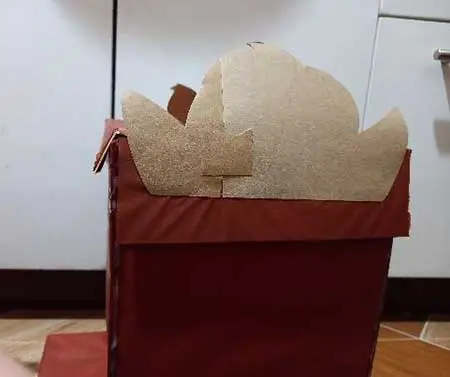
Step 3: Next, I moved on to the lid of the trash bin. I cut out 2 squares that measure 7 inches using brown kraft paper. The kraft paper is not too heavy but it is still sturdy at the same time.
After having two squares I cut down three strips that measure the same and one strip that is slightly longer by height. After arranging them, I glue them on each side of one square. After it is dry, I then top it with the other square and glue it on the inside.
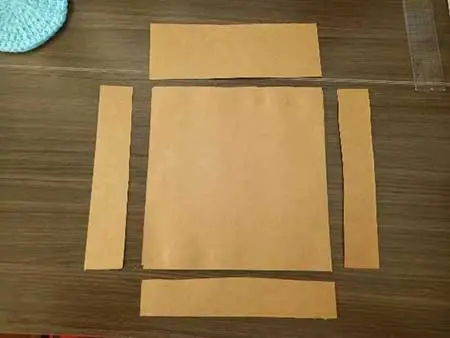
The side of the lid that has the longer strip would be placed at the back of the project.
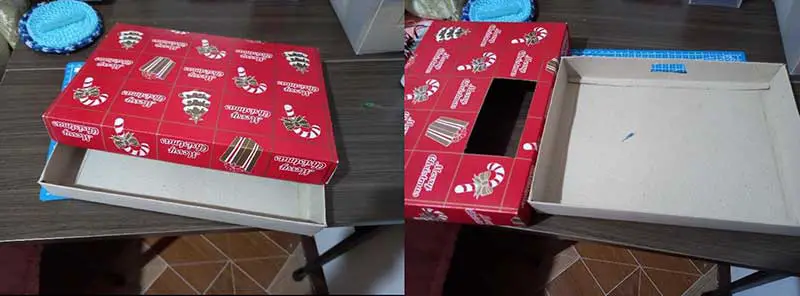
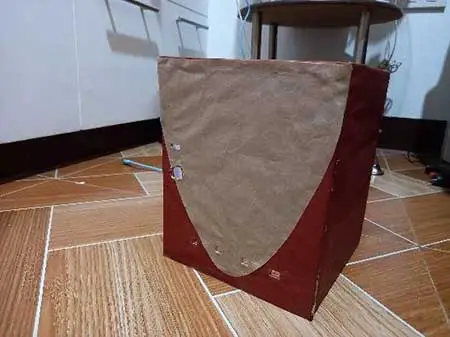
Step 4: Next part, I used an old box that I have kept in my room. I got it on Christmas last year. I recycled it and used it as another part of my project where my breadboard would be placed. It is so that the inside of my trash bin would be less messy and has more free space. I only cut a hole on the lid of the box so that wires can still go out. This is considered as the base.
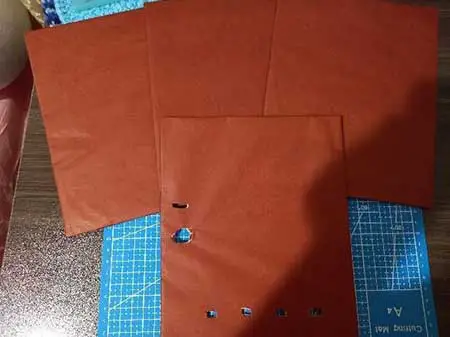
Step 5: The different parts of my project are ready for decoration. First, I focused on the body. Taz, the cartoon character, mostly has brown fur. I used brown Japanese paper that was close to his color. I wrapped the paper on all 4 rectangles and secure them with tape. On the front part of the body, I traced the holes from the illustration board to the Japanese paper and cut them.
Step 6: Same with step 5, I covered the handmade lid (Step 3) and the lid from my project’s base (Step 4) with brown Japanese paper. I also secure them with tape so that the Japanese paper won’t be ruined.
Step 7: After wrapping everything with brown Japanese paper, I then took the rectangle from the front body part to add more decoration. While looking at my reference, Taz has light brown fur at the front, so I shaped my manila paper into a U form and glued it on the front rectangle. When it dries, I cut holes again for them to be visible.
Step 8: After that, I glued all four sides of my rectangles using a glue gun. The body part for my project is now formed.
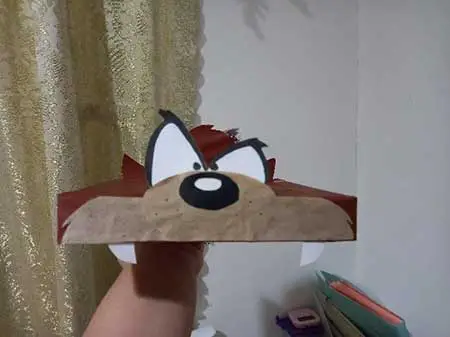
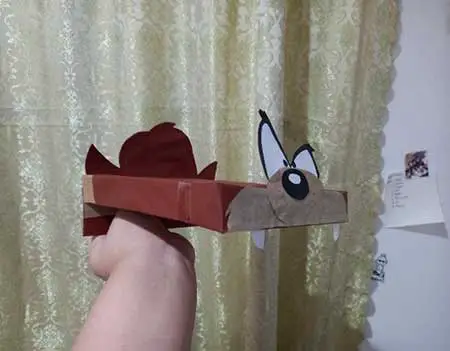
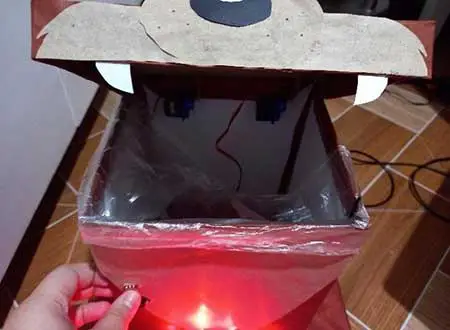
Step 9: Now is the time to create Taz’s facial features. First, I cut out the upper mouth part with whiskers using manila paper. I cut and glue the black nose to that part after. While letting them dry, I drew his eyes and glued them above some kraft paper. It is so that the eyes won’t move and reduce bending. To finish decorating the front lid, I added two fangs to identify that the opening on the trash bin is his mouth. At the back of the lid, I added his hair and glued it on top of some Kraft paper too. This is what the lid looked like:
Step 10: While waiting for the glue to dry on the lid, I started assembling my base and body including the breadboard structure that I made in Step 1. I used my glue gun to connect both my base and body to make my project sturdier. After arranging everything, I made sure to test out my Arduino if there were plugged-out wires or problems due to the arranging process.
This is what the project looks like so far:
I taped as many wires as possible in order to create more space. This is what the inside looks like:
Step 11: Finally, once the glue is all dry from the lid on Step 8, I attached the lid on top of the body. The side that has the longest strip would be placed on the back and is glued by a glue gun.
Step 12: After the glue dried, I must check if everything in the Arduino still works at this point, especially the servo motors. It appears that the kraft paper strips can carry the lid. After everything is checked and worked properly, I added a plastic bag to the bin, and I am done!
Based on my experience in planning and creating this project, I felt proud that I was able to finish a good output. Looking back at it, it was better than I expected. Before, I was worried that I may not replicate Taz from Looney Tunes because I know I can’t draw that well. The final output was nice in my opinion, and I was able to identify Taz. I even asked some of my family members and they too can tell it's Taz. I was shocked at myself that I was able to create something like this.
The process of creating this project was going smoothly. Everything was okay and most things were going according to plan. There were only minor problems in the process of making it.
One of the minor problems was rearranging some parts of the breadboard structure during the arranging part of the project. There were some wires that went loose. It was easy for me to figure it out in the end though.


