Made by Shandale Gulfan.
This quarter, we focused on actuators and how they work. If we want our Arduino projects to be able to produce motion, we need to add actuators which is what I have incorporated into this project.
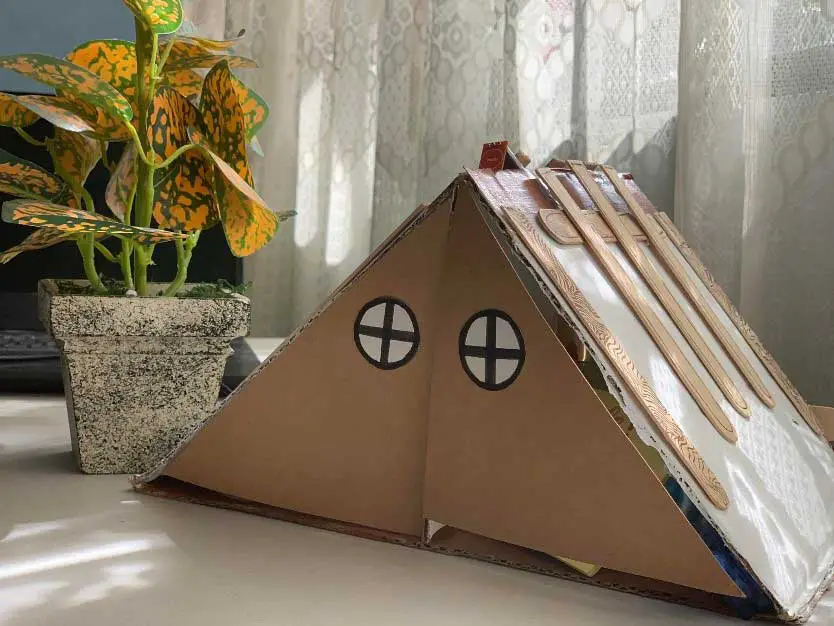
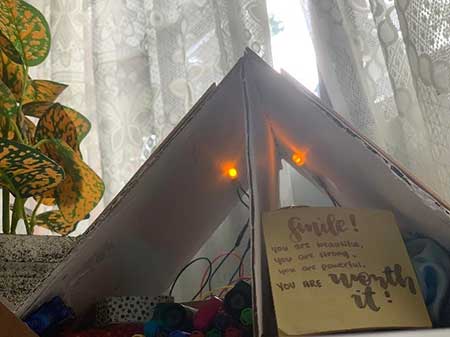
We all have days when our tables are filled with our things. Be it pens, papers, tape—everything leads to one big mess. Using simple materials that we can see in our homes and the knowledge of sensors and actuators, I thought of making a simple organizer that would keep my stuff inside and would also be fun to use! This organizer will hold your things and keep them safe all while providing entertainment as it works and opens up. With one touch of the sensor, the doors will open, revealing the stored stuff in the organizer. Another touch and 2 LEDs will light up from the inside which would help in navigating and looking for the trinkets inside, a sound will also go off. A third touch and the doors will close, keeping your stuff in place.
MATERIALS USED
-Used boxes
-Glue gun
-Stick glue
-Tape
-Box cutter and scissors
-Popsicle sticks and markers for decorating
-Acrylic paint (Brown and White)
-Folder
-Jumper Wires
-Breadboard
-Arduino Microcontroller
-2 LEDs
-220 ohm resistors
-TTP223 Capacitive Touch Sensor
-Piezo Buzzer (MH-FMD Passive Buzzer)
-2 Servo Motors (SG90)
STEP-BY-STEP PROCEDURE
Step 1
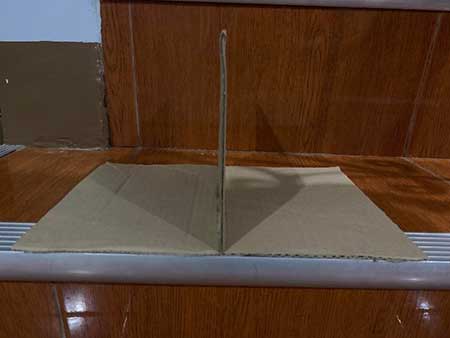
Cut a 20 x 29 cm piece from the used boxes and glue a 20 x 15 cm piece in the middle. The middle piece should divide the base into two sides/compartments.
Step 2
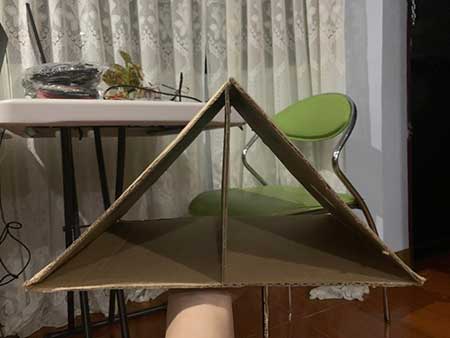
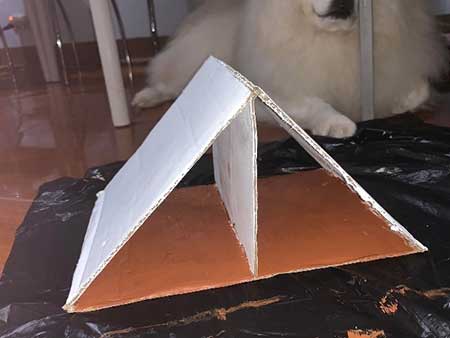
Form a triangle by using the middle piece as the vertex of the triangle.
Step 3
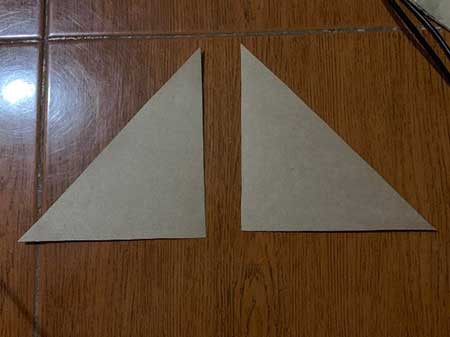
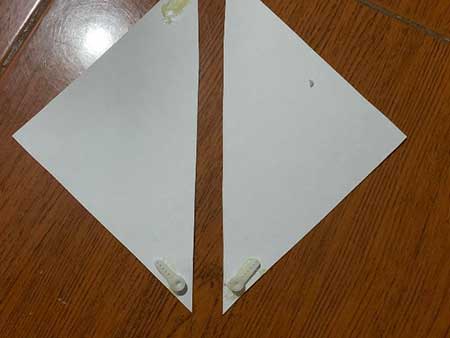
Cut 2 triangles from the folder. Make sure that these triangles fit the triangles formed in the base as these will be the “door”. Attach these triangles to the servo horns.
Step 4
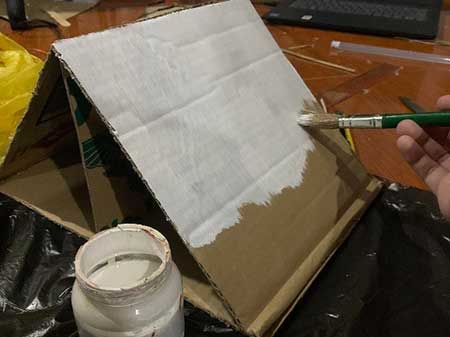
Paint the base white. Make sure to paint the outer part and the spaces where texts from the boxes can be seen. Paint the “floor” of the base brown.
Step 5
Make the breadboard connection. Make sure that the connections and components are correctly connected. This is to avoid unwanted accidents such as the servo being damaged or frying the touch sensor. In using LEDs, do not forget the resistors.
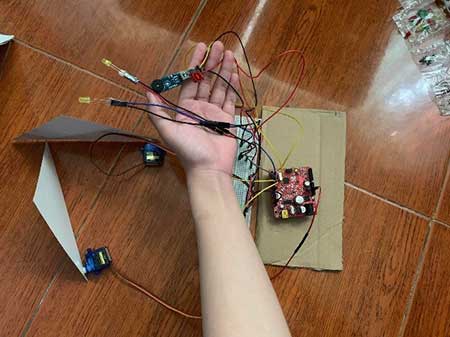
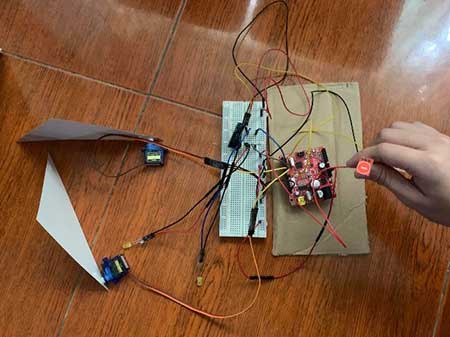
I used 2 servo motors for the doors of the organizer, 2 LEDs, a piezo buzzer, and a touch sensor to activate the doors and the lights.
This is the code I used:
#include <Servo.h>
Servo won;
Servo gyu;
int touchsensor=8;
  int led1=4;
  int led2=3;
  int mode=0;
  int pwon=6;
  int pgyu=5;
  int buzzer=2;
 void setup()
  {
    pinMode(touchsensor, INPUT);
    won.attach(pwon);
    gyu.attach(pgyu);
    pinMode(led1, OUTPUT);
    pinMode(led2, OUTPUT);
    pinMode(buzzer, OUTPUT);
  }
  void loop()
  {
    if(digitalRead(touchsensor) == 1)
    {
      mode=mode+1;
    }
    if (mode==0){
      won.write(0);
      gyu.write(160);
      digitalWrite(led1,LOW);
      digitalWrite(led2, LOW);
      delay(500);
    }
    if (mode==1){
      won.write(160);
      gyu.write(0);
      digitalWrite(led1,LOW);
      digitalWrite(led2,LOW);

      delay(500);
    }
    else if(mode==2){
      digitalWrite(led1,HIGH);
      digitalWrite(led2, HIGH);
      tone(buzzer,200,500);
      delay(500);
    }
    else if(mode==3){
      mode=0;
      delay(500);
    }
}
Step 6
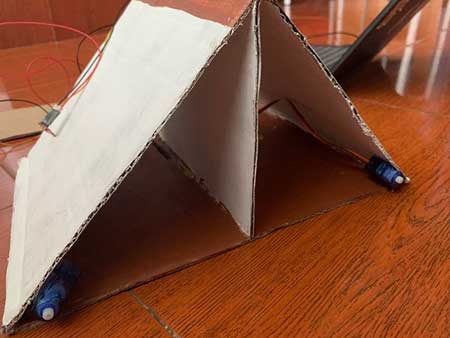
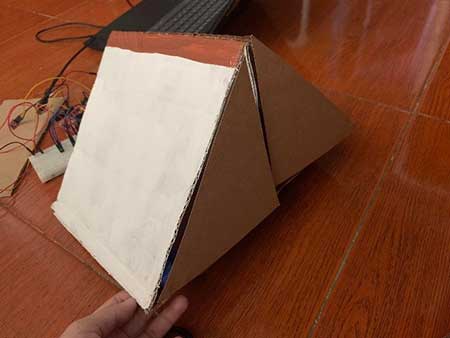
Attach the servo motors inside the base, in my case I used tape to keep them in place. Place them on the far left and right, sitting on the corner and the output shaft sticking out just a little bit. After securing the servo motors in place, attach the servo hoods with the doors glued onto them.
It should look something like this:
Step 7
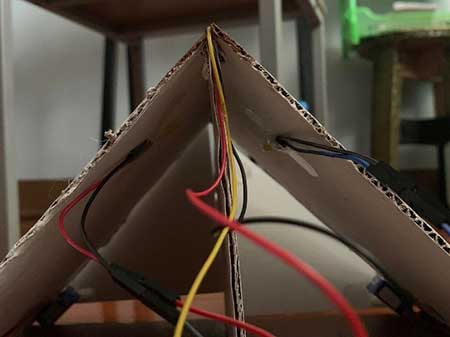
Secure the LEDs on the inner part of each compartment. One LED in each triangle. Then attach the touch sensor on the outer part, along the middle line of the entire roof.
It should look like this:
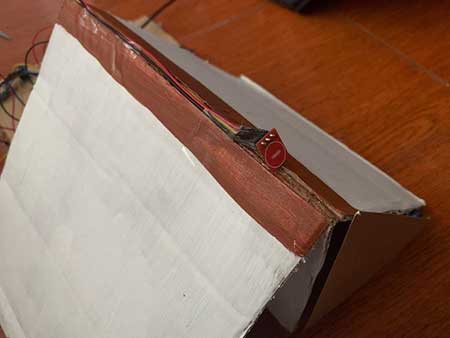
The piezo buzzer can be attached to the floor of the organizer. Make sure to secure the parts with tape for them to stay in place.
Step 8
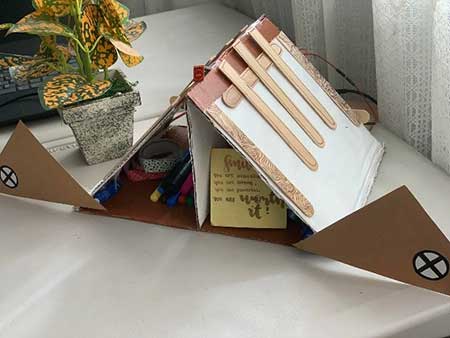
Decorate the organizer to your liking. I used popsicle sticks for the roof and drew on windows for the doors.
There you have it! One touch, it opens. Another then it lights up. Touch it again and it closes and keeps your things in!

Honestly, I thought I would have a hard time making this exit product since the topics were very intimidating. Surprisingly, it was easy and I was really amazed when the plan that I formed in my head worked out perfectly. The anxiety that comes with plugging the wires wrong, components not working, and the product not turning out the way you want was evident as I made this exit product. In my mind, I just kept hoping that I would not meet major inconveniences and that this exit product will work.
The initial plan of this exit product was to include a potentiometer instead of a touch sensor, however, it did not work the way I wanted to so I resorted to using a touch sensor. I felt so relieved when my exit product worked the way I wanted it to. The overall experience in making this product was more fun rather than challenging. I felt so happy as I finished it, I never thought I would be able to make something like this. I also incorporated concepts from the previous quarter which made me realize that everything I’ve learned in computer is truly useful and it would help me in the long run. As the quarter progressed, I learned new and valuable things that I would be glad to bring with me as I grow.


