Are you looking to create an interactive menu system using Arduino and pushbuttons? This article provides a step-by-step guide to building a basic menu system where users can navigate and change settings by pressing buttons. If you're new to Arduino or already have some experience, this guide will take you step-by-step through coding, wiring, and understanding the entire project.
This project can be used for practical applications such as setting up a home automation system, controlling devices, or customizing settings for a robot or any smart device.
This project requires the I2C LCD and Wire libraries. To download and install the libraries, click here.
Learn more about I2C LCD
|
|
For detailed knowledge about I2C LCD, read this article: Displaying Characters Using the I2C Liquid Crystal Display (LCD) (This link opens in another window) |
Why Create a Pushbutton Menu System with Arduino?
Adding a menu system to your Arduino project gives it a professional and interactive touch. You can allow users to change configurations without needing a computer connection. It’s an excellent learning experience for beginners and can serve as a foundation for more advanced projects, such as:
- Home automation controls
- Device settings customization
- Interactive educational tools
What You’ll Learn in This Article
- How to wire 4 pushbuttons and an I2C LCD to Arduino
- Writing the Arduino code to handle menu navigation
- Step-by-step explanation of the code
- Practical tips and common troubleshooting advice
Materials Required
To get started, you’ll need the following components:
- Arduino board (e.g., Uno or Nano)
- 4 pushbuttons
- 16x2 I2C LCD display
- Breadboard
- Jumper wires
- 10kΩ resistors (optional, for pull-down configuration)
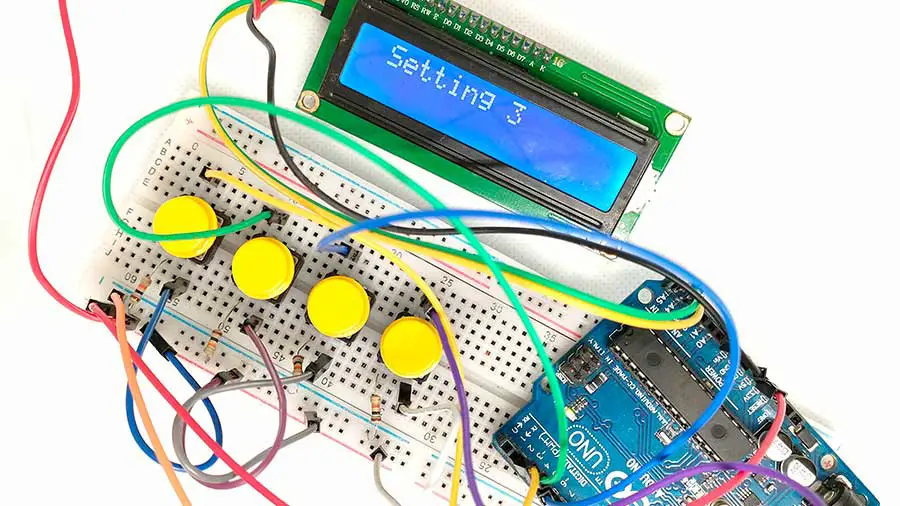
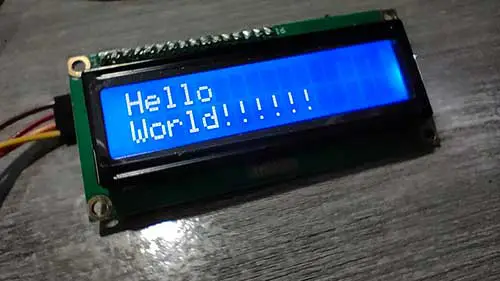
This is the output:
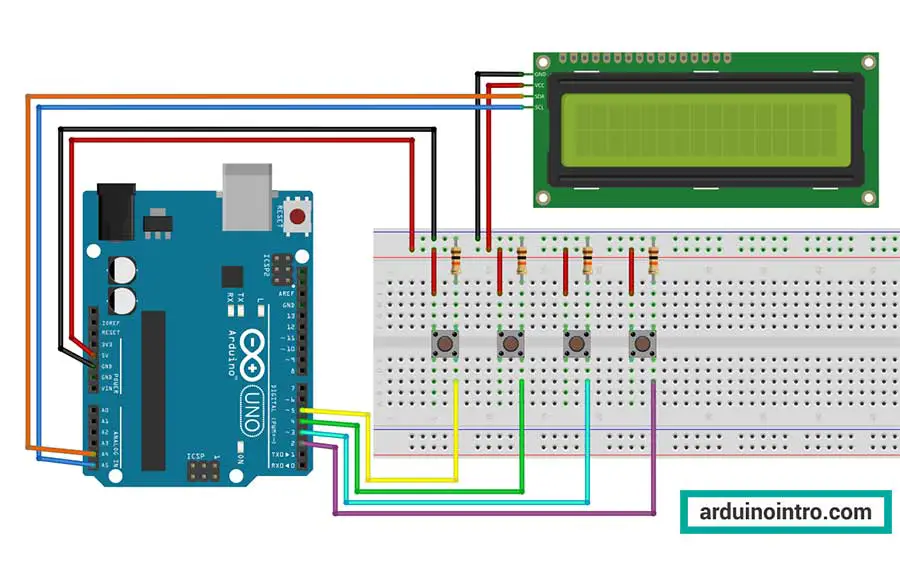
Wiring Diagram and Setup
Follow these steps to set up the circuit:
1. Connect the Pushbuttons
- Connect one leg of each pushbutton to the Arduino pins 2, 3, 4, and 5 (one button per pin).
- Connect the other leg of the pushbuttons to the ground (GND).
- Use pull-down resistors (10kΩ) to ensure stable readings, if needed.
For more information on pushbuttons, read this article: Using Simple Pushbutton Switches to Light Up LEDs
2. Connect the I2C LCD
- Connect the I2C pins of the LCD to the corresponding Arduino pins:
- SDA to A4 (Uno) or dedicated SDA pin (for other boards)
- SCL to A5 (Uno) or dedicated SCL pin (for other boards)
- VCC to 5V
- GND to GND

Arduino Code
Here’s the code you’ll be using for this project:
#include <Wire.h>
#include <LiquidCrystal_I2C.h>

LiquidCrystal_I2C lcd(0x27, 2, 1, 0, 4, 5, 6, 7, 3, POSITIVE);

int button_1=2;
int button_2=3;
int button_3=4;
int button_4=5;


void setup()
{
  lcd.begin(16,2);
  lcd.backlight();

  pinMode(button_1,INPUT);
  pinMode(button_2,INPUT);
  pinMode(button_3,INPUT);
  pinMode(button_4,INPUT);

  lcd.clear();
  lcd.setCursor(0,0);
  lcd.print(" PUSH BUTTON ");
  lcd.setCursor(0,1);
  lcd.print(" TO SELECT ");

}

void loop()
{
  if(digitalRead(button_1)==1){ //button 1 is pressed
    lcd.clear();
    lcd.setCursor(0,0);
    lcd.print(" Setting 1 ");
    delay(300);
  }

  if (digitalRead(button_2)==1){ //button 2 is pressed
    lcd.clear();
    lcd.setCursor(0,0);
    lcd.print(" Setting 2 ");
    delay(300);
  }

  if (digitalRead(button_3)==1){ //button 3 is pressed
    lcd.clear();
    lcd.setCursor(0,0);
    lcd.print(" Setting 3 ");
    delay(300);
  }
  if (digitalRead(button_4)==1){ //button 4 is pressed
    lcd.clear();
    lcd.setCursor(0,0);
    lcd.print(" Setting 4 ");
    delay(300);
  }
}
Step-by-Step Code Explanation
1. Libraries and LCD Initialization
The code begins by including the Wire and LiquidCrystal_I2C libraries for controlling the I2C LCD.
#include <Wire.h>
#include <LiquidCrystal_I2C.h>
The LCD object is initialized with its I2C address (0x27) and pin configuration.
2. Defining Button Pins
The four pushbuttons are assigned to pins 2, 3, 4, and 5.
int button_1 = 2;
int button_2 = 3;
int button_3 = 4;
int button_4 = 5;
3. Setting Up the LCD and Buttons
In the setup() function, the LCD is configured, and the button pins are set as inputs.
  lcd.begin(16, 2); // Initialize the LCD with 16 columns and 2 rows
  lcd.backlight();  // Turn on the LCD backlight
  Serial.begin(9600);

  // Set button pins as input
  pinMode(button_1, INPUT);
  pinMode(button_2, INPUT);
  pinMode(button_3, INPUT);
  pinMode(button_4, INPUT);
5. Displaying a Welcome Message
Also in the setup() function, the LCD screen is cleared, and a welcome message is displayed:
- First row: "PUSH BUTTON"
- Second row: "TO SELECT"
  lcd.clear();
  lcd.setCursor(0,0);
  lcd.print(" PUSH BUTTON ");
  lcd.setCursor(0,1);
  lcd.print(" TO SELECT ");
4. Menu Navigation in loop()
The loop() function continuously checks if any button is pressed using digitalRead():
- When a button is detected, the LCD displays the corresponding setting.
lcd.clear()ensures the screen is refreshed before printing new text.
Let’s break it down step by step for clarity:
Checking the Button State
if (digitalRead(button_1) == 1) { // Button 1 pressed
digitalRead(button_1): Reads the state of the pin connected to button 1.== 1: Checks if the button is pressed. When a button is pressed, the pin reads HIGH (logic 1).- If this condition is true, the code inside the braces
{}will execute.
Clearing the LCD Screen
lcd.clear();- Clears any text currently displayed on the LCD.
- This ensures the new setting text doesn’t overlap with the previous content.
Setting the Cursor Position
lcd.setCursor(0, 0);
lcd.setCursor(column, row): Specifies where the next text will appear on the LCD.(0, 0)places the cursor at the first column of the first row.
Displaying the Setting Name
lcd.print(" Setting 1 ");
Prints the string " Setting 1 " on the LCD at the position set by lcd.setCursor().
Adding a Short Delay
delay(300);
- Introduces a delay of 300 milliseconds.
- This ensures the button press doesn’t trigger the LCD update multiple times due to debounce issues. Without this delay, the button might be read multiple times because of the rapid electrical noise generated when pressing a button.
Repeating for Other Buttons
The same process is repeated for buttons 2, 3, and 4, but with different text being displayed on the LCD. For example:
if (digitalRead(button_2) == 1) { // Button 2 pressed
    lcd.clear();
    lcd.setCursor(0, 0);
    lcd.print(" Setting 2 ");
    delay(300);
}
- Checks if button 2 is pressed.
- Displays
" Setting 2 "on the LCD.
Why Use if ?
ifstatements: Each button press is checked independently. If button 1 is pressed, it doesn’t stop the checks for the other buttons.
How It Works Together
- When a button is pressed, the corresponding
ifcondition becomes true. - The LCD is cleared, the cursor is set, and the respective setting name is displayed.
- A short delay prevents misreading button presses due to debounce.
This design allows you to easily extend the code to include additional buttons or more complex menu functionality by following the same structure.
Practical Application
This menu system can be adapted for various applications, such as:
- Selecting brightness levels for LEDs
- Choosing different motor speeds
- Changing modes in a home automation system
For example, you could integrate this project into a smart lamp where each button changes the brightness or color.
Common Issues and Troubleshooting
1. LCD Not Displaying Text
- Check for broken jumper wires. Change your jumper wires.
- Ensure SDA and SCL connections are correct.
2. Buttons Not Responding
- Use pull-down resistors to stabilize button readings.
- Double-check button wiring to the correct Arduino pins.
- Check for broken jumper wires. Change your jumper wires.
- Use the Serial Monitor to check for the state of the button.
Conclusion
With this guide, you’ve learned how to create an interactive menu system using Arduino, pushbuttons, and an I2C LCD. This project is a great way to enhance your understanding of Arduino programming and circuit design. Once mastered, you can expand this system for more complex applications like home automation or robotics.


