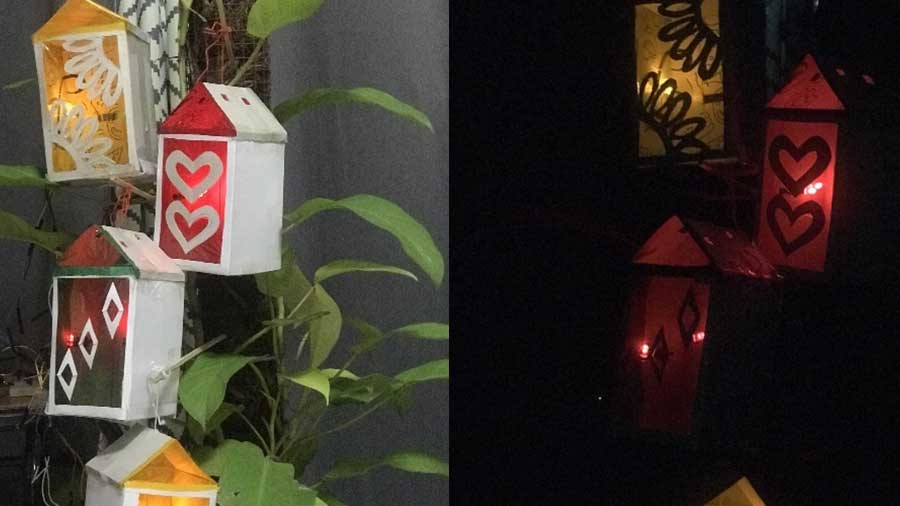
Made by: Chloe Lim
We are probably bored in our houses at this point of quarantine, am I right? So have you ever thought of making your own home decorations with low budget? Well, I have the perfect project just for you! This is “Ilaw ng Ating Tanglaw”, a very affordable, simple, and environmental-friendly home décor that can make a big change in your bare space. For this project, I used it as an indoor plant décor but it really is multi-purpose, you may choose your own unique way of using this product. You may use it as a lampshade, an interior wall décor, a simple home party decoration, even turn it into a lantern, or a plant décor just like what I did here. There are various ways in which this product can be used and can be designed, it just highly depends on your creativity, the ability to innovate, and being resourceful.
“Ilaw ng Ating Tanglaw” is made out of recycled materials, which is good for the environment plus can easily be found at home and these are the following:
- Pizza box (however any small box will do)
- Water Cellophane
- Glue
- Scissors
- Pencil and Eraser
- Barbeque Stick
- String (used to tie rice sack)
- LEDs
- Resistors (220 and 10k ohm)
- Jumper Wires
- Bread Board
- Pushbutton
- Arduino Microcontroller
Step-by-Step Process
1. I first made the small plant décor by cutting/ripping perfectly the sides of a pizza box to make the décor symmetrical and there were already broken lines available in the box so I just followed those. However, if you have a small box you may choose not to cut/rip its sides depending on the size of your recycled box found at home.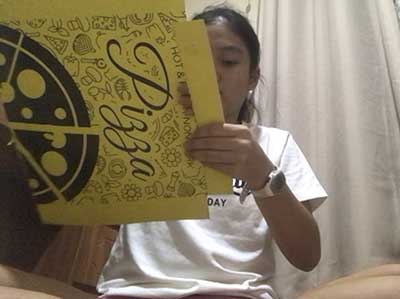
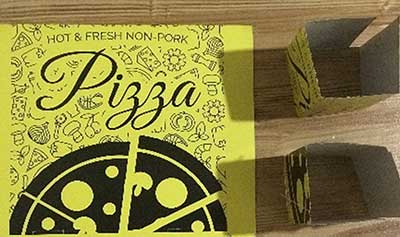
2. Then I folded the pizza box in half vertically and cut it into 2 pieces. Fold each 2 times into halves but this time horizontally. This should be what it looks like so far:
3. Next I drew my design on the inside part of my small box and I made sure to leave spaces outside my drawn design for it to have borders.
4. The 4th step is to cut your box in a way that follows your design and keep in mind that the places on your box that you will cut will be the space for you to place your water cellophane. (TIP: it is easier to cut your design using a cutter and be reminded of the “borders”).
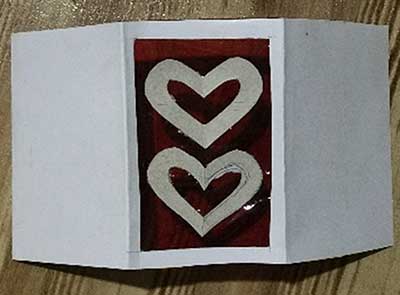
5. Paste the water cellophane of your choice in the inside part of the box using glue. It must already be like the bottom picture, then tape the side of your pizza box so that it will not leave a space and the light that you will place inside will be trapped.
6. The 6th step is to measure the top and bottom parts of the new box that you’ve created then make a very small hole in the center of both the top and bottom parts using a barbeque stick so that we would be letting the string pass through that hole.
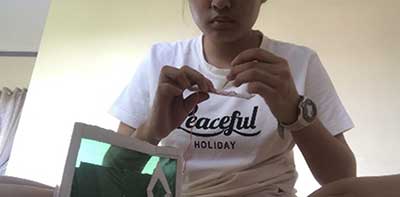
7. After making the hole, tie the barbeque stick and the string in the bottom and tape the bottom and then the top forming a roof structure.
8. I then made small holes in the roof for the light to shine through and also in the back part to insert my LEDs. This is how the product currently looks like:
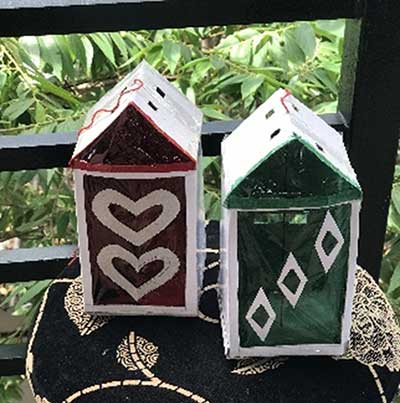
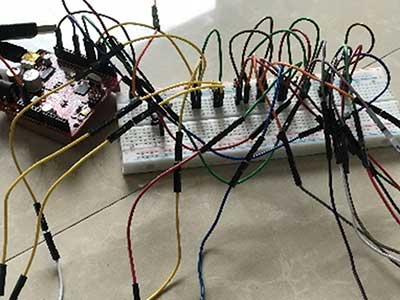
9. Lastly, I applied all our lessons and did both the programming and breadboarding parts. Here is my breadboard view and my sketches.
int PinButton = 2;
int Pinled1 = 3;
int Pinled2 = 5;
int Pinled3 = 6;
int Pinled4 = 9;
int val = 0;
int ledstate = LOW;
void setup() {
pinMode(PinButton, INPUT);
pinMode(Pinled1, OUTPUT);
pinMode(Pinled2, OUTPUT);
pinMode(Pinled3, OUTPUT);
pinMode(Pinled4, OUTPUT);
Serial.begin(9600);

}
void loop() {
  val=digitalRead(PinButton);
  Serial.println(val);
  if(val==HIGH)
 {
 digitalWrite(Pinled1, HIGH);
digitalWrite(Pinled2, LOW);
digitalWrite(Pinled3, HIGH);
digitalWrite(Pinled4, LOW);
delay(500);
digitalWrite(Pinled1, LOW);
digitalWrite(Pinled2, HIGH);
digitalWrite(Pinled3, LOW);
digitalWrite(Pinled4, HIGH);
delay(500);
 digitalWrite(Pinled4, LOW);
digitalWrite(Pinled1, HIGH);
delay(500);
digitalWrite(Pinled1, LOW);
digitalWrite(Pinled2, HIGH);
delay(500);
digitalWrite(Pinled2, LOW);
digitalWrite(Pinled3, HIGH);
delay(500);
digitalWrite(Pinled3, LOW);
digitalWrite(Pinled4, HIGH);
delay(500);
for(int fadevalue = 0; fadevalue <=255; fadevalue = fadevalue+5){
analogWrite(Pinled1,fadevalue);
analogWrite(Pinled2,fadevalue);
analogWrite(Pinled3,fadevalue);
analogWrite(Pinled4,fadevalue);
delay(30);}
for(int fadevalue = 255; fadevalue >=0; fadevalue = fadevalue-5){
 analogWrite(Pinled1,fadevalue);
analogWrite(Pinled2,fadevalue);
analogWrite(Pinled3,fadevalue);
analogWrite(Pinled4,fadevalue);
delay(30);
}
}


else
{ledstate=!ledstate;
digitalWrite(Pinled1, ledstate);
digitalWrite(Pinled2, !ledstate);
digitalWrite(Pinled3, !ledstate);
digitalWrite(Pinled4, ledstate);
}
}
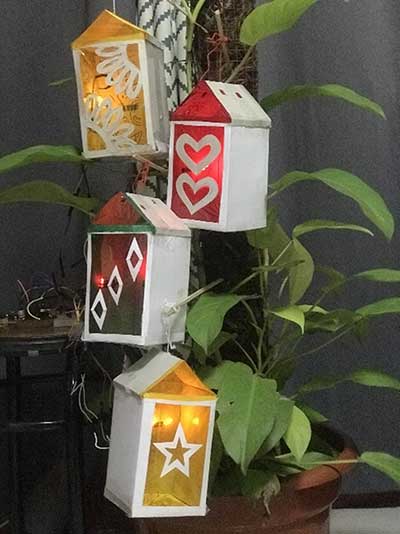
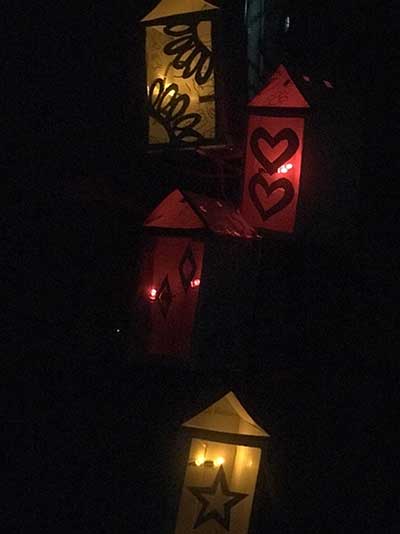
Honestly speaking, I feel very tired after making my project because I had no sleep since my first idea was a fail and this wasn’t my original idea so I needed to start all over again with just a little time that I had left, I decided to change my project at exactly 10 PM Friday night, so talk about pressure. I was feeling stressed while making my product however, it also felt fun because I love a good challenge that tests my thinking and shows hidden skills that I never knew I had in me.
The overall experience of making this product is most definitely a fun and creative learning experience because I was able to make an output using the new learnings I gained during this week. I was able to apply the lessons and with hard work, perseverance, sacrifices, trust in self, and trust in God I was able to create an output that 14 years old Chloe didn’t think would be possible. I have realized the importance of believing in your own talents, skills and ideas, capabilities, and yourself in general for you to be able to achieve better outputs and results in everything that you do. There are a lot of uncertainties during this time of the pandemic and we can never avoid questioning our own worth, but it is very important to start believing in ourselves and trusting God’s own process because with these, we will accomplish and overcome challenges we once thought were impossible to surpass. With these, we will beat the odds and become someone better for ourselves, for others, for our community, and for God.


