Made by Amhely Generalao.
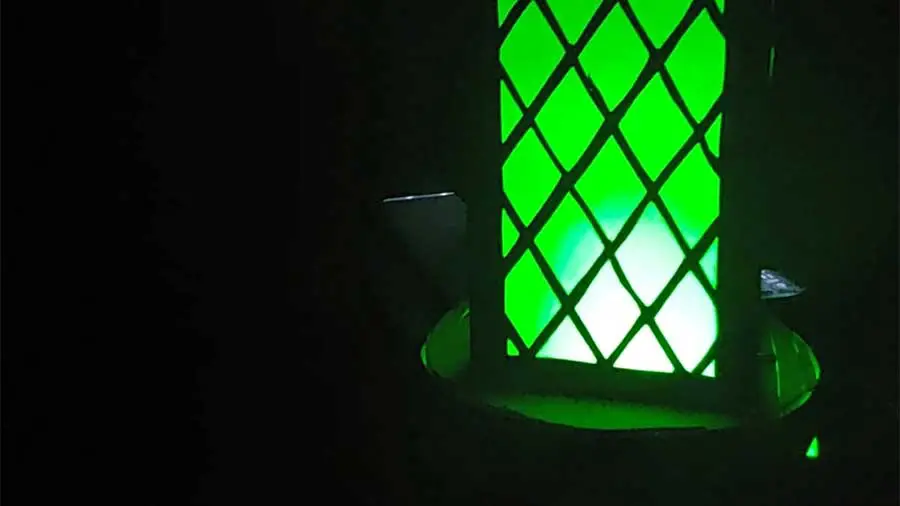
During this time of the pandemic, we students continue our education through virtual and online set-up at home. Many tend to make their learning space comfy and suitable for studying and learning so here is a DIY lamp that you can add up to your décor and interior designs.
Materials used:
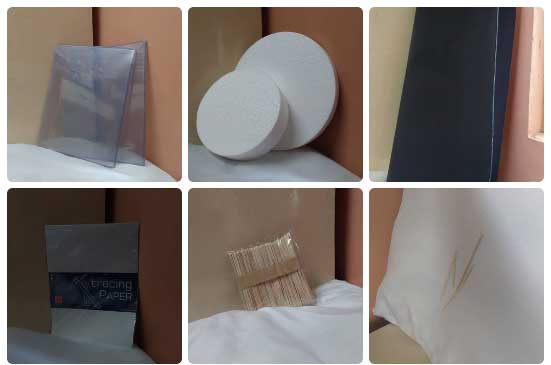
- Hard plastic card cover (or any flat hard plastic material)
- 2 circular Styrofoam
(can be any shape of your desire as long as one is bigger than the other) - Felt paper (any color but in my case black)
- Tracing paper (can be substituted with onion skin paper)
- Popsicle stick
- Toothpicks
- Hot melt glue / Stick glue
- double sided tape
- Scissors
- Cutter
- Arduino kit
Steps
Step 1:
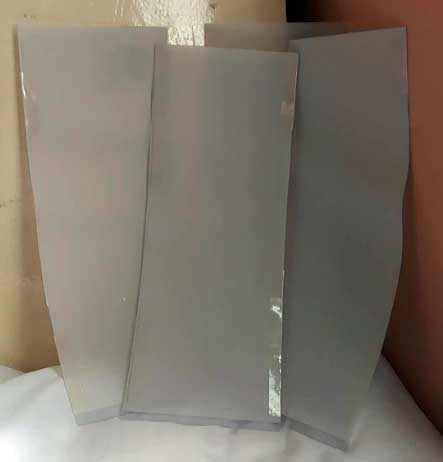
Cut the hard plastic material into 4 rectangular wide strips, the width and length can depend on your desired measurement.
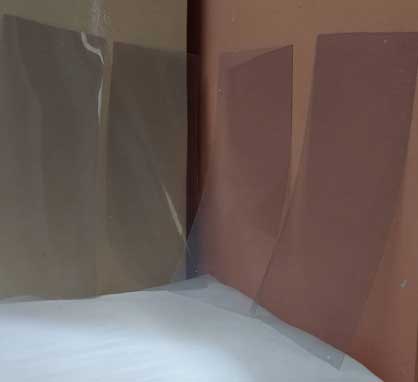
Step 2:
Cover one side of the plastic material with tracing paper or onion skin and stick them using tape on the side.
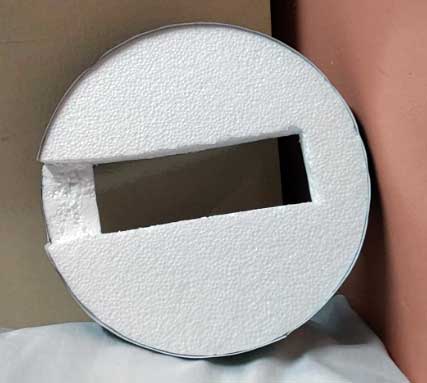
Step 3:
Cut a rectangular hole in the bigger Styrofoam that the breadboard can fit in, and cut one side of the rectangle hole only halfway through. (see pic)
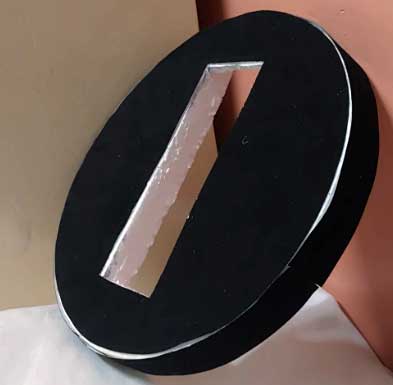
Step 4:
Cover the other side of the previous Styrofoam with the felt paper, include its side if you want to.
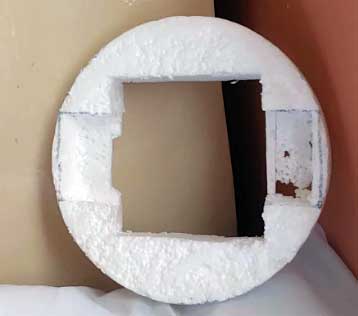
Step 5:
Cut the other Styrofoam with a rectangular hole following the picture (the whole on the right is a mistake on my side, pls don’t follow that T^T)
Step 6:
Place the 4 strips of plastic material into the other side of the smaller Styrofoam in a square form, you can use any means of sticking them.
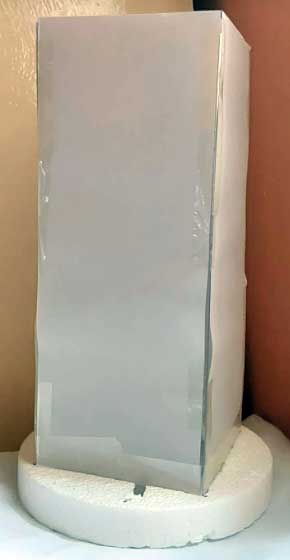
Step 7:
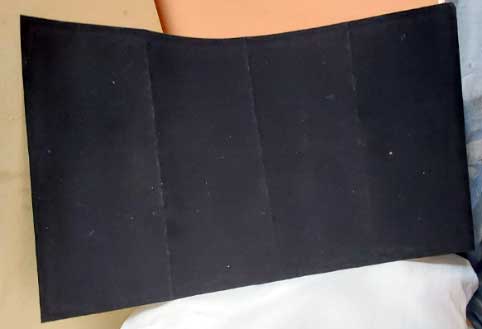
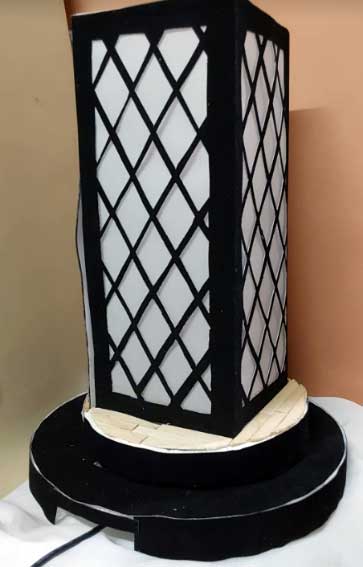
Cut the felt paper with the measurement of the lamp.
On the other side of the felt paper is white where you can then draw out the diamond pattern for the lamp.
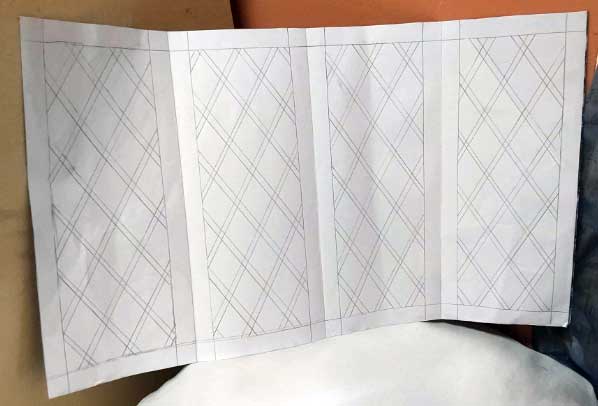
Cut out the pattern using a cutter.
(be sure to cut the right part of the pattern to avoid mistakes)
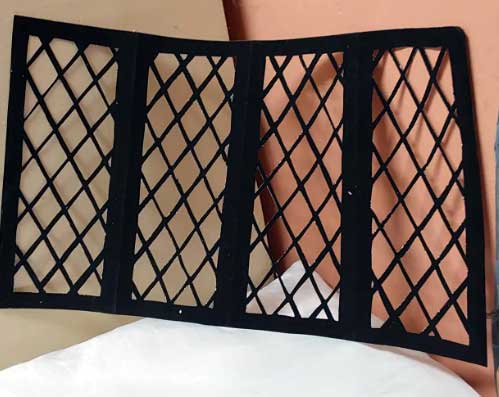
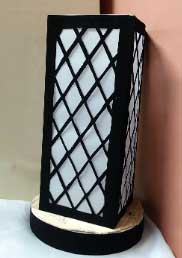
Wrap the cut-out design around the lamp, and stick them using double tape.

Step 8:
Decorate the Styrofoam with any design you want, in my case, I used popsicle sticks and felt paper.
Step 9:
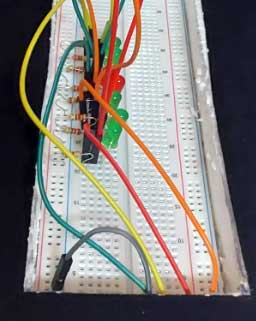
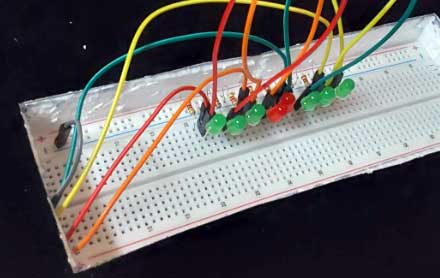
Place the breadboard inside the bigger Styrofoam.
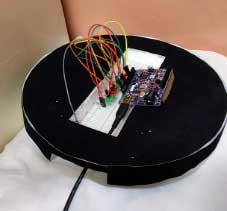
This is the arrangement of my breadboard with the LED and resistors.
Step 10:
Attach the lamp to the bigger Styrofoam, I used toothpicks to avoid the upper part from falling easily.
Step 11:
Upload the code!
int ledPin1 = 11;
int ledPin2 = 6;
int ledPin3 = 10;
int ledPin4 = 5;

void setup() {
  pinMode(ledPin1, OUTPUT);
  pinMode(ledPin2, OUTPUT);
  pinMode(ledPin3, OUTPUT);
  pinMode(ledPin4, OUTPUT);
}

void loop() {
  for (int fadeValue = 0 ; fadeValue <= 255; fadeValue = fadeValue+5) {
    analogWrite(ledPin1, fadeValue);
    analogWrite(ledPin2, fadeValue);
    delay(30);
  }

  for (int fadeValue = 255 ; fadeValue >= 0; fadeValue = fadeValue-5) {
    analogWrite(ledPin1, fadeValue);
    analogWrite(ledPin2, fadeValue);
    delay(30);
  }

  for (int fadeValue = 0 ; fadeValue <= 255; fadeValue = fadeValue+5) {
    analogWrite(ledPin3, fadeValue);
    analogWrite(ledPin4, fadeValue);
    delay(30);
  }

  for (int fadeValue = 255 ; fadeValue >= 0; fadeValue = fadeValue-5) {
    analogWrite(ledPin3, fadeValue);
    analogWrite(ledPin4, fadeValue);
    delay(30);
  }

}
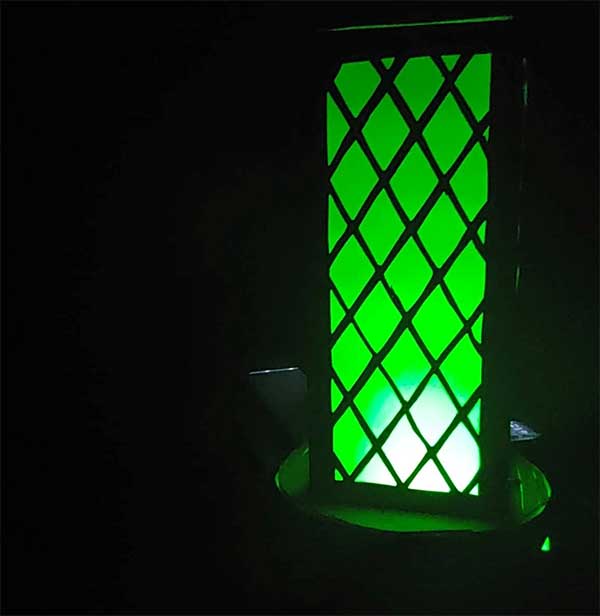
And you're done!
Doing this project has been very fun! It literally took me a whole day because I kept on changing my initial plan and switching between ideas. It honestly got me creative as I had a hard time at first in choosing what to create for the EP, but as soon as I started, I then now didn’t know which project to create. In the making of this exit product, I realized that I really should have planned ahead to avoid being late :,> (sorry sir) planning exists for a reason and time really is precious so better not waste them!
Overall, I found the spark once more in creating DIYs and making such projects that are not only fun in the making and result but also really useful.


