
Made by Nichole Miranda.
The environment around us affects us and how we act on a daily basis. Lighting is something to be considered. Here I will demonstrate how I made my Arduino Beach Galaxy Mood Lamp! Beachy in the morning and a moody galaxy in the evening. Let us set the mood, create a vibe and have a more productive atmosphere around us by considering the lighting of our home or your room.
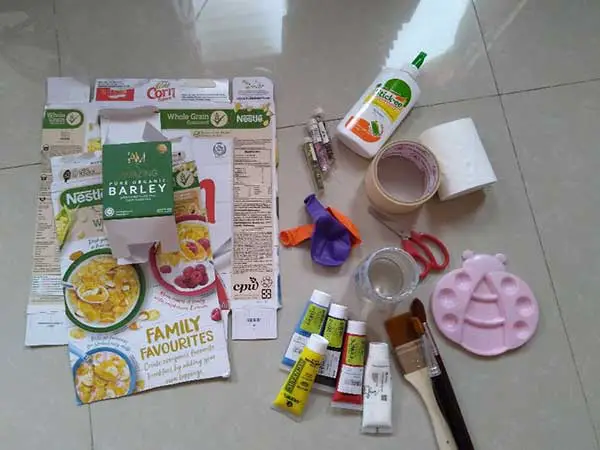
Materials (for the lamp):
(For the head of the lamp and the base)
- Balloon
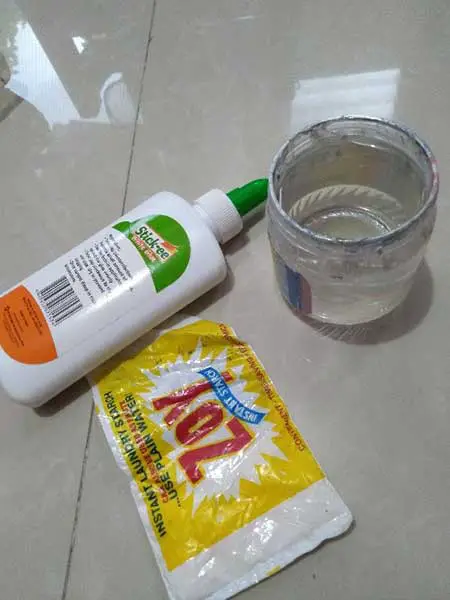
- Glue/Zoy Paste
- Water
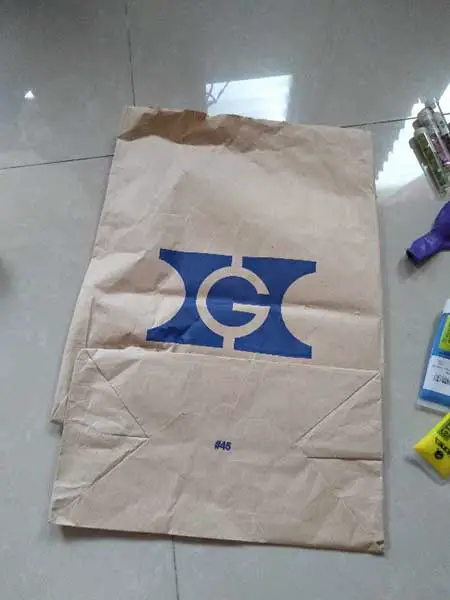
- Paper Bag
- Tissue
- Tissue core
- Masking Tape
- Paintbrush
- Any cardboard or carton boxes (ex. cereal box)
- Scissors
(Design)
- Glitters (optional)
- Paint (optional)
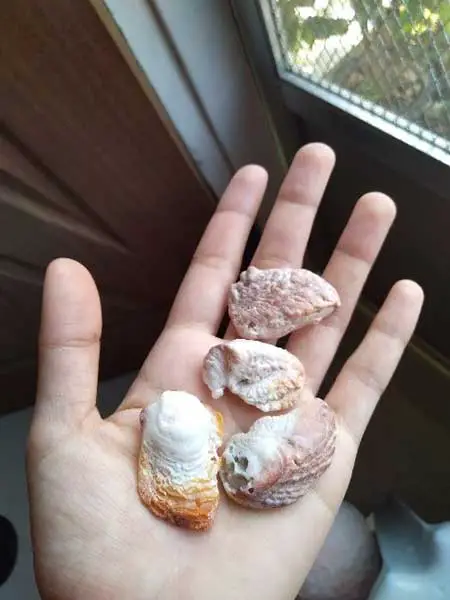
- Sea shells (optional)
The electronic components of the Lamp (Using Arduino)
- Arduino/Gizduino board + cable
- Breadboard
- Green & Red LED’s (4 each, but you can use any color you want)
- Jumper Wires (9)
- Female Jumper Wires (32)
- 220-ohm resistors (8)
How to Make It
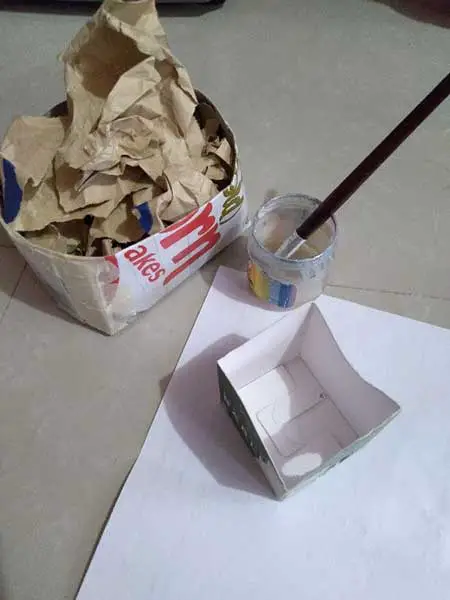
Before anything else, please prepare your materials so that it would be easier!
STEP 1
(Making the base)
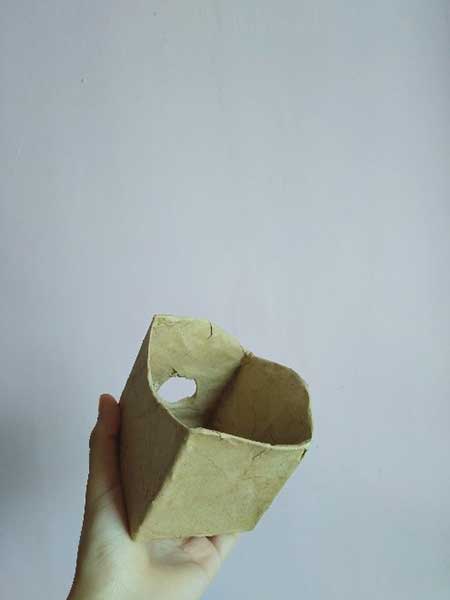
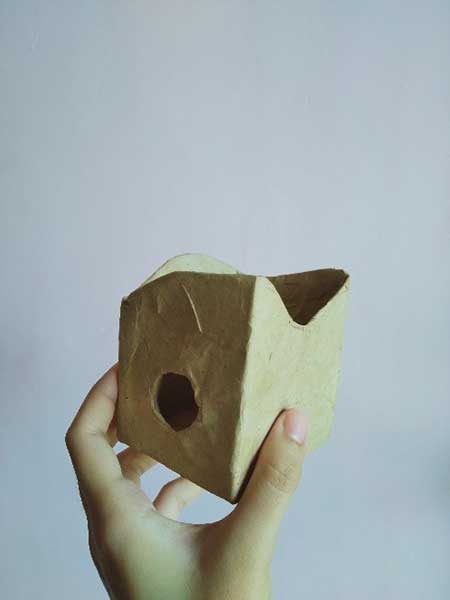
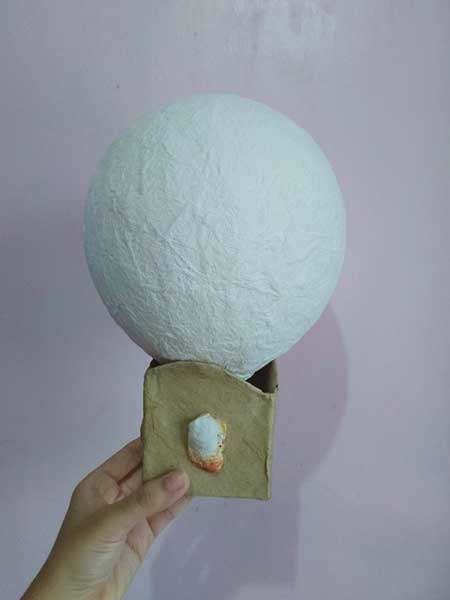
Get any small box or manually create one. Simply disassemble the small box and cut one side.
After, trace a wave-like outline as your guide on the box or any pattern you want. But since this is like a beach mood lamp, I traced waves. Then, use scissors to cut the outline you made.
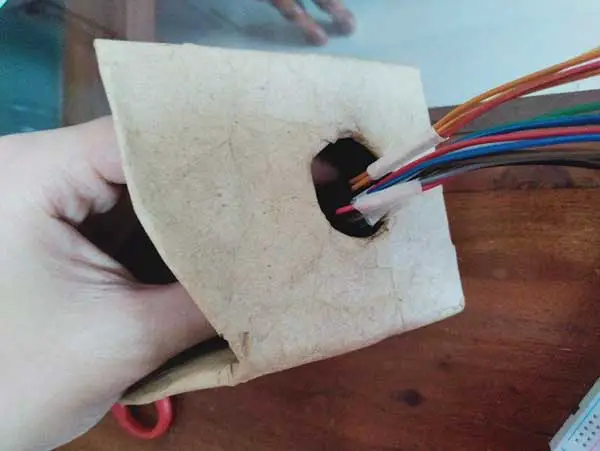
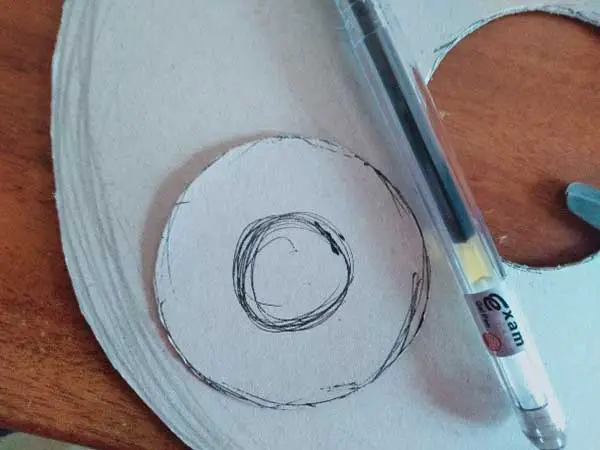
Also, don’t forget to make a small circle that would just fit your LED circuit inside the base!
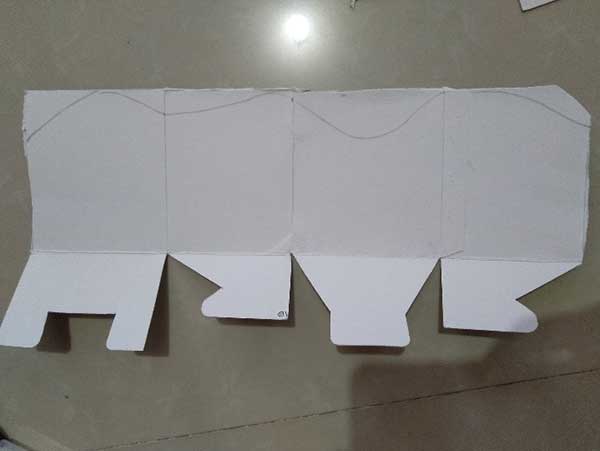
Reassemble the box again, and tape the edge you cut out on the box. It should look like this:
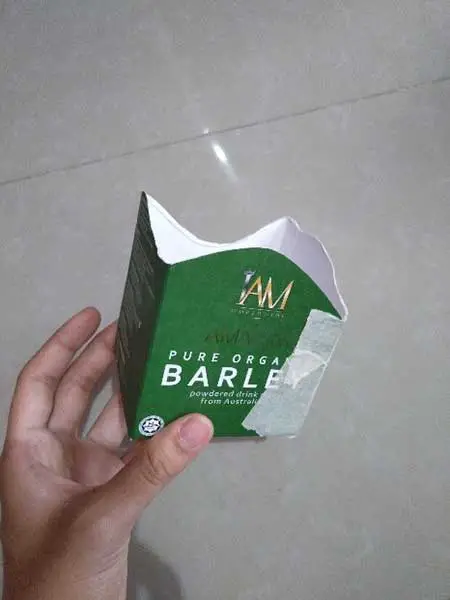
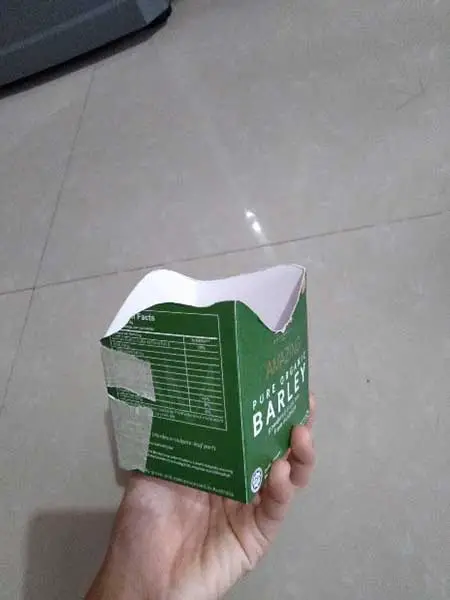
STEP 2
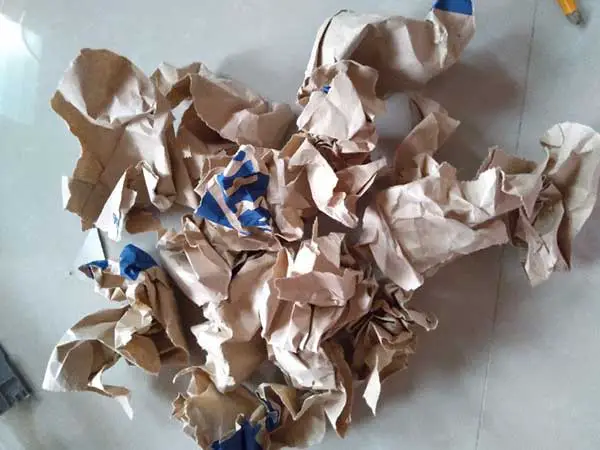
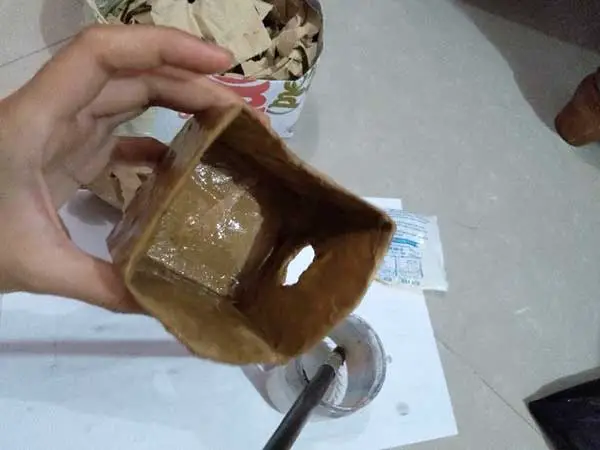
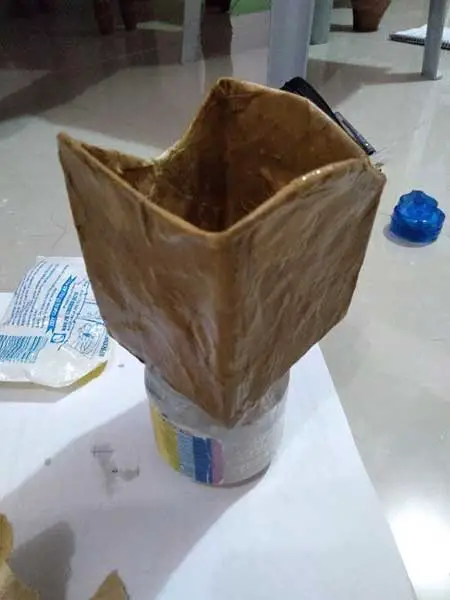
With a paper bag, tore it apart and make small pieces with it.
Using glue or Zoy Paste, mix it with water.
And use it to create a mache all over the small box you just made, so that we can cover the base with a unique texture and for it to look like the representation of sand!
After you’re done covering it, wait for it to dry completely and while waiting, move on to make the head of the lamp.
STEP 3
(Making the head)
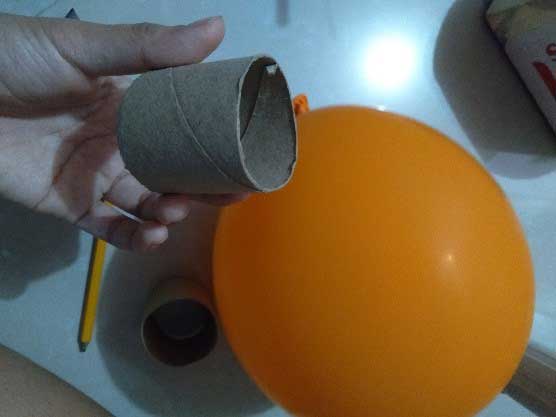
Blow air in the balloon to the size that you desire the head of your lamp to be.
And using glue and water mix them and then prepare pieces of your tissue to cover up the whole balloon.

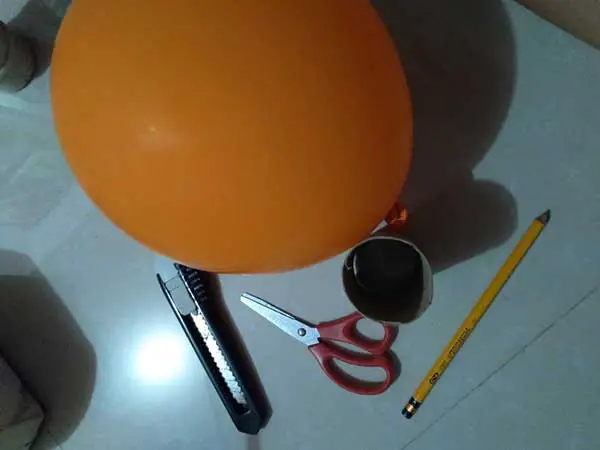
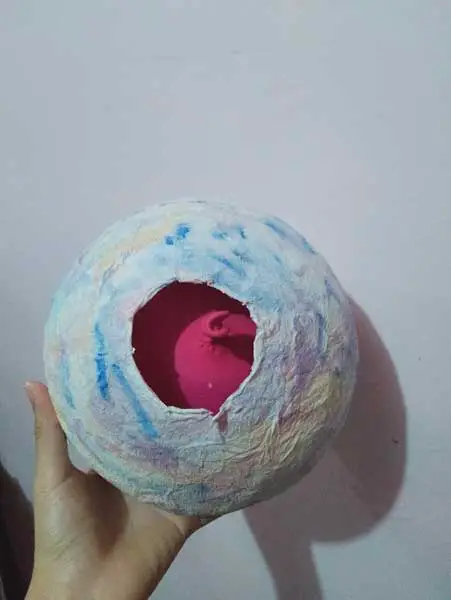
But, before you cover up the balloon, make sure you made an opening in the bottom of the balloon. You can use a tissue core, cut it in half and then tape it to the bottom of the balloon.
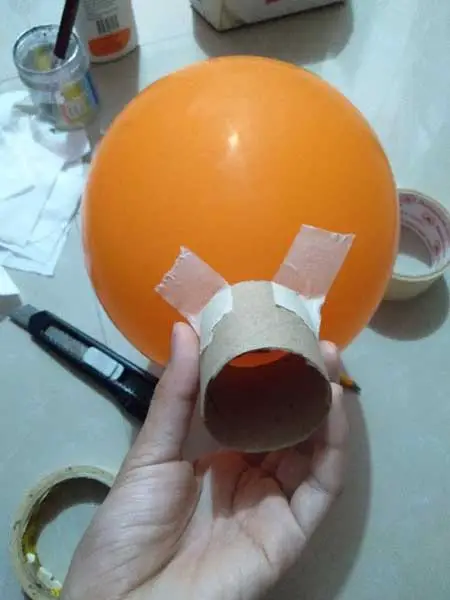
You can then proceed to slowly cover up your balloon with tissue, using glue mixed with water. Make sure that you don’t make the layer too thick so that we can still give our lamp a bright light.
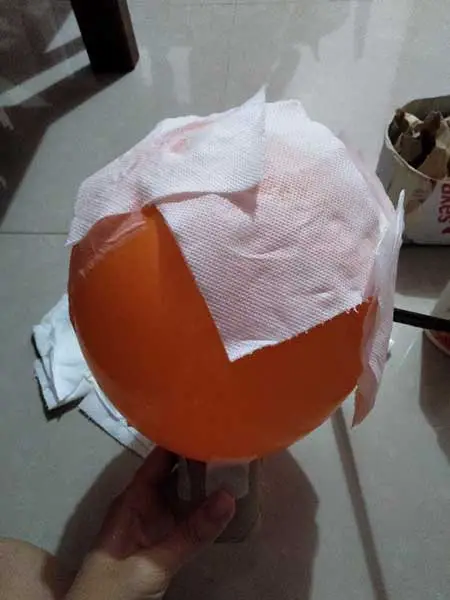
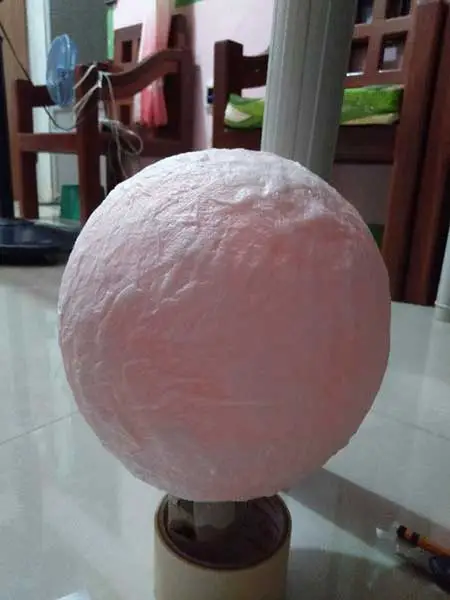
After you’re done, wait for it to dry completely and PLEASE DON’T PUT IT OUTSIDE LIKE LITERALLY UNDER THE SUN, your balloon will burst & we don’t want that to happen.
STEP 4
(Designing the base)
When the base of your lamp is dry and firm, you can proceed to make decorations around it!
Because it’s a beachy vibe, I used the sea shells I had collected before when we went on a trip to the beach for the base of the lamp. Just simply gluing it to each side.
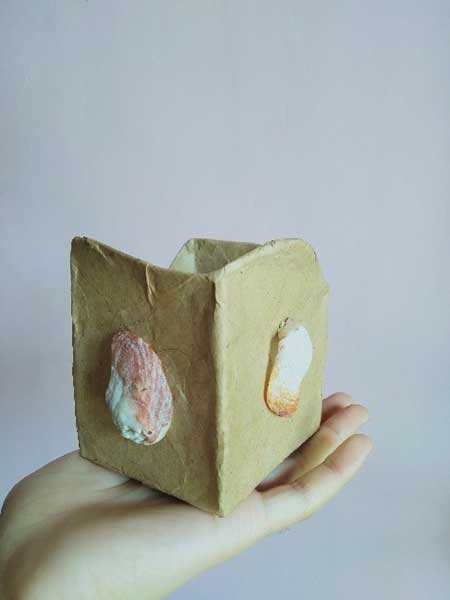
However, you can use any design or decoration you want your lamp to have, you can use rocks, glitters, or even paint them!
STEP 5
(Designing the head)
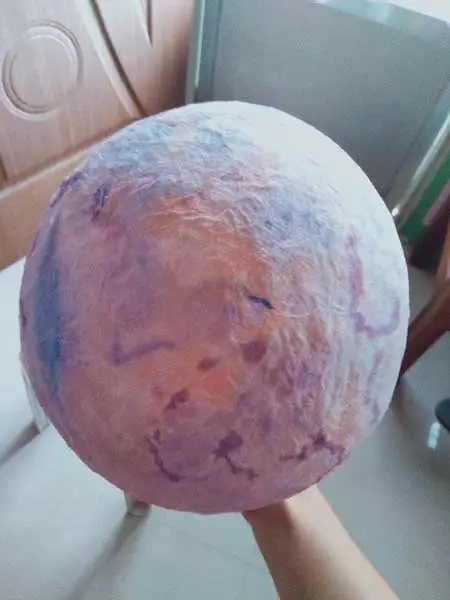
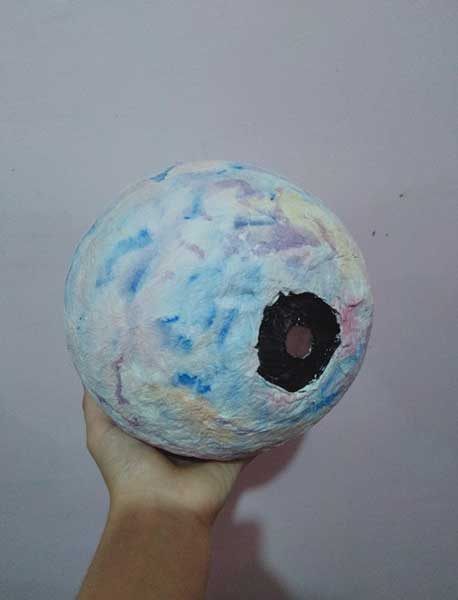
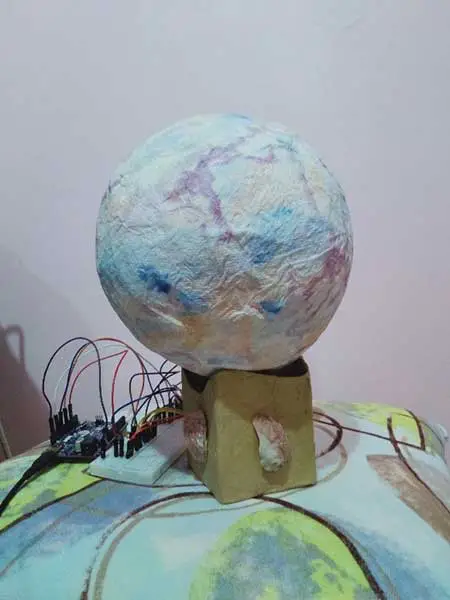
When the round orb or the head of your lamp is fully dry and firm, you can proceed to design it as well or just leave it as it is.
You can paint it or add glitter! It could have an awesome effect. For me, I painted mine like a planet so that it would have a galaxy vibe & as well for it to be more pleasing in the eyes as well as relaxing, considering it’s a beach theme.
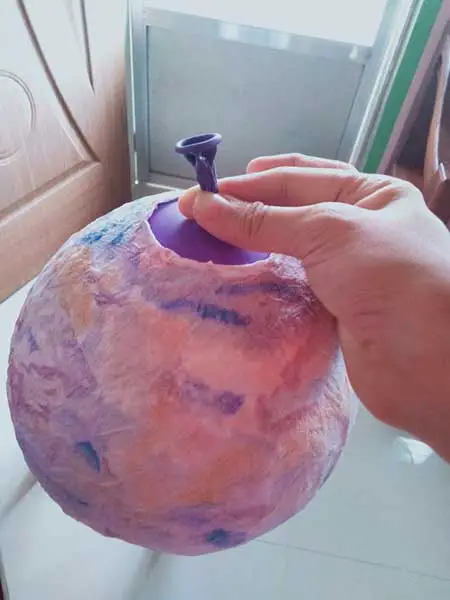
When you’re done designing you can let it dry and once dry you can take the tissue core, tape, and pop the balloon!

STEP 6
(Lighting up LEDs/ Arduino Set-up)
While you wait for the paint to dry up, you can start setting up your Arduino board.
Prepare the materials needed for this step before starting.
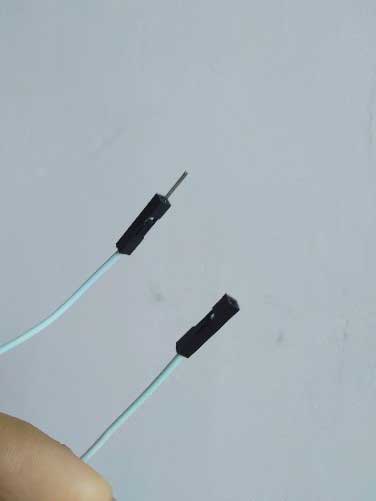
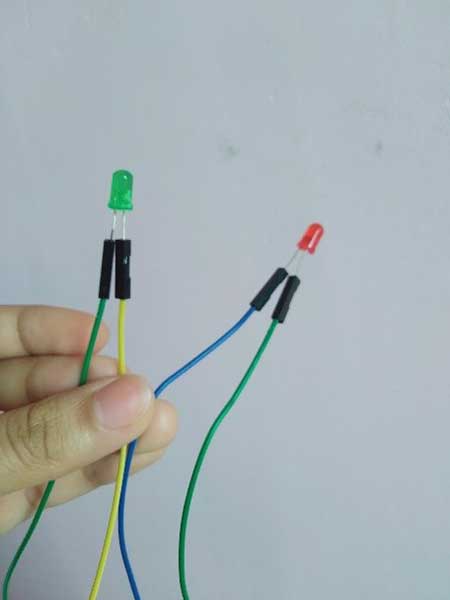
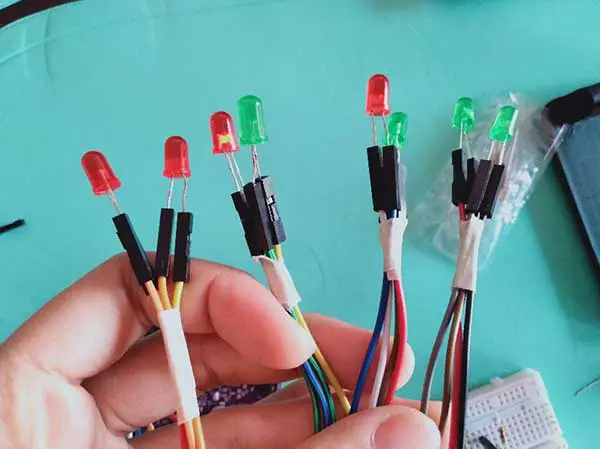
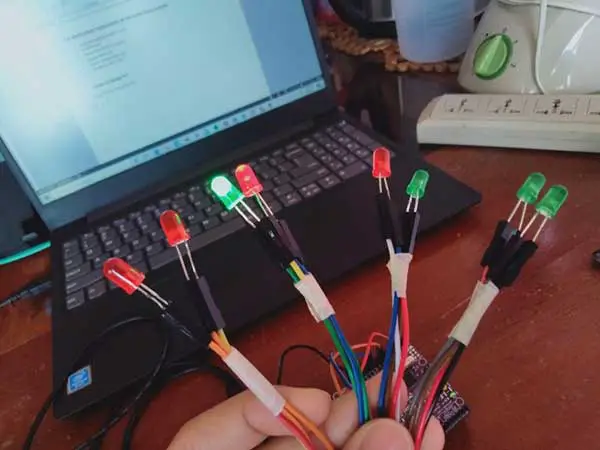
When you got your materials ready, connect the LEDs to a female Jumper wire, or the wire where it has one end with a spike and the other end where you can insert the legs of your LEDs.
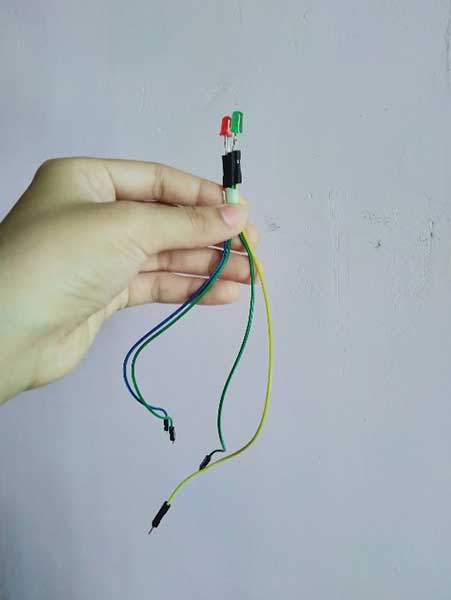
Insert each leg of your LED to the female jumper wires and add another female jumper wire on both ends, it should look like this:
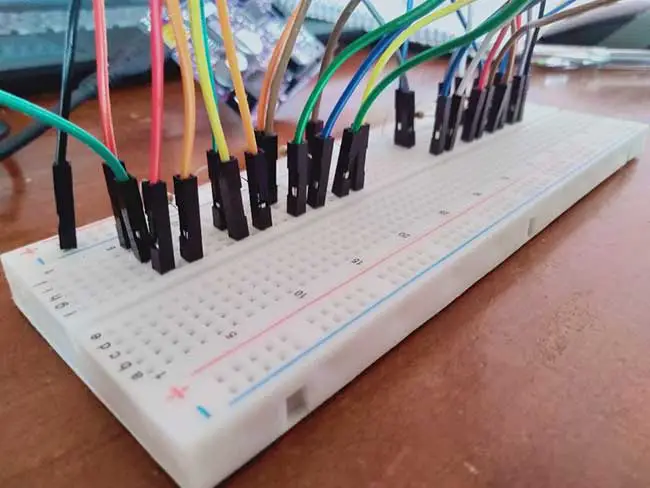
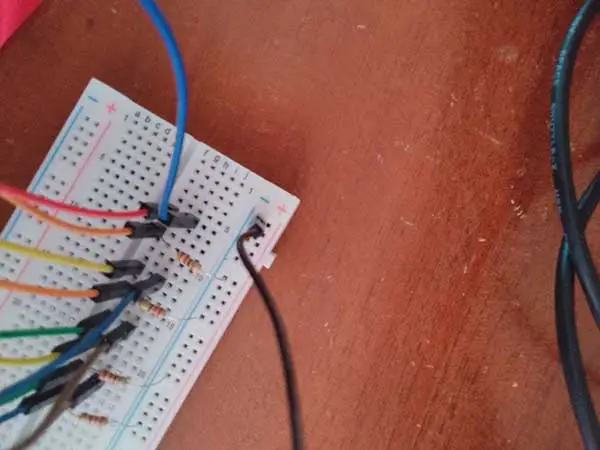
Then, insert each wire into the breadboard, and make sure you know which side is negative and positive!
We aim for our LEDs to have a fade-in and fade-out effect, however, we need two LEDs to light up together so the arrangement of the wires would look like this:
(Click here to read more about the 2 LEDs 1 Pin project.)
If your LED isn’t secured, you can tape two LEDs together to secure it with the female jumper wire.
Insert the resistors to the negative side of your LED and then connect the other end of the resistor to the negative side of the power rails. Remember to put a resistor on each LED!
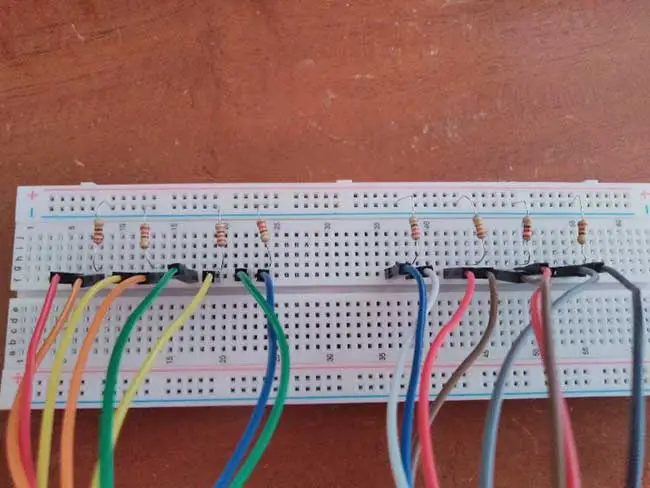
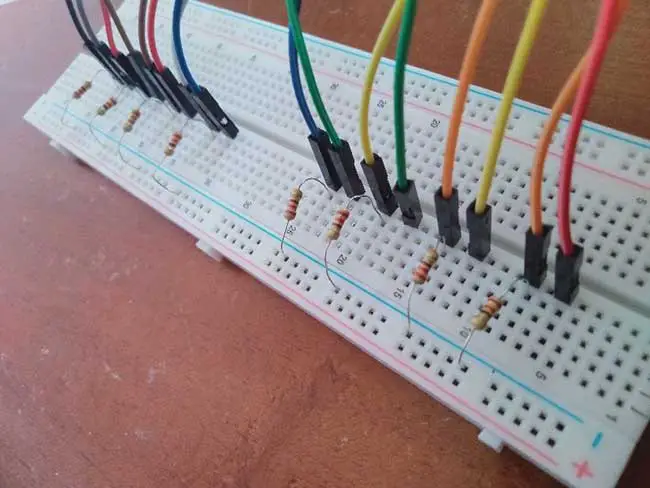
Using (4) jumper wires, that have both ends having spikes, connect one jumper wire to both of the positive sides of 2 LEDs, it should look like this:
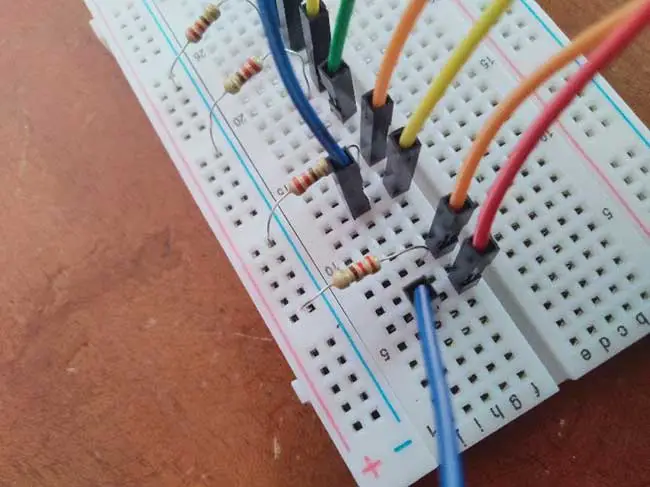
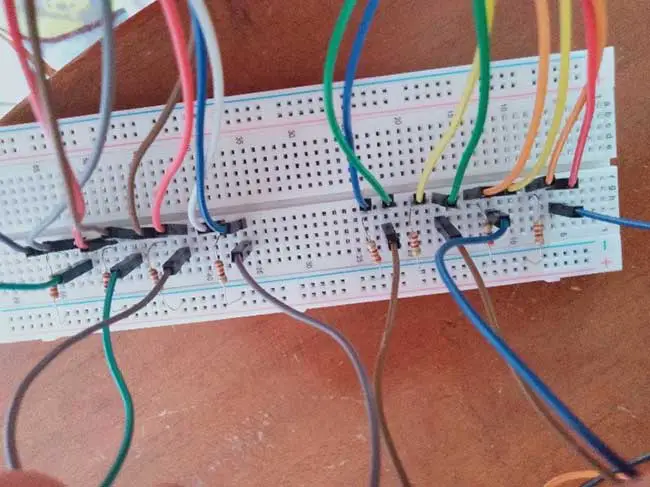
Since you have connected all 2 LEDs together making it one, you should now insert one jumper wire each, in one side of that positive jumper wire you just connected 2 LEDs with. It should be aligned horizontally to the breadboard and should be connected to the PWM Pins in the Gizduino board which are 3, 5, 6, 9, 10, 11. It looks like this:
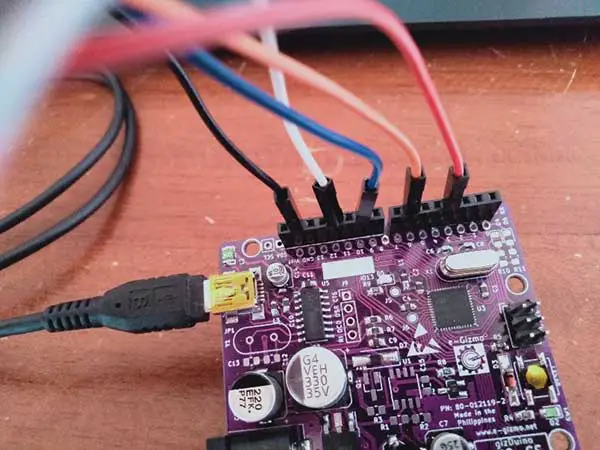
Now, connect another jumper wire to the end of the negative power rail, to the GND pin in the Gizduino board.

STEP 7
And you’re done with the breadboard! Now you only have to do the coding, this is the code that I used to light up my project.
int pinLED1 = 3;
int pinLED2 = 6;
int pinLED3 = 9;
int pinLED4 = 11;

void setup() {
  pinMode(pinLED1, OUTPUT);
  pinMode(pinLED2, OUTPUT);
  pinMode(pinLED3, OUTPUT);
  pinMode(pinLED4, OUTPUT);
}
void loop() {
  for (int fadeValue = 0 ; fadeValue <= 255; fadeValue = fadeValue+5) {
    analogWrite(pinLED1, fadeValue);
    delay(100);
  }
  for (int fadeValue = 255 ; fadeValue >= 0; fadeValue = fadeValue-5){
    analogWrite(pinLED1, fadeValue);
    delay(50);
  }
  for (int fadeValue = 0 ; fadeValue <= 255; fadeValue = fadeValue+5) {
    analogWrite(pinLED2, fadeValue);
    delay(100);
  }
  for (int fadeValue = 255 ; fadeValue >= 0; fadeValue = fadeValue-5) {
    analogWrite(pinLED2, fadeValue);
    delay(50);
  }
  for (int fadeValue = 0 ; fadeValue <= 255; fadeValue = fadeValue+5) {
    analogWrite(pinLED3, fadeValue);
    delay(100);
  }
  for (int fadeValue = 255 ; fadeValue >= 0; fadeValue = fadeValue-5) {
    analogWrite(pinLED3, fadeValue);
    delay(50);
  }
  for (int fadeValue = 0 ; fadeValue <= 255; fadeValue = fadeValue+5) {
    analogWrite(pinLED4, fadeValue);
    delay(100);
  }
  for (int fadeValue = 255 ; fadeValue >= 0; fadeValue = fadeValue-5) {
    analogWrite(pinLED4, fadeValue);
    delay(50);
  }
}
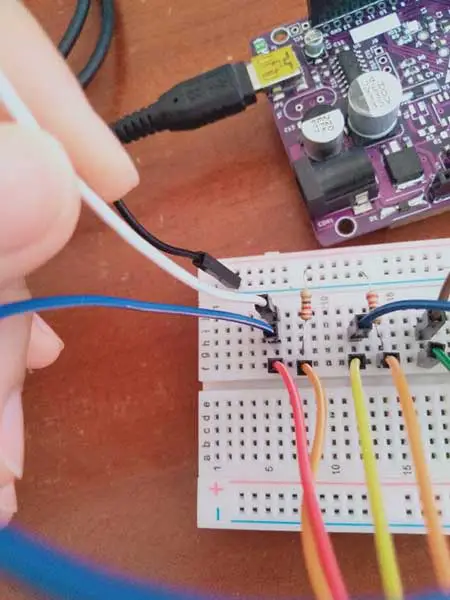
After you’re done with the code, upload it to your Gizduino board, but make sure your cable is connected to your Gizduino board and your laptop for you to check if lights up.
STEP 8
(Setting up Mood Lamp)
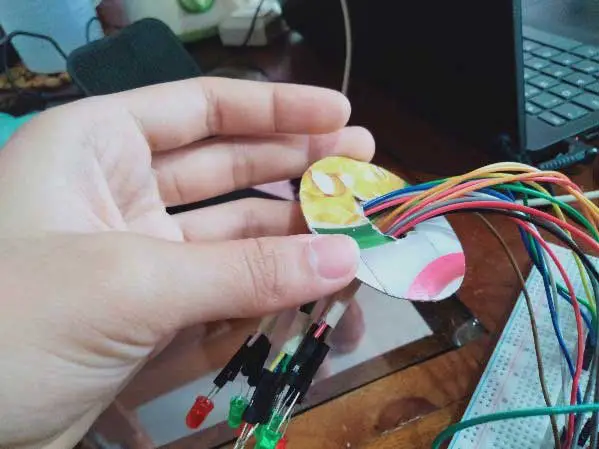
Insert the LEDs in the hole you made on your base.
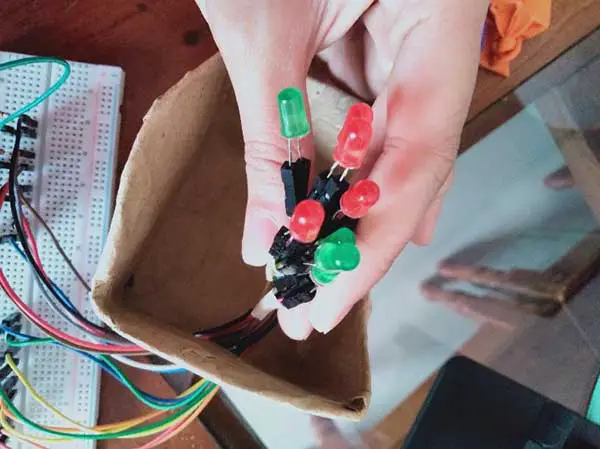
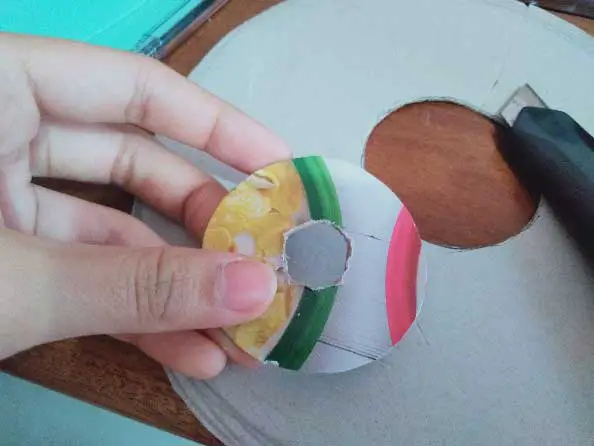
For your LEDs to stay inside the head of your lamp, cut out a circle the same size as the hole on the head of your lamp and then another circle to insert your LEDs inside. You can paint the small circle or any color you want! And then glue it to the bottom of your orb.
Finally, the exciting part! Connect your cable to the Gizduino board to your laptop for it to function and you’re Done!
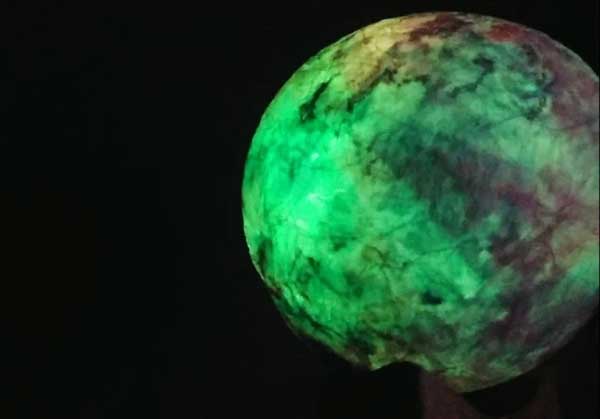


Enjoy your Beach Galaxy Mood Lamp!
I have always wanted a Mood Lamp that could boost my atmosphere and create a relaxing vibe. I am actually happy that I get to make this project with my own hands and get to experience this kind of creativity. It honestly makes me so proud of myself! The whole experience had a lot of trial and error, but it was a way for me to keep going because it’s not the outcome that would make me feel good, but the whole process of it.
The fact that I made this and was able to light it up was such a fullfiling experience. Not all people could make this and be good at it too and I have realized that for a while. It still feels amazing that I get to make this and get the opportunity to learn and grow with this.


