Made by: Jvhonne Tabaniag
If you have only limited materials to make a decoration, but not limited to nature things like stones, grass, flowers, wood, etc. You can make a more garden-like or forest-like project such as mushroom lights with grass and wood and stone below looking like a magical and colorful forest. You can make other DIY’s as you like. It is fun to do but also it can help the environment because you are, reusing, reducing, and recycling things; you are not wasting things.
Here are the materials I used:
- Glue stick
- Glue gun
- Clays (Red and Yellow)
- Any kind of grass
- 5- inch irregular-shaped wood
- Stone
- Dried leaves
- Styrofoam
- Watercolor
- Plastic container
- Eco-bag
- Arduino board
- Jumper wires
- 8 LEDs
- 10k and 220-ohm resistors
- A pushbutton
- A breadboard
- Some bottle container’s lid
Step-by-Step Procedure
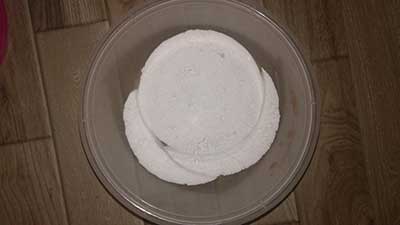
Step 1:
The first thing that I did was to cut some Styrofoam to be able to fit into the container. I painted it with the color brown because it is a pretend soil. This serves as the base for my project, and this helps elevate certain things to be put in the container.
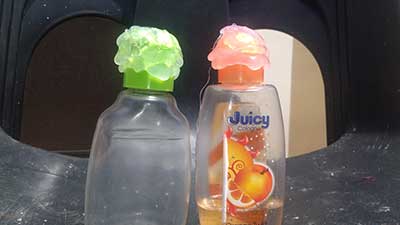
Step 2:
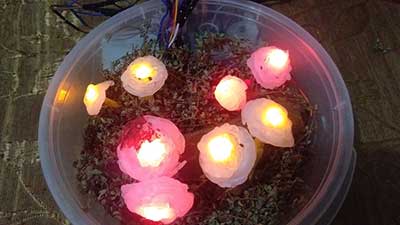
I used a bottle container’s lid to make the shape of the head of the mushrooms. I used a glue stick for this so that the LEDs will be visible. I made 8 of these because I will be using 8 LED lights.
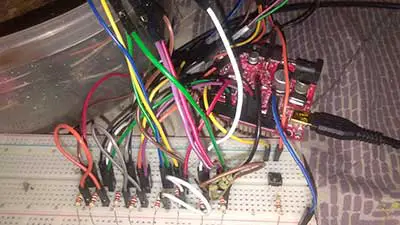
Step 3:
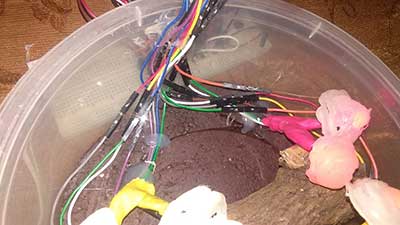
I readied my breadboard circuit for LEDs to be put in the mushrooms. I used the 8 LEDs 4 Pins method here. I used a lot of jumper wires to reach far places. I placed my pushbutton at distance from the LEDs and wirings.
My Arduino sketch:
  int pinButton=2;
  int pinLED1=11;
  int pinLED2=10;
  int pinLED3=9;
  int pinLED4=6;
  int val=0;
  int ledstate=LOW;

  void setup()
  {
    pinMode(pinButton,INPUT);
    pinMode(pinLED1,OUTPUT);
    pinMode(pinLED2,OUTPUT);
    pinMode(pinLED3,OUTPUT);
    pinMode(pinLED4,OUTPUT);
  }

  void loop()
  {
    val=digitalRead(pinButton);

    if(val == HIGH) //button is pressed
  {
    ledstate=!ledstate;
      digitalWrite(pinLED1, ledstate);
      delay(1000);
      digitalWrite(pinLED2, ledstate);
      delay(1000);
      digitalWrite(pinLED3, ledstate);
      delay(1000);
      digitalWrite(pinLED4, ledstate);
      delay(1000);
    }
    if (ledstate==HIGH)
    {

    // fade in from min to max in increments of 5 points:
    for (int fadeValue = 0 ; fadeValue <= 255; fadeValue = fadeValue+5) {
      // sets the value (range from 0 to 255):
      analogWrite(pinLED1, fadeValue);
      analogWrite(pinLED2, fadeValue);
      analogWrite(pinLED3, fadeValue);
      analogWrite(pinLED4, fadeValue);
      // wait for 30 milliseconds to see the dimming effect
      delay(30);
    }

    // fade out from max to min in increments of 5 points:
    for (int fadeValue = 255 ; fadeValue >= 0; fadeValue = fadeValue-5) {
      // sets the value (range from 0 to 255):
      analogWrite(pinLED1, fadeValue);
      analogWrite(pinLED2, fadeValue);
      analogWrite(pinLED3, fadeValue);
      analogWrite(pinLED4, fadeValue);
      // wait for 30 milliseconds to see the dimming effect
      delay(30);
    }
    val=digitalRead (pinButton);
    if (val == HIGH)
    {
      digitalWrite(pinLED1, HIGH);

      digitalWrite(pinLED2, HIGH);

      digitalWrite(pinLED3, HIGH);

      digitalWrite(pinLED4, HIGH);
    }

      else
      digitalWrite(pinLED1, LOW);

      digitalWrite(pinLED2, LOW);

      digitalWrite(pinLED3, LOW);

      digitalWrite(pinLED4, LOW);
  }
  }
Step 4:
I stuck LEDs to my mushrooms for their stems and covered them with clay. And when done, I put glue sticks at its bottoms to make it stick and standing.

Step 5:
I arranged its wirings and I stuck it with a glue stick on the wall of the plastic container.
Step 6:
I covered the wirings and the glue sticks with grass so that everything will be clean and neat.
Step 7:
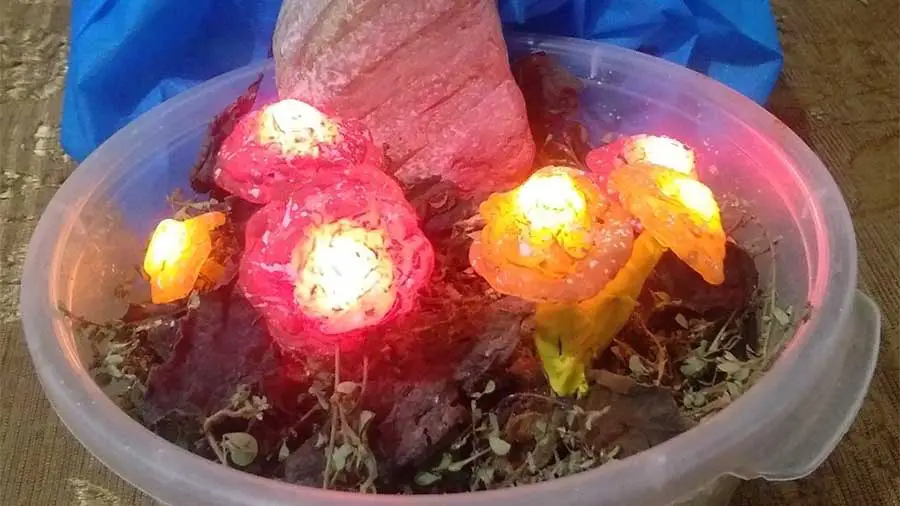
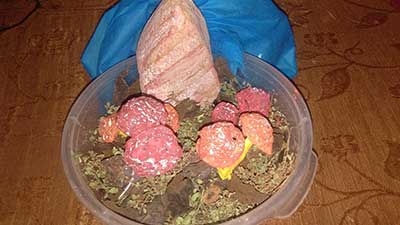
I improved my mushrooms by painting it reds and yellows with white splotches of watercolor. I added a stone to the back and some dried leaves all over the plastic container. I placed my Arduino board and breadboard inside an eco-bag so that the wirings will not be seen.
Final product:
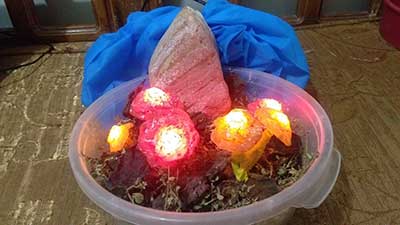
I am very proud of my project, and I am fond of it. But it was very hard to make, especially in making my sketch for it because I did many trials and errors. The nature things: the rock, grass, and wood that I got for this project are hard to find because I had to desperately search everywhere inside the subdivision.
Overall, it is fun and exciting. I got to do my own DIY with my first Arduino project. After making my glowing mushroom project, I realized that I should seek first God’s help and wisdom to do be able to do things easily. I should not overthink because when I overthink, I happen to run out of ideas and not be able to think straight and I keep on staring at everything. And I should not procrastinate to do my every task so that I may be able to finish things fast and not just do useless things in the meanwhile.


