In most programming languages, you start with a program that simply prints “Hello, World” to the screen. The equivalent in the micro-controller world, such as Arduino, is getting light to blink on and off. The LED blinking sketch is the first program that you should run to test whether your Arduino board is working and is configured correctly. An LED, which stands for Light-Emitting Diode, is a small electronic component that’s a bit like a lightbulb, but is more efficient and requires a lower voltage to operate.
Before we get to the programming part, let’s talk first about how to connect an LED to the Arduino microcontroller. To help you make the proper connection, you can download the Learn Arduino Intro app from the Google Play store. The Arduino Intro app contains a lot of Arduino projects to help you get started with Arduino. It will show you the materials you need, the breadboard diagram, and of course the Arduino code complete with comments.
Important Things to Know About LED
LED stands for Light Emitting Diode. A diode only allows electricity to flow through it one way, so if you hook it up backward, it won’t work. An LED has two leads or sometimes called legs. The longer leg, which is the positive side, is called the anode. The shorter leg, which is the negative side, is called the cathode. LEDs can come in many shapes, colors, and sizes, for this video, you’ll be using a 5mm LED.
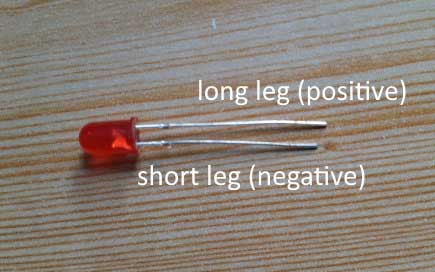
Now, each digital pin of the Arduino is outputting 5v DC at 40mA, and most LEDs require a voltage of 2v and a current of 35mA. Anything higher than 2 volts may damage your LED. Therefore, you need a resistor that will reduce the 5v to 2v and the current from 40mA to 35mA, if you want to display the LED at its maximum brightness.
Why You Need Resistors
A resistor is a device designed to cause resistance to an electric current in order to cause a drop in voltage across its terminals. You use resistors to decrease voltage or current to other devices. If you want the LED to be dimmer, you could use a higher value of resistance. To get the correct resistance, you need to know Ohm’s Law. The value of resistance is known as ohms. According to Ohms Law, Voltage is equal to Current times Resistance. This is an entirely separate topic, so we’ll not talk about it in this article.
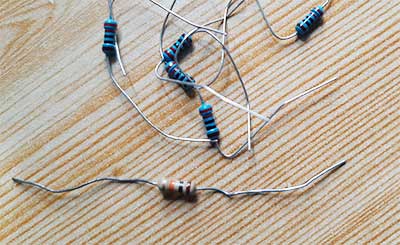
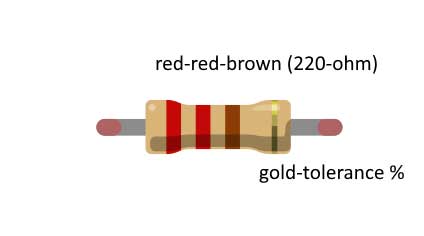
For now, you can use a 220-ohm resistor. Resistors have color bands on them that let you know what value they have. A 220-ohm resistor has the colors red-red-brown. Resistors don’t have polarity, meaning they don’t have a positive and a negative side. Therefore you don’t have to worry if it’s inverted or not.
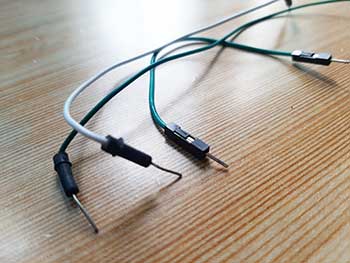
Lastly, you’ll be needing some jumper wires. The jumper wires you use can either be commercially available jumper wires (usually with molded ends to make insertion into the breadboard easier) or you can make your own by cutting short strips of the stiff single core wire and stripping away about 1 inch from the end. For a 1 LED circuit, jumper wires are not necessarily required, but it’s good to practice using jumper wires as early as now.
Again, for our blinking LED project, you’ll be needing an LED, a 220-ohm resistor, jumper wires, and of course a breadboard and your Arduino board. In this article, I’ll be using an Arduino Uno board, but you can use any Arduino board for this one.
PROJECT: Blink
Assembling the Components on the Breadboard
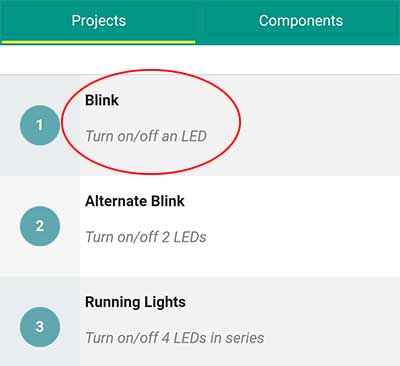
To start, let’s open up the Arduino Intro app and tap on Project number 1, Blink, from the Projects tab.
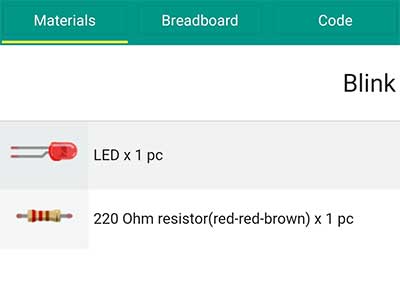
Now we can see the materials we need. By default, you should have an Arduino board, breadboard, and jumper wires at hand. Now, let’s tap on the Breadboard tab to view the breadboard diagram or how the components are connected.

In this diagram, the straight leg of the LED which is called is the cathode or the negative side, is inserted in J5. While the bent leg, which is the anode or the positive side, is inserted in J6. You don’t have to follow this exactly. You can insert the legs of the LED anywhere on the terminal strips as long as the negative side and the positive side are not directly connected. Just be sure that the LED is inserted firmly into the holes.
Next, the negative side of the LED should be connected to the Ground or GND pin of your Arduino board. You can achieve this by inserting one end of a jumper wire in H5 and the other end in the GND pin. Note that F5 to J5 are connected via the metal strip found underneath the holes of the breadboard. You can use any color of jumper wire.
Next, you connect the positive side of the LED to any of the digital pins. Well, except pins 0 and 1. These pins are reserved for serial communications. In this case, it is connected to digital pin 9. But before you make the connection, you have to put a 220-ohm resistor between the positive side of the LED and pin 9. This will bring down the 5v of the pin to 2 volts. If the full 5 volts will be fed directly to the LED, your LED will get damaged.
Note again that the resistor has no polarity so you can place it in any way. In this diagram one end of the resistor is placed on I6 and the other end on I10. Then a jumper wire is inserted in H6 going to digital pin 9 of the Arduino. Again F10-J10 are all connected in the breadboard. However, they are not connected to A10-E10 because of the break in the middle called the groove.
Now your circuit is complete. You’ll now have to connect the Arduino circuit to your computer via a USB cable.
Writing the Code in Arduino IDE
Let’s go now to the Arduino code or sketch. You can see the sketch for the Blink project in the Code tab of the Arduino Intro app. If you have the Arduino IDE installed already, you can open it up and type in the code you see in the app. You don’t have to copy the green-colored text. These are called comments, and they will not be read by the compiler.
Press the Verify/ Compile button at the top of the IDE to make sure there are no errors in your code.
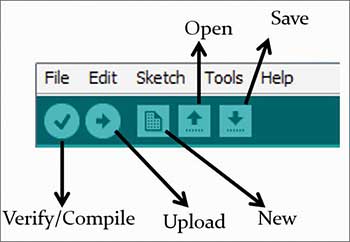
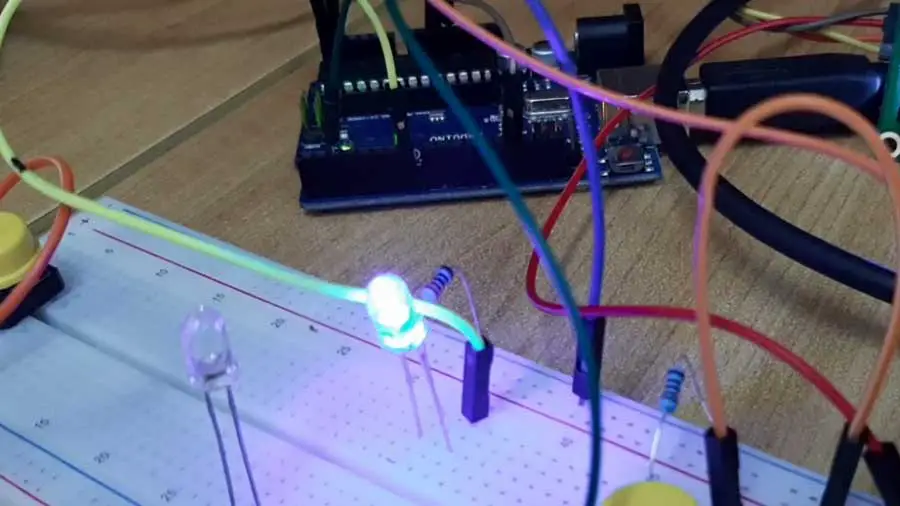
If this is successful, click the Upload button to upload the code to your Arduino. If you have done everything right, you should now see the red LED on the breadboard flashing on and off every second.
Let's take a look at the code and the hardware to find out how they both work.
	/*
	blink
		1.	Turn on LED for 1 second
		2.	Turn off LED for 1 second
		3.	Repeat
	*/

	int pinled = 9;

	void setup() {
		// initialize the digital pin as an output.
		pinMode(pinled, OUTPUT);
	}

	// the loop routine runs over and over again forever:
	void loop() {
		digitalWrite(pinled, HIGH);   // turn the LED on
		delay(1000);               // wait for a second
		digitalWrite(pinled, LOW);    // turn the LED off
		delay(1000);               // wait for a second
	}
This is the code to control the LED. An Arduino code or sketch must contain at least two functions. A function is a series of programming statements that can be called by name.
- setup() which is called once when the program starts.
- loop() which is called repetitively over and over again as long as the Arduino has power.
So the shortest valid Arduino program (even though it does nothing) is:
void setup() {
  // put your setup code here, to run once:

}

void loop() {
  // put your main code here, to run repeatedly:

}
Full Breakdown of the Arduino LED Blink Code
	/*
	blink
		1.	Turn on LED for 1 second
		2.	Turn off LED for 1 second
		3.	Repeat
	*/
The first 6 lines are what you call a comment. A comment is just text meant to be read by humans. As a code, it is just ignored. You are not really required to write comments. However, they are helpful if you have plenty of lines of code so you can keep track of what’s happening in your program. There are 2 types of comments.
The first one is a multi-line comment. It starts with the /* symbol and ends with the */ symbol. Anything in between is considered a comment and it will not produce an error. It can span many lines.
The 2nd one is the single-line comment. It starts with a double forward slash. Anything after that will be considered a comment. You don’t have to end the single-line comment with another symbol as long as the text is written on the same line.
int pinled = 9;Line 8 declares a variable named pinled. A variable is a place to store data. In this case, you are setting up a variable of type int or integer. An integer is a whole number within the range of -32,768 to 32,767. Next, you have assigned that integer the name of pinled and have given it a value of 9. You don't have to call it pinled, you could call it anything you wanted to. But you want your variable name to be descriptive, so you call it pinled to show that this variable is for the pin on the Arduino where the LED is connected. In this case, you are using digital pin 9. At the end of this statement is a semi colon. This symbol tells the compiler that this statement is now complete.
Although you can call your variables anything, every variable name in a C-based program like Arduino must start with a letter; the rest of the name can consist of letters, numbers, and underscore characters. Note that Arduino recognizes upper and lower case characters as being different. Finally, you cannot use any of Arduino’s keywords like main, while, switch, and many more as variable names. Keywords are constants, variables, and function names that are defined as part of the Arduino language. To help you avoid naming a variable after a keyword, all keywords within the sketch will appear in red. It also helps if the first letter in your variable name is capitalized.
What’s Inside the setup() and loop() Functions?
An Arduino sketch must have a setup( ) and loop() function, otherwise, it will not work. The setup( ) function runs once only at the start of the program. It is where you will issue general instructions to prepare the program before the main loop runs, such as setting up pin modes, setting serial baud rates, etc. Basically, a function is a bunch of code assembled into one convenient block. All of the code within the function is contained within the curly braces. An open curly brace symbol starts the block of code and a close curly brace symbol ends the block. Anything in between those two symbols is code that belongs to the function.
	void setup() {
		// initialize the digital pin as an output.
		pinMode(pinled, OUTPUT);
	}
Your setup function only has one statement and that is pinMode, which tells the Arduino that you want to set the mode of one of your pins to be in OUTPUT mode, rather than INPUT mode. This also means that the Arduino is writing to a pin instead of reading from it.
Within the parenthesis, you put the pin number and the mode (OUTPUT or INPUT). Your pin number is pinled, which is the variable that has been previously set to the value 9. Therefore, this statement is simply telling the Arduino that Digital Pin 9 is to be set to OUTPUT mode. As the setup( ) function runs only once, you now move on to the main function which is the loop function.
	void loop() {
		digitalWrite(pinled, HIGH);   // turn the LED on
		delay(1000);               // wait for a second
		digitalWrite(pinled, LOW);    // turn the LED off
		delay(1000);               // wait for a second
	}
The loop( ) function runs continuously as long as the Arduino is turned on. Every statement within the loop( ) function (that is within it’s curly braces) is carried out, one by one, step by step, until the bottom of the function is reached, then the loop starts again at the top of the function, and so on forever or until you turn the Arduino off or press the Reset switch on your Arduino board.
In this project, you want the LED to turn on, stay on for one second, turn off and remain off for one second, and then repeat. The commands to tell the Arduino to do this are contained within the loop ( ) function because you want them to repeat over and over. The first statement is digitalWrite(pinled, HIGH);
The digitalWrite command sets a HIGH or a LOW value to the pin within the statement (in this case pinled, which is Digital Pin 9). When you set a pin to HIGH, you are sending out 5 volts to that pin. When you set it to LOW, the pin will have 0 volts. This statement, therefore, sends out 5v to pin 9 and turns the LED on.
After that is delay (1000);
This statement simply tells the Arduino to wait for 1000 milliseconds or 1 second before carrying out the next statement.
The next line is digitalWrite(pinled, LOW);
This will turn off the power going to Digital Pin 9 and therefore turn the LED off.
Then there is another delay statement for another 1000 milliseconds and then the function ends. However, as this is your main loop( ) function, the function will start again at the beginning.
Uploading the Code from the Computer to the Arduino Board
Now that your sketch is complete, the next thing you need to do is upload this sketch into your Arduino board. First, make sure that you connect your board to your computer via USB cable. Next, go to Tools->Port and select the correct port number. In windows, it starts with COM which is followed by a number. Normally, it’s a number higher than 1. You can check this out in the Device Manager settings in windows. Then select your board by going to Tools->Board. Since I’m using an Arduino Uno board, that’s what I’m going to select. Finally, click on the Upload button (it’s the button with the right-facing arrow)
If everything is ok, you’ll receive a done uploading message on the lower portion of the IDE. If not, the IDE will give you an error message with some descriptions of what went wrong with your sketch.
Common Errors in Your Arduino Code
If your program won’t compile (or it doesn’t do what you expect), here are a few things to check:
- The Arduino programming language is case-sensitive. In other words, pinled with a small p is different from Pinled with a capital P.
- Blocks of code are encapsulated with curly braces. Make sure an open brace is paired with a close brace
- Every open parenthesis must have a matching close parenthesis
- There are no commas in numbers.
- In general, each program statement needs to end with a semicolon. This means that each line of your program will have a semicolon.
By following the program structure step by step, you can see that it is really very simple: To summarize everything:
You start off by assigning a variable called pinled, giving that variable a value of 9, which is where the positive side of the LED is connected. Then you move on to the setup( ) function where you set the mode for Digital Pin 9 as an output. In the main program loop, you set Digital Pin 9 to HIGH, sending out 5v. Then you wait for a second and then turn off the 5v to Digital Pin 9, before waiting another second. The loop then starts again at the beginning. The LED will tum on and off continuously for as long as the Arduino has power.
Now that you know this, you can modify the code to turn the LED on or off for varying amounts of time.




Great! Let me know if it worked.