Made by Bea Bacquial.
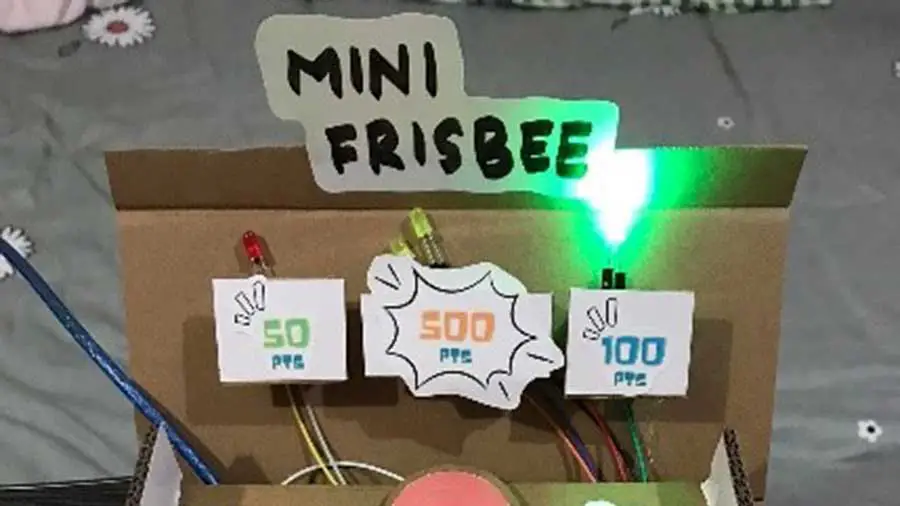
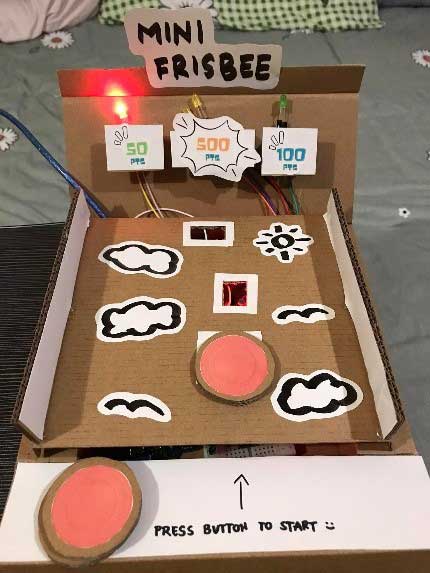
As time goes by, technology keeps on improving and more people use them not only to get experience but also to use them in their daily lives. A sensor is a type of technology that is used to detect something in order to control an object. Examples of these are our cellphones and other devices that uses a ‘touch screen’ option. For my Exit Product this quarter, I created a game that includes sensors, particularly a light sensor and a pushbutton. My output is called ‘Mini Frisbee’.
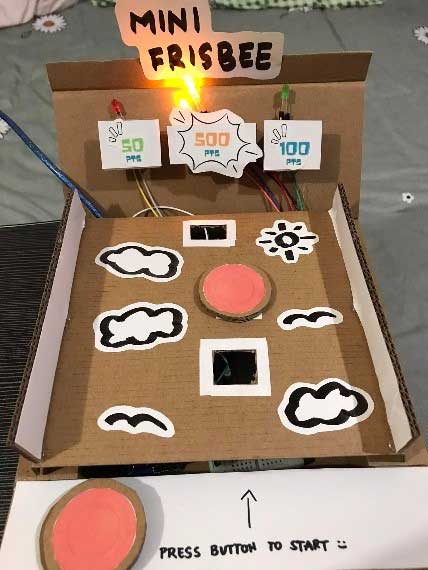
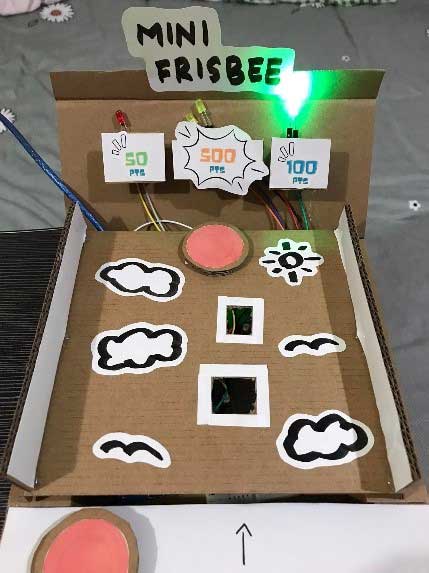
To play this game, there will be 3 mini frisbee discs provided. A pushbutton is also present and when you press it, the buzzer makes a sound to indicate the start of the game. When you throw the disc and it lands on the target, an LED will light up to show how many points you get. You will get a buzzer sound if you hit the 500-point target.
Materials
The materials needed to make this game are the following:
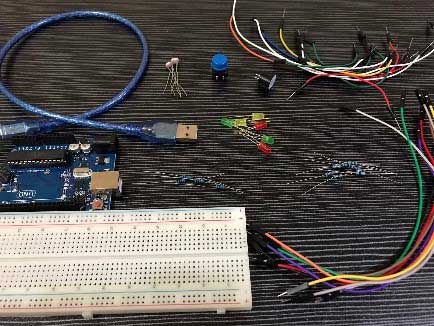
- Arduino microcontroller
- Breadboard
- Cable
- Light Dependent Resistor/LDR
- Pushbutton
- Buzzer
- 6 LEDs
- Resistors (220 Ohm & 10 KOhm)
- Jumper wires
- Male to female wires
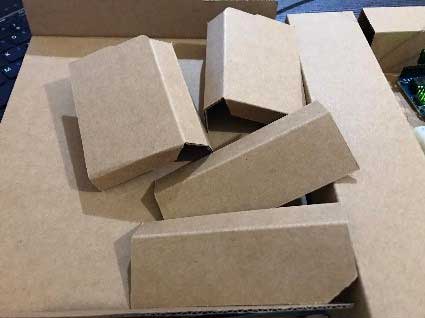
- Cardboard
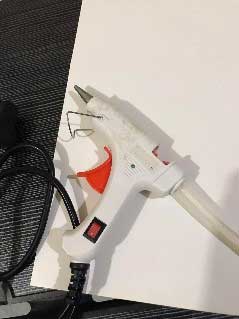
- Glue gun
- Sticker or other decorations
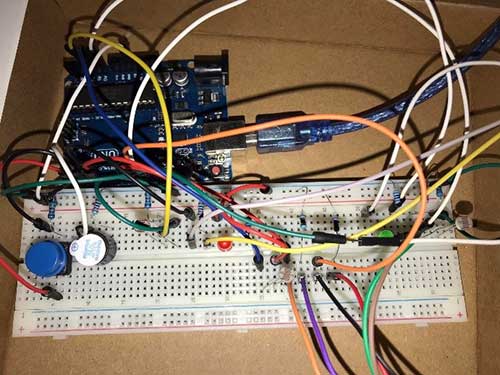
Step 1: Create your own setup and sketch.
For the first step, I had to do a lot of trial and error. I made my own setup and sketch through what I’ve learned and combined the sketches of the activities we did.
Place the components in the breadboard one by one and create the code slowly but surely. If you do this, you will avoid starting over again because you have already checked each of them if they work or not.
Do the placements and sketch of the pushbutton and buzzer first followed by the light sensors and the LEDs. For the LEDs, I placed two of them on the breadboard and connected the other 6 to male to female wires.
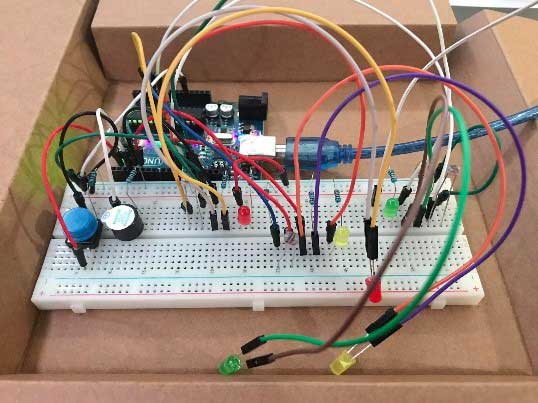
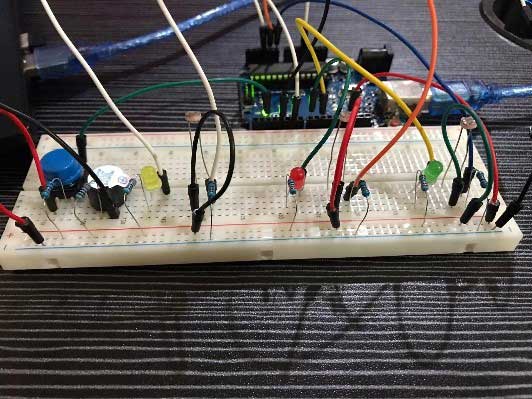
This was how my final setup + sketch looked like:
  int pinLDR1=A2;
  int pinled1=4;
  int pinled2=5;
  int pinLDR2=A1;
  int pinled3=10;
  int pinled4=11;
  int pinLDR3=A0;
  int pinled5=12;
  int pinled6=13;
  int PinButton1 = 2;
  int buzzer = 3;
  int val =0;
  int buzzerstate=LOW; //initial value
  void setup(){
    pinMode(pinled1,OUTPUT);
    pinMode(pinled2,OUTPUT);
    pinMode(pinled3,OUTPUT);
    pinMode(pinled4,OUTPUT);
    pinMode(pinled5,OUTPUT);
    pinMode(pinled6,OUTPUT);
    pinMode(PinButton1, INPUT);
    pinMode(buzzer, OUTPUT);
  }
  void loop(){
    val = analogRead(pinLDR1);
    if (val <927){
      digitalWrite(pinled1,LOW);
      digitalWrite(pinled2,LOW);
    }
    else{
      digitalWrite(pinled1,HIGH);
      digitalWrite(pinled2,HIGH);
    }
    val = analogRead(pinLDR2);
    if (val <927){
      digitalWrite(pinled3,LOW);
      digitalWrite(pinled4,LOW);
    }
    else{
      digitalWrite(pinled3,HIGH);
      digitalWrite(pinled4,HIGH);
      digitalWrite(buzzer, buzzerstate);
       tone(buzzer,2000,500);
      //wait 1 second before the next reading to ensure stability
      delay(1000);
    }
    val = analogRead(pinLDR3);
    if (val <927){
      digitalWrite(pinled5,LOW);
      digitalWrite(pinled6,LOW);
    }
    else{
      digitalWrite(pinled5,HIGH);
      digitalWrite(pinled6,HIGH);
    }
     val=digitalRead(PinButton1);
    if(val == HIGH) //button is pressed
    {
      digitalWrite(buzzer, buzzerstate);
       tone(buzzer,1535,500);
      //wait 1 second before the next reading to ensure stability
      delay(1000);
    }
  }
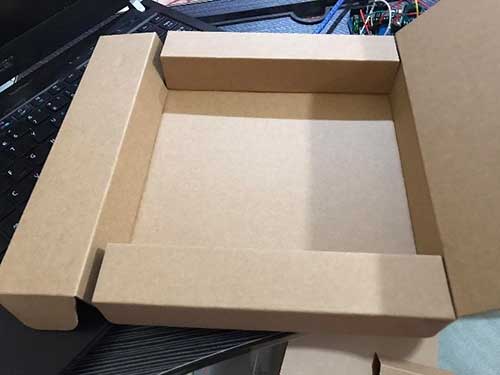
Step 2: Make the base of the game.
Start off with the area where you will place your Arduino setup. Assemble the parts of the cardboard using your glue gun. This can be anything of your imagination, as long as it is big enough to become a mini frisbee base. Don’t forget to include the area where the LEDs and score/points can be placed.
I got my cardboard pieces from a laptop box therefore it was easy for me to assemble the base that I wanted.
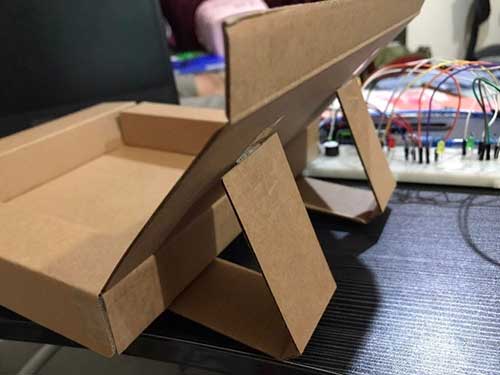
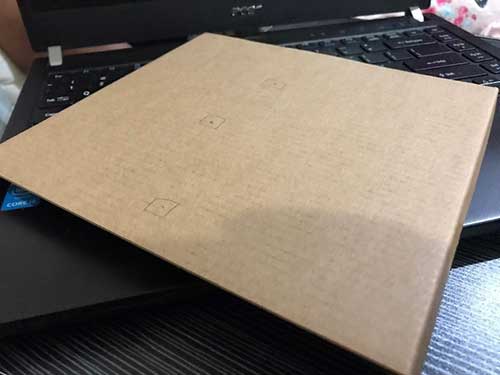
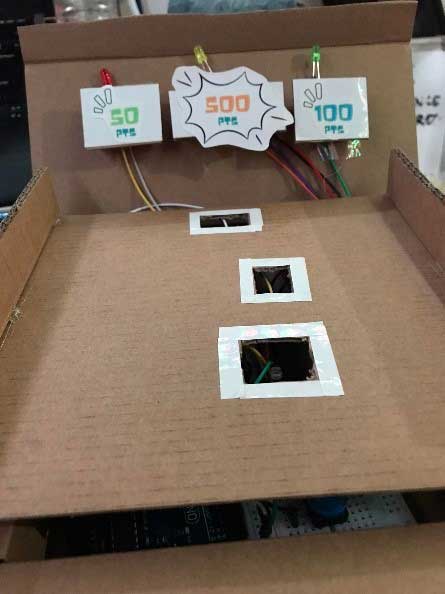
Step 3: Find a cardboard piece that is perfect for the cover and draw gaps or holes where the light sensor can detect light.
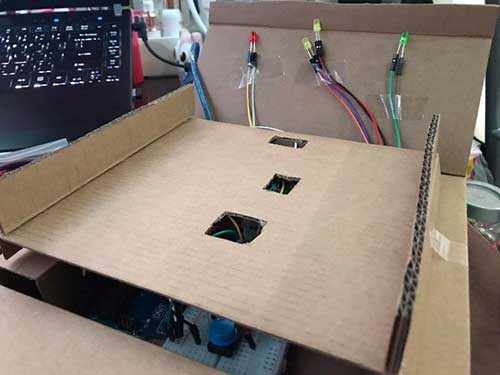
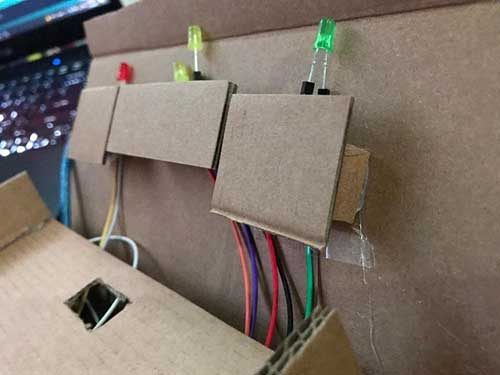
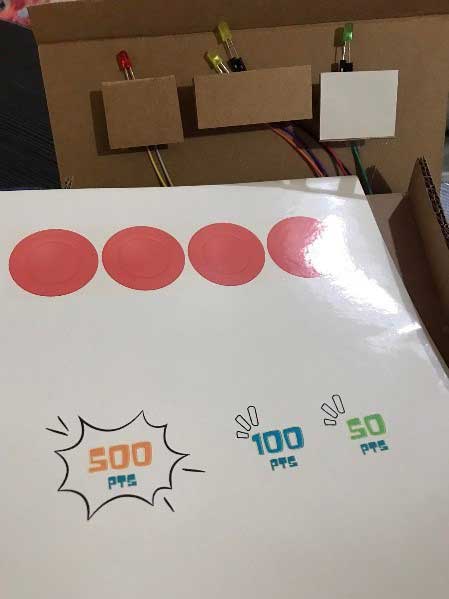
Step 4: Cut out the holes and carefully place your setup on the base. Then, tape the LEDs connected to the male to female wires on the area where the scores will be placed. When the sensor detects the mini frisbee, the LEDs will light up.
Also, create a cardboard cover for the wires so that your product would look neat.
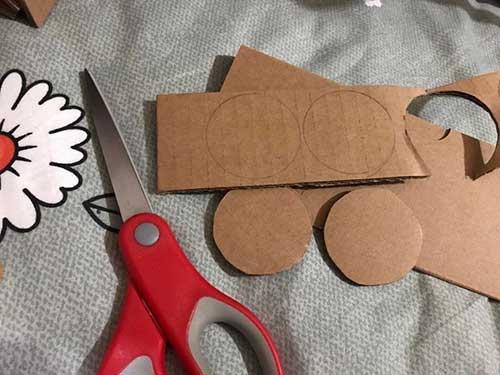
Step 5: Create the mini frisbee discs.
I recommend tracing a round object or using a compass to draw perfect circles and cut them out.
Step 6: Decorate. 😊
Using sticker paper, you can print decorations as well as the label for the points. If your choice of theme is white, you can easily use sticker paper to cover your product with white and draw on designs using markers.
Step 7: Test out your product by placing the mini discs on top of the gaps. The LEDs will light up if it detects the object since light is being blocked from the Light Dependent Resistor/LDR. You might also need to place your game on a bright area as it needs light to function properly.
If everything works out well, you are now ready to play!
While making the product, it took me a lot of hours to create the setup as well as the code since it needed lots of experimenting. At first, it looked like the game in mind will be easy to create but when I started making everything, it overwhelmed me. However, the overall experience was nice because I got to familiarize the world of robotics even though that it wasn’t something I was interested in before.
My realizations after making my product are that professionals that create technology in this kind of field are really amazing people because they put a lot of effort in not only studying every single material but also assembling and creating the particular codes. I’m now looking forward to the next quarter because everything was fun to do overall.


