In some robotics applications, a robot usually needs the guidance of a human operator. This can be done using a joystick or a special controller box. This is useful for remote tasks where the safety of a human being is a priority. An example would be a robotic arm that can handle dangerous substances which are controlled from a distance by a human controller.
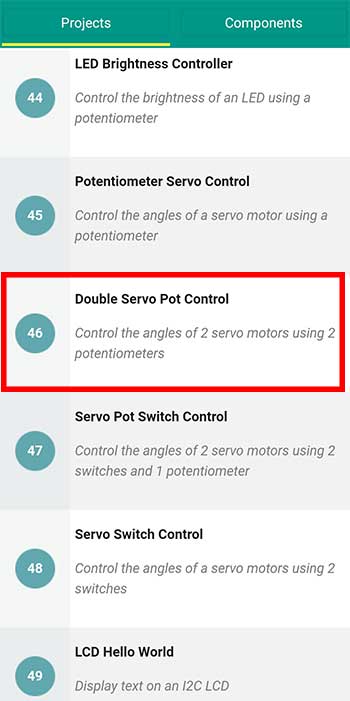
In this article, we will learn how to control servo motors using potentiometers and pushbutton switches. We will explore three projects from the Learn Arduino app to help you get started.
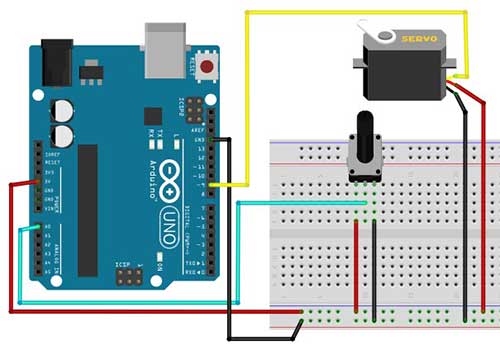
PROJECT 1: Potentiometer Servo Control
This project controls the angles of a servo motor in real-time.
Materials
- 1 potentiometer
- 1 servo motor
- 1 Arduino Microcontroller
Breadboard
Arduino Sketch
#include <Servo.h>
Servo s;

int ps=9; //servo is connected to digital pin 9
int potPin = A0; // potentiometer is connected to analog 0 pin
int angle; // variable used to store the angle value

void setup() {
  s.attach(ps);
}

void loop() {
 angle = analogRead(potPin); // read the value from the potentiometer and save to angle variable
 angle = map(angle, 0, 1023, 10, 170); // convert potentiometer reading to servo angle

 s.write(angle);
 delay(20);
}
Explanation
#include <Servo.h>This statement lets us access the Servo library which contains built-in codes that we can use later for our servo motor.
Servo s;We created a new servo object called s that we will be using from this point forward when we reference the servo motor in the code.
int angle; // variable used to store the angle value
Since the angle is controlled later on by a human controller, we declare this one as a variable. Later on, the value of this angle variable will be changed every time the potentiometer is turned in either direction.
 angle = analogRead(potPin); // read the value from the potentiometer and save to angle variable
 angle = map(angle, 0, 1023, 10, 170); // convert potentiometer reading to servo angle
The value that the angle variable can get from the potentiometer will range from 0 to 1023. We want to use this value as the actual angle that we write into our servo motor. However, there’s no such angle as 1023 degrees. Therefore we need to map these values so that the lowest value we get is 10 degrees and the highest will be 170 degrees, depending on the angles available for your servo motor. Some servos can do 180 degrees, while others have 360 degrees.
Now that we have the angle, we can use it to move our servo motor. We write:
 s.write(angle);
 delay(20);
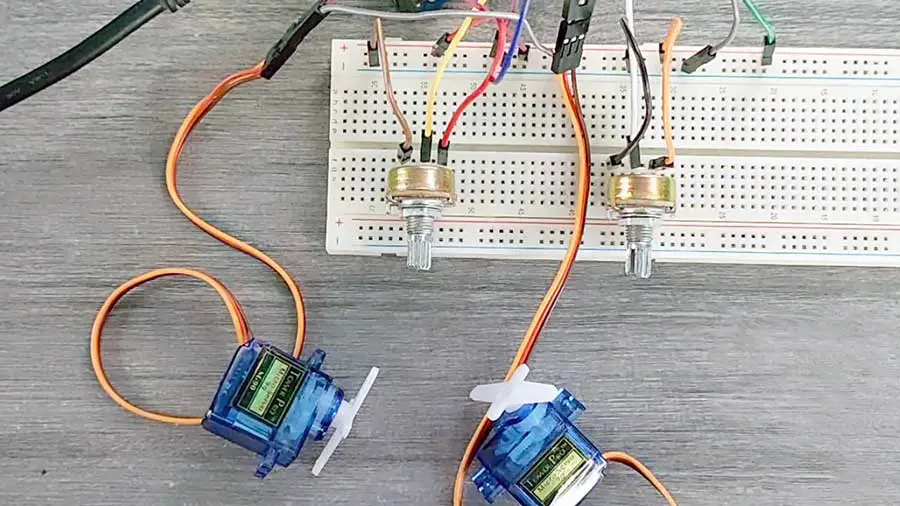
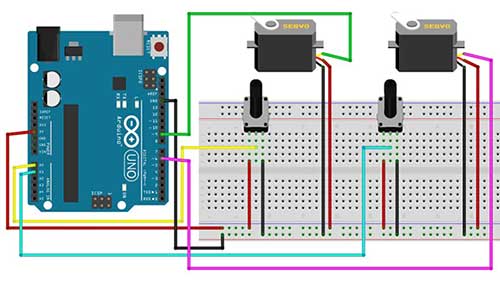
PROJECT 2: Double Servo Pot Control
This time we will try to control 2 servo motors using 2 potentiometers. This is a nice setup for a robotic arm that can move in both x and y-axis.
Materials
- 2 potentiometers
- 2 servo motors
- 1 Arduino Microcontroller
Breadboard
Arduino Sketch
#include <Servo.h>
Servo s1;
Servo s2;

int servo_pin_1 = 9;
int servo_pin_2 = 6;
int pot_1 = A0; //potentiometer analog pin
int pot_2 = A1;
int angle_1; // variable used to store the angle value for servo 1
int angle_2; // // variable used to store the angle value for servo 2

void setup() {
  s1.attach(servo_pin_1);
  s2.attach(servo_pin_2);
}

void loop() {
 // read the value from the potentiometer
 angle_1 = analogRead(pot_1);
 // convert potentiometer reading to a servo angle
 angle_1 = map(angle_1, 0, 1023, 10, 170);

 // read the value from the potentiometer
 angle_2 = analogRead(pot_2);
 // convert potentiometer reading to a servo angle
 angle_2 = map(angle_2, 0, 1023, 10, 170);

 s1.write(angle_1);
 s2.write(angle_2);
 delay(20);
}
This code is heavily commented so there’s really nothing much to explain. I think what’s important here is that whatever we do with the first servo motor, we also do to the second servo. And don’t forget to give each servo a different name, in this project we have s1 and s2.
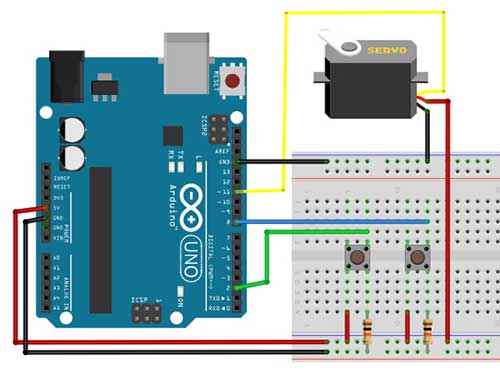
PROJECT 3: Servo Switch Control
In some robotics applications, pushbuttons are used instead of potentiometers, or a combination of both. This project will use two pushbutton switches to control the direction of the servo.
Materials
- 2 pushbutton switches
- 2 10K-ohm resistors
- 1 Arduino Microcontroller
Breadboard
Arduino Sketch
#include <Servo.h>
Servo s1;
int sp1=11;
int pos=0; //the angle of the servo motor
const int b1=2;
const int b2=8;

void setup() {

  s1.attach(sp1);
  pinMode(b1,INPUT);
  pinMode(b2,INPUT);
  Serial.begin(9600);
}

void loop() {

  // Show the value of the buttons on the serial monitor
  Serial.print("b1=");
  Serial.println(digitalRead(b1));
  Serial.print("b2=");
  Serial.println(digitalRead(b2));

  //in this example, when the button is pressed,
  //the value on the serial monitor is 1 (HIGH)

  if (digitalRead(b1)==HIGH || digitalRead(b2)==HIGH){
    while(digitalRead(b1)==HIGH && pos<160){
      pos++; //add 1 to the servo angle, same as pos=pos+1
      s1.write(pos);
      delay(15);
    }
    while(digitalRead(b2)==HIGH && pos>20){
      pos--; //subtract 1 from the servo angle, same as pos=pos-1
      s1.write(pos);
      delay(15);
    }
  }
}
Explanation
First, we check the values of our pushbuttons using the Serial Monitor. We can see the code here:
  // Show the value of the buttons on the serial monitor
  Serial.print("b1=");
  Serial.println(digitalRead(b1));
  Serial.print("b2=");
  Serial.println(digitalRead(b2));
Now what we want to happen is to only move the position of the servo motor if either of the buttons is pressed. That’s why we start with this condition first:
if (digitalRead(b1)==HIGH || digitalRead(b2)==HIGH){If the value in your Serial Monitor is 1 when you press the button then changed the LOW to HIGH.
The first button (b1) takes care of moving the servo up to 160 degrees or to the maximum angle allowable by your servo motor.
The second button (b2) takes care of moving the servo down to 20 degrees or to the minimum angle allowable by your servo.
    while(digitalRead(b1)==HIGH && pos<160){
      pos++; //add 1 to the servo angle, same as pos=pos+1
      s1.write(pos);
      delay(15);
    }
After Arduino has determined that button 1 is pressed, it still has to check if the angle is still less than 160 degrees. If it still is, then we add 1 to the current servo angle which is stored in the variable pos. Even if button 1 is pressed but the angle is already 160, Arduino will no longer add 1 to the current pos variable. Thus, the servo will not move past 160 degrees.
A similar effect is done for button 2. But this time it checks if the angle is still greater than 20. If it is, then it will continue subtracting 1 until it reaches 20.


