You are not limited to letters and numbers when it comes to displaying data on an LCD. If you don’t know it yet, you can easily make your own custom character and give it a name. A custom character can be a logo or an icon that can be used to make creative and fun LCD displays instead of the regular text, numbers, and symbols.
Custom Characters
To create your own custom character, you will need the createChar() function. Each character of a 16x2 LCD panel has a 5-pixel width and an 8-pixel height. Up to 8 different custom characters can be defined in a single program.
To design your own characters, you’ll need to make a binary matrix of your custom character from an LCD character generator or map it yourself.
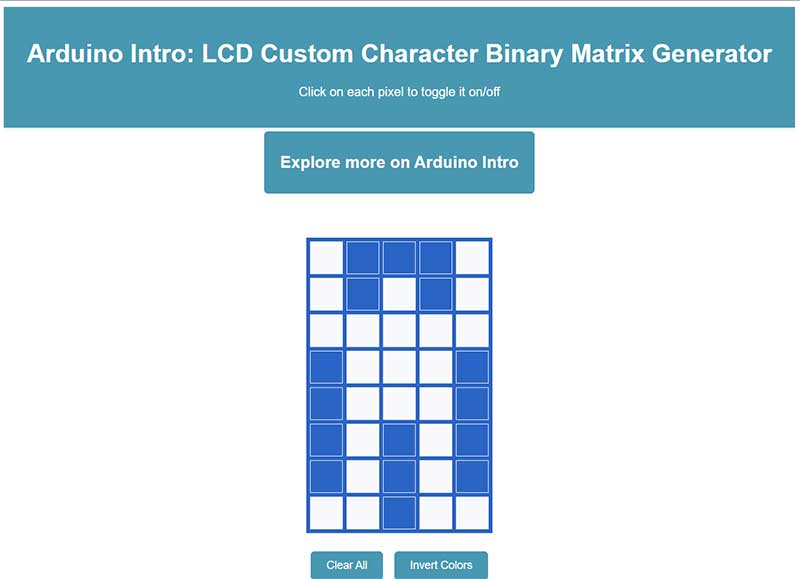
Creating Binary Matrix Online
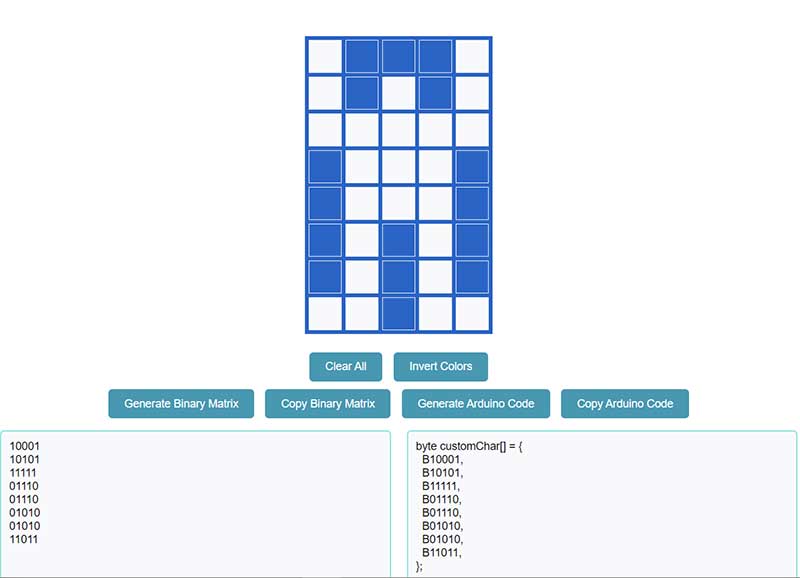
Don’t worry, it’s easy to make a binary matrix. By using an online custom character generator, you’ll just have to click a few pixels to form a design. Once you are satisfied, you can simply copy the auto-generated code into your Arduino sketch.
You can design your custom character here: https://arduinointro.com/lcdcustomcharacter/
PROJECT 1: LCD Custom Characters
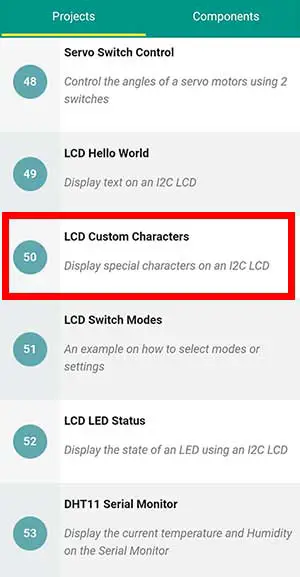
For this project, you will make Project 50: Custom Characters of the Arduino Intro app. Making this LCD project requires you to install the LCD library. You can read the details here.
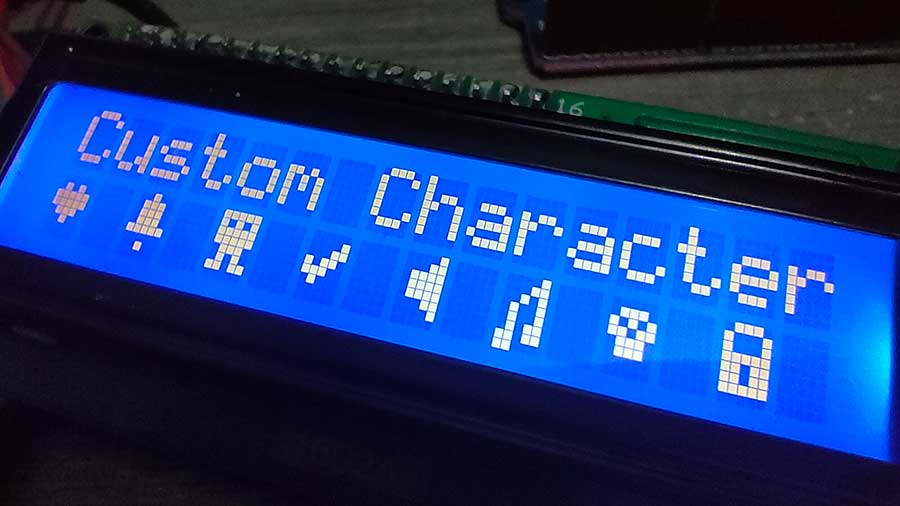
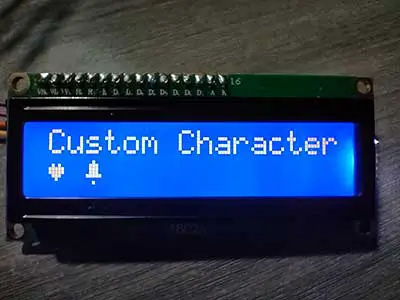
This is the expected output:
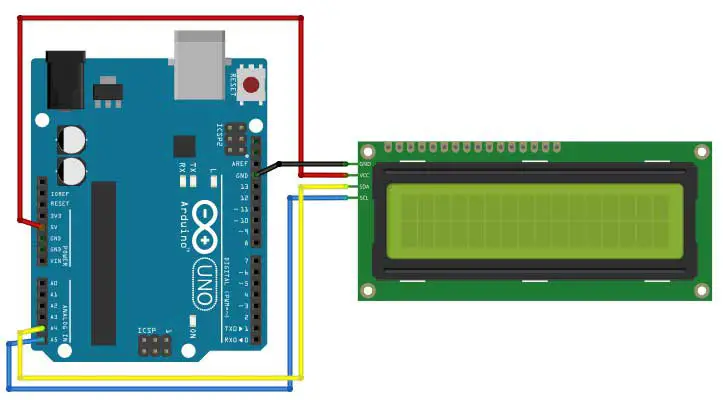
Here is the breadboard circuit:
This is the code:
#include <Wire.h>
#include <LiquidCrystal_I2C.h>
// Creates an LCD object. Parameters: (RS, E, D4, D5, D6, D7)
LiquidCrystal_I2C lcd(0x27, 2, 1, 0, 4, 5, 6, 7, 3, POSITIVE); //lcd is a user-defined name

// Make custom characters:
byte Heart[] = {
  B00000,
  B01010,
  B11111,
  B11111,
  B01110,
  B00100,
  B00000,
  B00000
};
byte Bell[] = {
  B00100,
  B01110,
  B01110,
  B01110,
  B11111,
  B00000,
  B00100,
  B00000
};


void setup() {
  // Specify the LCD's number of columns and rows:
  lcd.begin(16, 2);

  // Create new characters:
  lcd.createChar(0, Heart);
  lcd.createChar(1, Bell);

  // Clears the LCD screen:
  lcd.clear();
  // Print a message to the lcd:
  lcd.print("Custom Character");
}

void loop() {
  // Print all the custom characters:
  lcd.setCursor(0, 1);
  lcd.write(byte(0));
  lcd.setCursor(2, 1);
  lcd.write(byte(1));
}
Here's an explanation of some parts of the code. If this is your first time working with an I2C LCD, I highly suggest reading this article first: Displaying Characters Using the I2C Liquid Crystal Display (LCD)
byte Heart[] = {
  B00000,
  B01010,
  B11111,
  B11111,
  B01110,
  B00100,
  B00000,
  B00000
};
byte Bell[] = {
  B00100,
  B01110,
  B01110,
  B01110,
  B11111,
  B00000,
  B00100,
  B00000
};
This is the part that you should copy from the online custom character generator. You can change the name of your symbol which is found right after the word byte, or you can just leave it as is.
lcd.createChar(0, Heart);This command allows you to create your own custom characters. Up to 8 different custom characters can be created in a single program.
You have to assign your custom character a number starting from 0, followed by the name of your character which was defined in the variable declaration part of your sketch (byte Heart[])
lcd.write(byte(0));To display your special character, use the byte data type followed by the number you specified for your character.
PROJECT 2: LCD Scrolling Text Effect
Making the text scroll across the width of the LCD may seem difficult to code, but, actually, it’s very easy. You just have to add two lines of code and the entire text will scroll either from left to right or from right to left.
Here’s a sample code:
#include <Wire.h> //enables us to use i2c communication
#include <LiquidCrystal_I2C.h> //enables us to use the lcd functions
//I2C pins declaration
LiquidCrystal_I2C lcd(0x27, 2, 1, 0, 4, 5, 6, 7, 3, POSITIVE); //lcd is a user-defined name

void setup()
{

lcd.begin(16,2);//Defining 16 columns and 2 rows of lcd display
lcd.backlight();//To Power ON the back light
lcd.clear();//Clean the screen

}

void loop()
{

lcd.setCursor(16,0); //Defining positon to write from first row,last column .
lcd.print(" Hello World!"); //You can write 16 Characters per line
lcd.scrollDisplayLeft();
delay(1000);

}
lcd.scrollDisplayLeft();
delay(1000);
This function takes anything printed to the LCD and moves it to the left. It should be used in the void loop() section with a delay command following it. You can experiment with the delay to get your desired scroll speed.
The function will move the text 40 spaces to the left before it loops back to the first character.
lcd.scrollDisplayRight();
This is not part of the sample code but this one exists. This function is similar to the lcd.scrollDisplayLeft(), but instead, it moves the text from left to right.


