Here is a simple Arduino project that displays the value of a potentiometer on the screen. In addition, LEDs will also light up based on the value of the potentiometer. Here’s the exact behavior of the LEDs:
|
Potentiometer Value |
LED |
|
Less than or equal to 2 |
Only LED 1 is on |
|
Equal to 3 |
Only LED 2 is on |
|
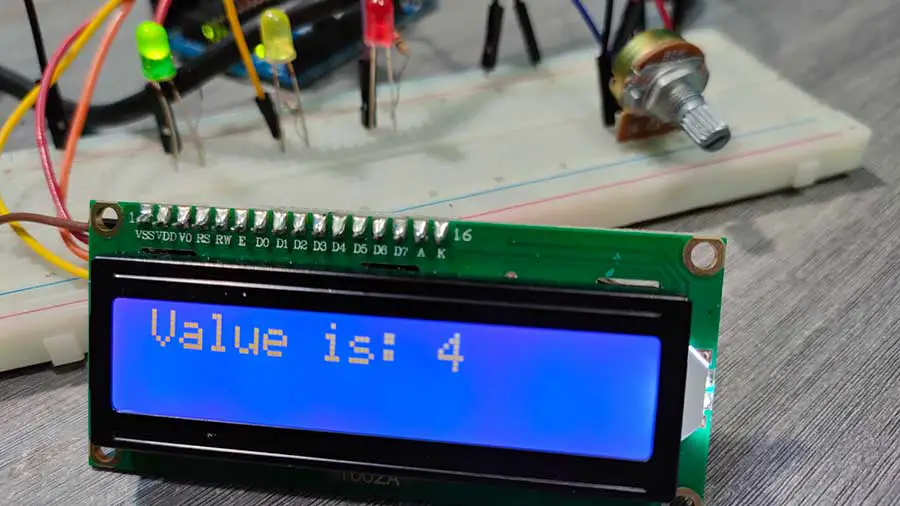
More than or equal to 4 |
Only LED 3 is on |
This project uses the I2C LCD. Using this LCD requires libraries to be installed in your Arduino IDE. For a more thorough explanation of how the I2C LCD works, you may read this article: Displaying Characters Using the I2C Liquid Crystal Display (LCD)
Materials
- Potentiometer x 1
- LED x 3
- 220-ohm resistor x 3
- I2C LCD x 1
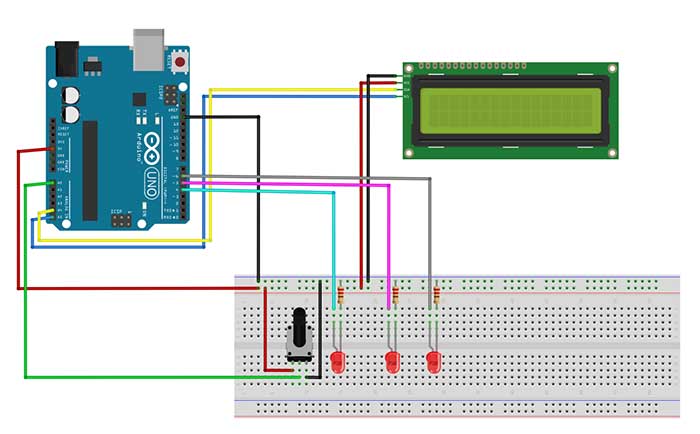
Breadboard Circuit
Arduino Sketch:
#include <Wire.h> //enables us to use i2c communication
#include <LiquidCrystal_I2C.h> //enables us to use the lcd functions
//I2C pins declaration
LiquidCrystal_I2C lcd(0x27, 2, 1, 0, 4, 5, 6, 7, 3, POSITIVE); //lcd is a user-defined name

int sensorValue = 0;
int led_1=4, led_2=5,led_3=6;

void setup()
{
  lcd.begin(16,2);
  lcd.backlight();
  pinMode(led_1,OUTPUT);
  pinMode(led_2,OUTPUT);
  pinMode(led_3,OUTPUT);
}

void loop()
{
  sensorValue=analogRead(A0);
  sensorValue=map(sensorValue,0,1023,1,5);

  lcd.clear();
  lcd.setCursor(0,0);
  lcd.print("Value is: ");
  lcd.print(sensorValue);
  delay(500);

  if (sensorValue <= 2){ //sensorValue is less than or equal to 2
    digitalWrite(led_1,HIGH);
    digitalWrite(led_2,LOW);
    digitalWrite(led_3,LOW);
  }

  else if (sensorValue==3){
    digitalWrite(led_1,LOW);
    digitalWrite(led_2,HIGH);
    digitalWrite(led_3,LOW);
  }
  else if (sensorValue>=4){ //sensorValue is greater than or equal to 4
    digitalWrite(led_1,LOW);
    digitalWrite(led_2,LOW);
    digitalWrite(led_3,HIGH);
  }
}
sensorValue=map(sensorValue,0,1023,1,5);For this sketch, we want to map or convert the value of the potentiometer from a range of 0-1023, to a range of 1-5. Arduino will take care of the values in between.
  lcd.setCursor(0,0);
  lcd.print("Value is: ");
  lcd.print(sensorValue);
If you're familiar with the concatenation operation in Java, then this is exactly what's happening in this section of the code. We have concatenated, or joined two expressions: The string "Value is: " and the value of the sensorValue variable. What happens here is that the value of the sensorValue variable is printed in the next available space, in this case, right after the colon symbol. This is why we don't specify anymore the row and column for it.
This is the output:
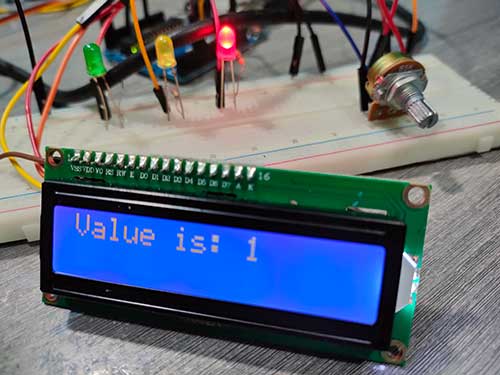
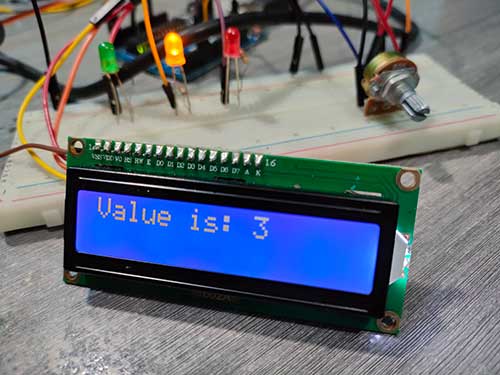
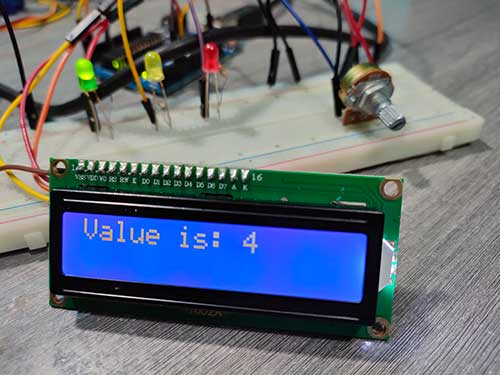
Note the LEDs that are turned on based on the value of the potentiometer.
Here's a demo of this project:


