
Aside from being able to sense what is happening in the environment, a robotics application must also be able to move or manipulate objects around its vicinity. To be able to produce motion, we need to add actuators to our Arduino projects.
Actuators can be likened to the “muscles” of a robot. They provide power that allows the end effectors to move. End effectors are the tools that allow the robot to interact with its environment. Some examples of end effectors are:
- Grippers
- Drills
- Welding guns
- Magnets
- Vacuum cups
But to make these end effectors move from place to place, we need to attach them to an actuator. Some common types of actuators are:
- Electric motors
- Hydraulic systems
- Pneumatic systems
- Shape memory alloys
In this project, we will be using a type of electric motor called a servo motor.
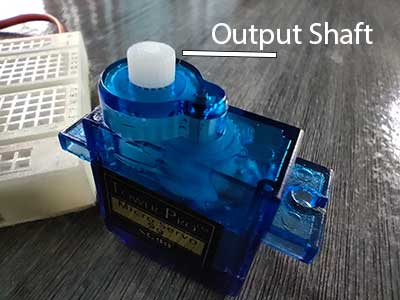
A servo motor is a special type of DC (Direct Current) motor that uses an encoder to determine the position of the output shaft.
A servo motor can move to a specific position quickly. In Arduino, you can specify the angle of the output shaft. Most servo motors can move the shaft from 0 to 180 degrees. While some others can move from 0 to 360 degrees. Some smaller servo motors can move from 20 to 160 degrees.
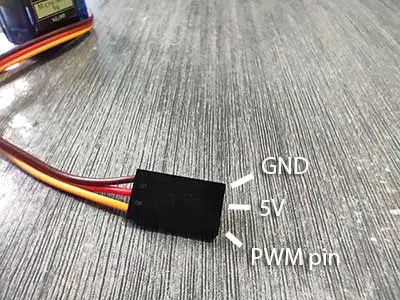
Wiring
The servo we will be using is the small, but popular, TowerPro SG90 micro servo. It is capable of moving the output shaft from 20 to 160 degrees. These are where the servo wires go:
Sample Arduino Servo Projects
Here are 3 actual projects from the Learn Arduino Intro app that will help you get started with the servo motor.
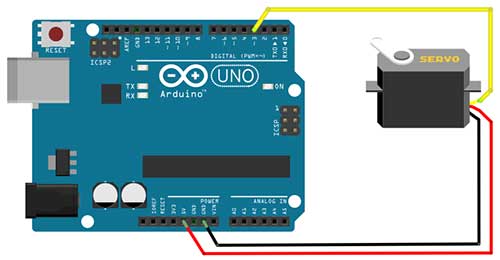
PROJECT 1: Wiper
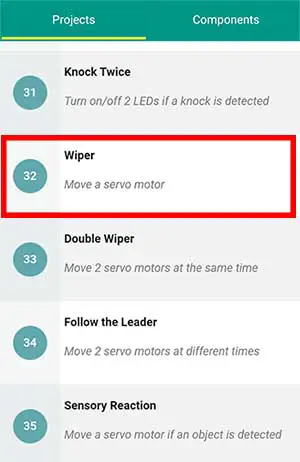
This project moves the servo motor shaft in a continuous loop like a wiper on a windshield.
Materials:
- 1 servo motor
- 1 Arduino microcontroller
Breadboard:
Arduino Sketch:
	//move the servo motor like a wiper

	//access the built-in servo library
	#include <Servo.h>
	Servo Serv1; //create a servo object named Serv1

	//use a PWM pin (3,5,6,9,10,11)
	int pinServo1=3;

	void setup(){
		Serv1.attach(pinServo1);
	}

	void loop(){
		//move the servo 20 degrees
		Serv1.write(20);
		//allow enough time to move
		delay(1000);

		//move the servo 100 degrees
		Serv1.write(100);
		//allow enough time to move
		delay(1000);
	}
Explanation:
Ok, here’s what’s happening in the code:
#include <Servo.h>The first line tells Arduino to access the built-in servo library. In simple terms, a library is nothing but a folder containing codes about the servo motor. So instead of writing the codes again, we can now simply “call” those pre-written codes using functions.
Servo Serv1; //create a servo object named Serv1The second line tells Arduino to create an object from the Servo class. This is now in the realm of Object-Oriented Programming (OOP). Well, we can simply think of it as giving a unique name for our servo motor. Each servo motor connected to our Arduino board should be given a name, that’s it. In this case, the name of the servo motor is Serv1. You can choose another name if you want but consider some of these general rules:
- It should start with a letter
- There should be no spaces
- It should not be a reserved keyword in Arduino (ex: setup, loop, pinMode, etc…)
int pinServo1=3;Next is to declare a variable for the digital pin where the servo motor is connected. The pin must be a PWM pin. (3,5,6,9,10, and 11 on Arduino UNO)
Serv1.attach(pinServo1);Inside the setup function, we need to specifically tell Arduino that a servo motor is attached to a certain pin.
Now, we go inside the loop().
Serv1.write(20);What we want to do is move the servo 20 degrees. To do that, we just type in the name of our servo motor then followed by the write(20). The 20 inside the parentheses signifies the angle.
We should give our servo some time to travel to that particular angle, so we need to type in some delay. A delay of 1000 milliseconds is safe enough, but you can try to experiment with a time delay that suits you.
Serv1.write(100);After that delay, the servo is then instructed to move again, this time, at 100 degrees. Give it a delay once again.
That’s it. Since this is inside a loop, the servo will move from 20 degrees to 100 degrees and vice versa.
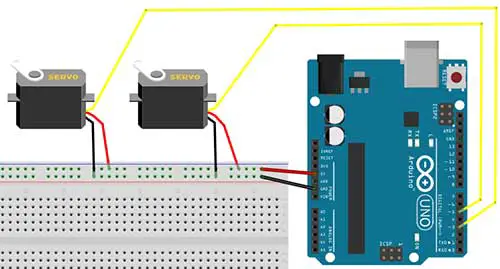
PROJECT 2: Double Wiper
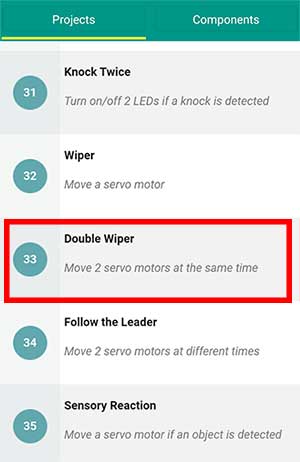
This is similar to the previous project but this time, we will use 2 servo motors.
Materials:
- 2 servo motors
- 1 Arduino microcontroller
Breadboard:
Arduino Sketch:
//move 2 servo motors like a wiper

  //access the built-in servo library
  #include <Servo.h>
  Servo Serv1; //create a servo object named Serv1
  Servo Serv2; //create a servo object named Serv2

  //use PWM pins
  int pinServo1=3;
  int pinServo2=5;

  void setup(){
    //attach the servo motors to their pins
    Serv1.attach(pinServo1);
    Serv2.attach(pinServo2);
  }

  void loop(){
    //move the servo motors at the same time
    Serv1.write(20);
    Serv2.write(20);
    delay(1000);

    Serv1.write(160);
    Serv2.write(160);
    delay(1000);
  }
Explanation:
  Servo Serv1; //create a servo object named Serv1
  Servo Serv2; //create a servo object named Serv2
Since we have 2 servos connected, we should give one a unique name. Take note that Servo is written with a capital S.
    Serv1.attach(pinServo1);
    Serv2.attach(pinServo2);
Attach each servo motor to its Arduino pin.
    Serv1.write(20);
    Serv2.write(20);
    delay(1000);
To make the servos move at the same time, we can simply write Serv2.write(20) immediately after typing Serv1.write(20).
    Serv1.write(160);
    Serv2.write(160);
    delay(1000);
We will do the same to move the servo to 160 degrees.
PROJECT 3: Follow the Leader
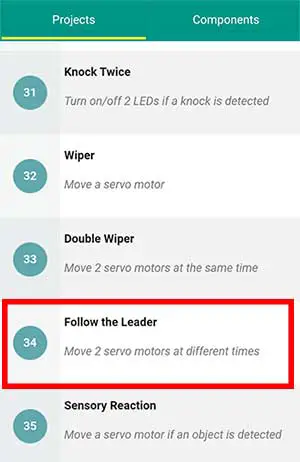
This is basically the same with Project 33: Double wiper. We will use the same breadboard setup. The only thing we will modify is the code. Instead of the 2 servos moving at the same time, we will move each of them separately.
Arduino Sketch:
	//move 2 servo motors like a wiper
	//but not at the same time

 	//you may need an external power supply
	//for the servo motors if using more than 1

	//access the built-in servo library
	#include <Servo.h>
	Servo Serv1; //create a servo object named Serv1
	Servo Serv2; //create a servo object named Serv2

	//use PWM pins
	int pinServo1=3;
	int pinServo2=5;

	void setup(){
		//attach the servo motors to their pins
		Serv1.attach(pinServo1);
		Serv2.attach(pinServo2);
	}

	void loop(){
		Serv1.write(20);
		//wait for 1 second before moving the
		//other servo motor
		delay(1000);
		Serv2.write(20);
		delay(1000);

		Serv1.write(160);
		delay(1000);
		Serv2.write(160);
		delay(1000);
	}
		Serv1.write(20);
		//wait for 1 second before moving the
		//other servo motor
		delay(1000);
		Serv2.write(20);
		delay(1000);
The first thing we did is to move Serv1 to 20 degrees, then wait 1 second while it travels. Next, we moved Serv2 and then wait another second.
		Serv1.write(160);
		delay(1000);
		Serv2.write(160);
		delay(1000);
We do the same thing to move Serv1 and Serv2 to 160 degrees.


