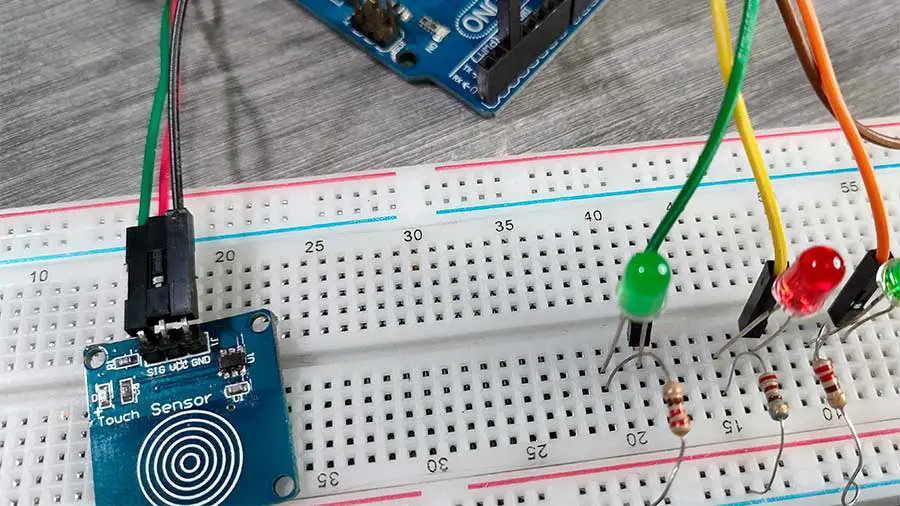
Creating different modes for your projects adds a new level of sophistication. With this technique, you can already combine many different functionalities in just one Arduino sketch. Your end-user can activate a mode by simply triggering a sensor connected to your project. In this article, the sensor used is a touch sensor, although, you may use any sensor that you like.
This Arduino sketch has 5 modes to interact with the 3 LEDs. Here’s what will happen for each mode:
Mode 0: All LEDs will be turned off
Mode 1: Only LED 1 will be turned ON
Mode 2: Only LED 2 will be turned ON
Mode 3: Only LED 3 will be turned ON
Mode 4: All LEDs will blink
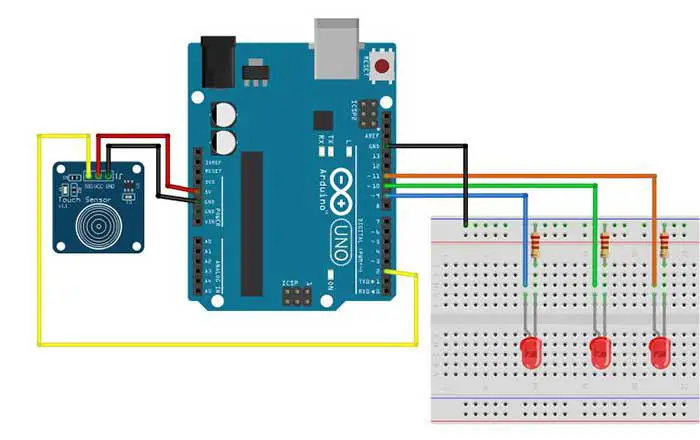
This is the breadboard circuit:
And here is the code:
  //add LED modes using a touch sensor

  int touchsensor = 2;
  int led1=9,led2=10,led3=11;
  int mode=0;


  void setup()
  {
    pinMode(touchsensor, INPUT);
    pinMode(led1, OUTPUT);
    pinMode(led2, OUTPUT);
    pinMode(led3, OUTPUT);

  }

  void loop()
  {
    if(digitalRead(touchsensor) == 1) //sensor is touched
    {
      //add 1 to the current value of the mode variable
      mode=mode+1;
    }


    //check for the current value of the mode variable
    //and execute the appropriate LED behavior.
    if (mode==0){
      //turn of all LEDs
      digitalWrite(led1,LOW);
      digitalWrite(led2,LOW);
      digitalWrite(led3,LOW);
      delay(500);//time to next touch sensor reading

    }
    if (mode==1){
      //only LED 1 is on
      digitalWrite(led1,HIGH);
      digitalWrite(led2,LOW);
      digitalWrite(led3,LOW);
      delay(500);//time to next touch sensor reading
    }
    else if(mode==2){
      //only LED 2 is on
      digitalWrite(led1,LOW);
      digitalWrite(led2,HIGH);
      digitalWrite(led3,LOW);
      delay(500);//time to next touch sensor reading
    }
    else if(mode==3){
      //only LED 3 is on
      digitalWrite(led1,LOW);
      digitalWrite(led2,LOW);
      digitalWrite(led3,HIGH);
      delay(500);//time to next touch sensor reading
    }
    else if(mode==4){
      //blink all LEDs

      digitalWrite(led1,HIGH);
      digitalWrite(led2,HIGH);
      digitalWrite(led3,HIGH);
      delay(500);
      digitalWrite(led1,LOW);
      digitalWrite(led2,LOW);
      digitalWrite(led3,LOW);
      delay(500);
    }
    else if(mode==5){
      //turn off all LEDs
      digitalWrite(led1,LOW);
      digitalWrite(led2,LOW);
      digitalWrite(led3,LOW);

      //reset the mode variable to 0
      mode=0;
      delay(500);//time to next touch sensor reading
    }

  }
The secret to this sketch is the use of the mode variable, although you can have another name for this variable.
   if(digitalRead(touchsensor) == 1) //sensor is touched
    {
      //add 1 to the current value of the mode variable
      mode=mode+1;
    }
Every time the touch sensor is touched, it will add 1 to the current value of the mode variable.
Immediately after adding 1 to the current value of the mode variable, the sketch will check for the current mode using the if-else if statement. In programming, we often encounter problems where we need to choose from many options. When you want to evaluate several conditions, we can use the if-else if statement or the switch statement.
In this example, we will be using the if-else if statement. To use this statement, you need to provide a condition for each else if. Remember that the condition must return a TRUE or a FALSE answer. When a condition becomes TRUE, all the commands inside that else if block will be executed and the rest will just be ignored. Arduino then proceeds to the next statement after the if-else if statement.
    else if(mode==5){
      //turn off all LEDs
      digitalWrite(led1,LOW);
      digitalWrite(led2,LOW);
      digitalWrite(led3,LOW);

      //reset the mode variable to 0
      mode=0;
      delay(500);//time to next touch sensor reading
    }
One final thing, I mentioned that every time the sensor is triggered, the mode variable will be increased by 1. However, we only have 5 modes for this project. There must be a way to cycle through the modes from 0 to 5. To achieve this, we must reset the mode variable to 0 once it reaches the 5th mode. This could be as simple as assigning 0 as the new value of the mode variable when the last mode is selected.


