0:00
With sound or ultrasonic sensors, a high frequency signal beyond the range of human hearing is generated by an oscillator
0:10
The signal is then passed to a transducer which emits the signal in varying ultrasonic frequencies
0:23
If there are objects within the range of the sensor, the reflected sound will then be taken
0:29
processed by the sensor. The delay between the transmission and reception of the sound gives an
0:37
indication as to how far or how near an object is. The ultrasonic sensor is another type of proximity
0:44
sensor. These proximity sensors all use the basic detection principle. The sensor emits a signal
0:52
which will bounce back once it detects an obstacle. The sensor will read the bounce signal and
0:59
compare it to the original signal emitted. If there is a difference between those signals
1:07
the sensor will then consider that it has encountered an obstacle. In this project, we will be using
1:15
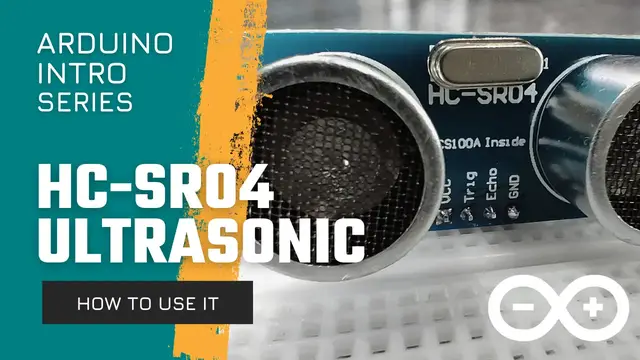
the HCSR-O-4 ultrasonic sensor module. The sensor can detect objects from 2 centimeters to 400
1:24
centimeters are roughly one inch to 13 feet the sensing angle is 15 degrees or less its
1:32
operating voltage is 5 volts the pins of the hc sr o 4 are VCC the RIG or trig
1:42
echo and Gn d the VCC pin connects to the 5 Vp pin of the Ardlino G and D
1:51
connects the G pin you can attach the TRIG and ECHO pin to any digital pin except 0 and 1 To test our HCSRO4 ultrasonic sensor we will make Project 22 Sonar Distance Calculator of the Arduino
2:09
Intro app. This project will simply print out the distance of an object in the serial monitor
2:16
The distance will be expressed in inches. In our circuit, the DRIG pin is connected to pin 6 and the echo pin is
2:27
connected to pin 7. VCC goes to 5V and G and D goes to GND. Now let's go to the code
2:35
First we need to declare our variables. The first variable is constant trigger equal to six
2:43
The constant keyword stands for constant which means that we can no longer change the value
2:50
of the trigger variable. However, this is not really necessary. You can still write
2:57
it as int trigger equal to 6. The same can be said about the echo variable. The trigger variable is needed so we can control when the sensor will limit the sound signal. The echo variable will enable us to receive the reflected sound signal
3:19
Next are the distance and disk underscore inches variables. They are assigned as float data types and not int
3:27
All variables with a float data type can accept whole numbers with decimal parts
3:34
We will use float since the signal that we will be getting from the HCSRO4 ultrasonic sensor is encoded in decimal form
3:46
Later on in the code, we will convert the distance value to inches and it will be saved in the dist underscore inches variable
3:57
Remember that we will be using the serial monitor to print the distance of an object in inches So in the setup function we write serial that begin 9
4:10
Next, we need to set the trigger variable as an output pin and the echo variable as an input pin
4:16
Again, trigger enables the sensor to send the signal, while echo enables it to receive the reflected signal
4:25
Next, we go to the loop function. First, we need to clear the trigger pin so we can start sending out the signal
4:33
We do this by writing digital right trigger, comma, low, followed by delay microseconds 5
4:42
Next, we will start sending out the ultrasonic signal. This can be achieved by writing digital right trigger, comma, high, followed by delay microseconds 10
4:55
And lastly, digital right trigger, comma, low. Now we will expect the signal to bounce back once an object is detected
5:05
So we need to prepare the echo pin to receive that signal
5:10
To do this, we need to write distance as equal to pulse in, echo, comma, high
5:16
This means that whenever a reflected signal is received, it can be saved to the distance variable
5:23
The HCSR-O-4 sensor will express the signal in decimal form. As of this time, the value of our distance variable is still meaningless as it's just a series of numbers
5:37
Therefore, we need to convert it into something that we can measure easily
5:42
The next part of the code will convert the value of the distance variable into inches
5:50
The formula is simple. We just multiply the distance variable by 0.001657, which is a constant
6:01
And then finally we multiply the result by the constant 39 The result will then be saved to the disk underscore inches variable Finally we are ready to print the actual distance in inches in the
6:16
serial monitor. We write serial that print this underscore inches followed by serial
6:22
print line double quotes then inches. This technique enables us to print the actual
6:29
number of inches followed by a space and the word inches. They will be written on the same line. A delay of 200 milliseconds is
6:40
added which means that the next reading will happen after 200 milliseconds have passed
6:57
Now let us try to turn on an LED once an object is
7:02
detected by our ultrasonic sensor. Don't forget to add an LED to your breadboard circuit
7:13
For the code we simply add an if else statement after we get the distance value. Our code will now look like this
7:32
Ultrasonic sensors are a great addition to your Arduino projects. However, there may be some things that can interfere with the signal
7:45
The problem with sound sensors is that the resolution of sound decreases with distance
7:50
It's also possible to get false readings since the physical properties of objects may change
7:55
the frequency of the sound that is reflected or may cause the sound to be absorbed completely
8:02
Nonetheless, ultrasonic sensors remain a popular choice among robotics enthusiasts