0:00
A touch sensor is a type of device that captures and records physical touch on an object
0:07
It enables a device or object to detect touch, typically by a human user or operator
0:19
A touch sensor primarily works when an object or individual gets in physical contact with it
0:28
Today, almost all user interface is based on touch. There is a vast range of applications for touch sensors
0:37
We can see them in softphones, lamps, elevators, ATMs, and many others
0:43
Touch sensors are the important components in modern, automated, and robotics applications
0:51
Other than touch, it can capture a certain extent of proximity without direct
0:58
interaction or physical contact. The touch sensor used in applications will reduce operating costs such as repairs and maintenance
1:05
For example, in computers, the usage of touch sensors eliminates mechanical objects like mouse and keyboard
1:12
Mechanical parts in these sensors tend to break down after prolonged use
1:17
Touch sensors are more convenient and more reliable to use without moving parts
1:23
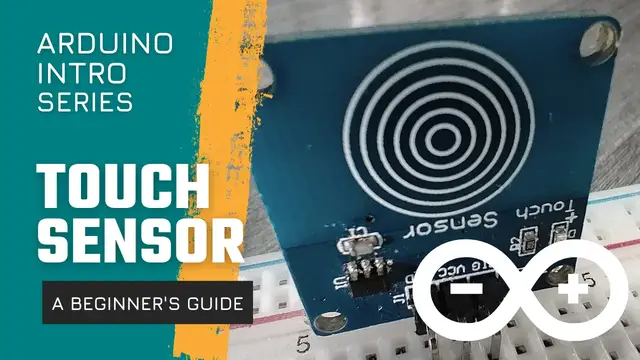
In this video, we will be using the TTP-223. 3B Capacitive Touch Sensor Module
1:31
This is the momentary variety of the touch sensor. Touch it and it turns on, release and it turns off
1:40
In the normal state, the module output is low, with a low power consumption
1:45
When a finger touches the corresponding position, the module output is high
1:51
And if it is not touch for 12 seconds, it switches to low power mode
1:57
For the control interface, there is a total of three pins, GND, VCC and SIG
2:05
GND is the ground, VCC is the power supply, and SIG is the digital signal output pin
2:13
The green LED power indicator lights up when all the connections are correct
2:19
The touch area is the area inside the icon which is similar to a fingerprint and can be triggered by a light touch of a finger Before making our Touch sensor project let talk first about the working principle of touch sensors
2:37
As you know by now, these sensors are sensitive to any pressure or force applied such as the touch of a finger
2:48
The principle of touch is like that of a switch. When the switch is closed, the current flows
2:56
Otherwise, the current will not flow. Similarly, when the touch sensor senses the touch, then it acts like a close switch
3:06
Otherwise, it acts as an open switch. There are two types of touch sensors, capacitive and resistive sensors
3:16
The touch sensor we are working with is a capacitive type of sensor
3:23
A capacitive touch sensor contains two parallel conductors with an insulator between them
3:30
These conductor plates act as a capacitor. A capacitor is just a device used to store an electric charge, consisting of one or more pairs of conductors separated by an insulator
3:45
Now, when these conductor plates come in contact with our fingers, our finger acts as a conductor
3:53
object. So due to this, there will be an uncertain increase in capacitance. The sensor then
4:01
measures the change in capacitance. When the circuit detects a change in capacitance, it
4:09
generates a signal. The signal can then be read by your Arduino board. To demonstrate
4:16
the use of a touch sensor, we will make projects 11 and 12 of the Arduino
4:23
intro app. Basically, the coding is just the same with the push button and the switch project
4:29
A touch sensor is just another kind of switch that we can use in our Arduino projects
4:36
Project 11 touch sensor value lets us check if we connected touch sensor properly. This project
4:42
only writes the one or zero on the screen using the serial monitor. The number one should
4:49
appear when the sensor is touch and zero if. if it is not touched
4:54
For the breadboard circuit we connect the VCC pin of the touch sensor to the 5V pin of the Arduino board Next we connect the GND pin of the sensor to the G of the Arduino
5:11
Finally, we connect the SIG pin of the sensor to any of the digital pins of the Arduino
5:16
board except 0 and 1. These pins are reserved for modules that can process serial communication, such as Bluetooth modules
5:27
In this project, we'll connect it to Digital Pin 2. Now, for the code, first we declare a variable called Touch Sensor for Digital Pin 2
5:38
Remember that this is where the SIG pin of the touch sensor is connected to the Arduino board
5:45
The second variable, Val, is used to hold the value of the signal generated by the sensor
5:54
The value of this valve variable will either be 1 or 0
6:01
1 if the sensor is touch, 0 if not touch. For the setup function, we just need to set the touch sensor variable as input
6:11
since we will be expecting a signal from the touch sensor attached to this pin
6:17
Then we set up the communication between the touch sensor and the Arduino
6:21
by writing serial that begin 9,000.6. This is needed if you want to display the 1 and 0 on the screen using the serial monitor
6:31
Inside the loop function, we continuously take a reading from the sensor by writing Val is equal to digital read touch sensor
6:41
The signal from the sensor will then be saved to the Val variable which we declared earlier
6:47
Remember that the signal we get from the sensor is either 1 or 0
6:53
Finally, we write Serial. Print LN Val to display the value of the Val variable
7:00
We display this on the serial monitor of the Arduino IDEE. A delay of 100 milliseconds is added, which simply means that you are going to read the touch sensor again after 100 milliseconds
7:15
This could be adjusted based on your preference. When you are done uploading the code, open the serial monitor by going to go
7:23
the tools menu and selecting serial monitor. For our next project Project 12 Lead Touch of the Arduino Intro app we will try to turn on an LED when the sensor is touched and turn it off when left untouched For the breadboard circuit we simply add an LED circuit
7:42
In this project, the LED anode is connected to Digital Pin 10
7:48
For the code, again, we declare a variable for Digital Pin 2
7:53
We will also add another variable for the digital pin used by the LED
7:59
In this example, the variable will be called pin lead. Since we connected the LED to pin 10, the value of the pin lead variable will be 10
8:09
In the setup function, we set the touch sensor pin as input and the LED pin as output
8:16
In the loop function, we just want to check if the touch sensor was touch or not
8:22
A simple if-else statement will do the job. You will notice that we can write the digital read function inside the condition
8:29
part of the if statement. Instead of writing a separate digital read statement, just before the if
8:37
statement, we can actually use this shortcut method. Take note of the double equal symbol. This is how we
8:45
compare two expressions if they are equal. A single equal sign will simply assign a value to a variable
8:53
or another expression. If the answer to the condition is true, then the code block under the
8:59
the if statement will be executed and the code block under the else statement will just be ignored
9:06
In this case, if the center is not touch, meaning if the touch sensor value is low, then the LED is turned on
9:14
You can, of course, modify this behavior if you want. Otherwise, when a touch sensor value is high, then the LED is turned off
9:24
In robotics and automation, we are trying to mimic how the human body works
9:29
When a part of our body touches something, immediately the surface information will be sent to our brain so we can react accordingly
9:39
The same technique can also be implied in today's robotics applications and also electronic devices consisting of various sensors like infrared, light, temperature, and many others
9:52
Nowadays, we are coming across many user interfaces that are operated on a single touch
9:57
So if you have not added a sensor to your Arduino projects yet, I would highly recommend using a touch sensor first