Adding some kind of a meter can enhance your Arduino projects visually. It offers a nice interface that updates the users on what’s happening in your project. A nice example would be an audiometer that tells how loud the sound is.
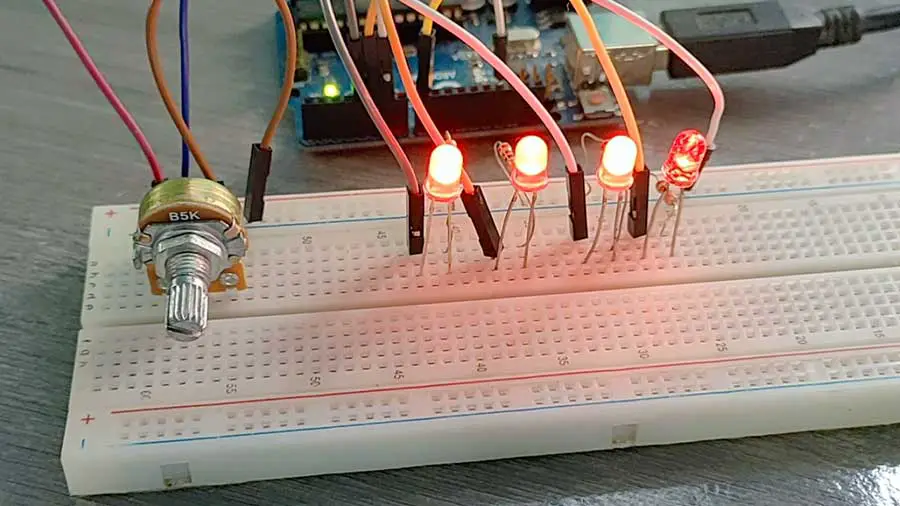
This project uses LEDs to create a simple meter. The LEDs are connected to a rotary potentiometer. The idea is to light up a certain number of LEDs depending on how far the potentiometer’s knob has traveled in either direction.
Here is basically what will happen:
- Potentiometer value is equal to 0: All LEDs are turned off
- Potentiometer value is equal to 1: Only LED 1 will be turned ON
- Potentiometer value is equal to 2: Only LEDs 1 and 2 will be turned ON
- Potentiometer value is equal to 3: Only LEDs 1, 2, and 3 will be turned ON
- Potentiometer value is equal to 4: All LEDs are turned ON
Materials:
- 4 LEDs
- 4 220-ohm Resistor
- 1 Rotary Potentiometer
- 1 Arduino Microcontroller
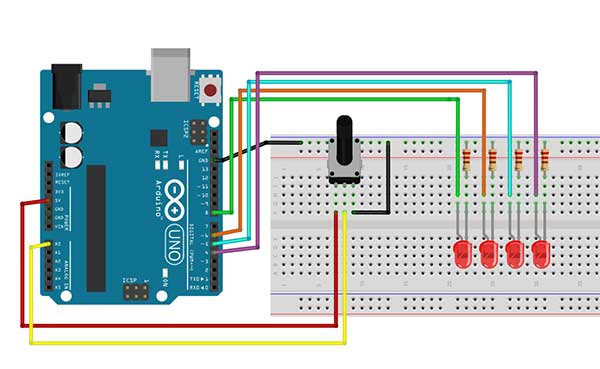
Breadboard
Arduino Sketch
int sensorValue = 0;
int led1=4,led2=5,led3=6,led4=8;

void setup()
{

  pinMode(led1,OUTPUT);
  pinMode(led2,OUTPUT);
  pinMode(led3,OUTPUT);
  pinMode(led4,OUTPUT);

}

void loop()
{
  sensorValue=analogRead(A0);
  sensorValue=map(sensorValue,0,1023,0,4);

  delay(100);

  if (sensorValue==0){

    digitalWrite(led1,LOW);
    digitalWrite(led2,LOW);
    digitalWrite(led3,LOW);
    digitalWrite(led4,LOW);
  }

  if (sensorValue==1){

    digitalWrite(led1,HIGH);
    digitalWrite(led2,LOW);
    digitalWrite(led3,LOW);
    digitalWrite(led4,LOW);
  }

  if (sensorValue==2){

    digitalWrite(led1,HIGH);
    digitalWrite(led2,HIGH);
    digitalWrite(led3,LOW);
    digitalWrite(led4,LOW);

  }

  if (sensorValue==3){

    digitalWrite(led1,HIGH);
    digitalWrite(led2,HIGH);
    digitalWrite(led3,HIGH);
    digitalWrite(led4,LOW);
  }

  if (sensorValue==4){

    digitalWrite(led1,HIGH);
    digitalWrite(led2,HIGH);
    digitalWrite(led3,HIGH);
    digitalWrite(led4,HIGH);
  }

}
int sensorValue = 0;The first thing you will do is to declare variables for the LEDs and a variable to store the value of the potentiometer (sensorValue).
  pinMode(led1,OUTPUT);
  pinMode(led2,OUTPUT);
  pinMode(led3,OUTPUT);
  pinMode(led4,OUTPUT);
And then inside the setup() you just need to set the LED pins as OUTPUT pins.
sensorValue=analogRead(A0);This line enables you to read the value of any device connected to an analog pin. The analogRead() will give you a value from 0 to 1023. The value is then stored into the sensorValue variable.
The next step is to map the value of the sensorValue variable. We could use the value as is, but we still need to find the correct values to trigger the LEDs from a range of 0 to 1023. In this project, we only need 5 values:
- 0 - All LEDs are turned off
- 1 - Only LED 1 will be turned ON
- 2 - Only LEDs 1 and 2 will be turned ON
- 3 - Only LEDs 1, 2, and 3 will be turned ON
- 4 - All LEDs are turned ON
In order to change the range from 0 -1023 to 0-4, we need the map() function. The map() function re-maps a number from one range to another. That is, a value of fromLow would get mapped to toLow, a value of fromHigh to toHigh, values in-between to values in-between, etc.
This is the syntax of the map() function:
map(value, fromLow, fromHigh, toLow, toHigh)
This is our code:
sensorValue=map(sensorValue,0,1023,0,4);
This means that if the current value of the sensorValue variable is 0 then its new value will be 0. If the current value is 1023, then its new value will become 4. Arduino will do some mathematical computations to get the values in between.
The rest of the code is just a series of if statements.