Infrared or IR proximity sensors emit infrared light and once this light hits an object, it is reflected back to the sensor. Depending on the strength of the reflected light, the sensor will know how far or close an object is. The stronger the reflected signal, the closer the object. The weaker the signal, the farther the object is.
The function of a proximity detector is to be able to tell a moving machine when it is near an object without it having to actually bump against the obstacle. In proximity detection, what we are more interested in are devices that allow machines to detect obstacles without collision.
There are several types of proximity sensors available. One of which is the infrared or IR proximity sensor. An example of an infrared proximity sensor is the parking detector. The parking detector is a simple device that can be seen in a modern parking lot. A green light may turn on when there is no car occupying the parking space, while a red light turns on when the space is occupied. The IR sensor in effect detects the presence of a car in a parking space.
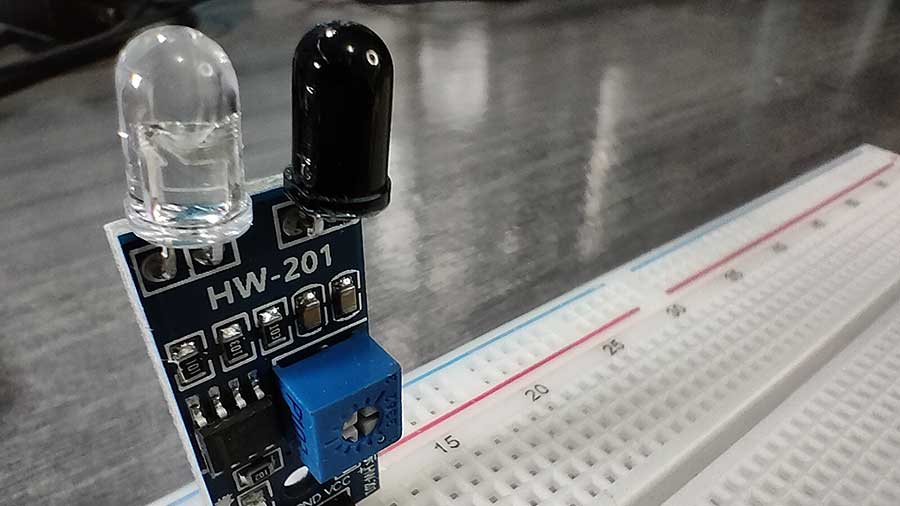
To demonstrate the capability of an IR proximity sensor, we’ll be using the HW-201 IR obstacle sensor module.
The detection range of this module is from 2-30cm (depending on the surface). It only has a digital output, which means, it only gives a HIGH or LOW signal, or 1 or 0. HIGH if it detects an object, LOW if no object is detected. This module requires 5 volts DC.
An IR sensor is made up of two basic parts: an infrared LED and an infrared photodiode. The IR LED emits the infrared light while the IR photodiode converts the reflected LED light to an electrical current that allows the sensor to interpret the strength of the reflected IR.
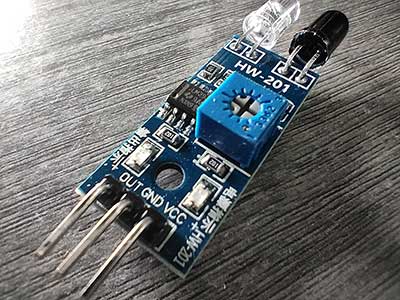
There are three header pins for the HW-201 obstacle sensor. The VCC goes to the 5V on the Arduino board. GND, of course, should be connected to the GND on the Arduino, and the OUT pin goes to any digital pin, except 0 and 1.
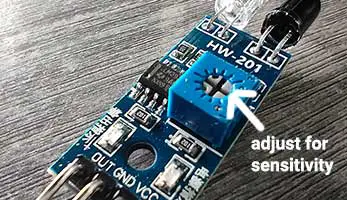
There is also an adjuster in the module to adjust the distance of the object before the sensor is triggered. You can turn the adjuster clockwise or counterclockwise using a screwdriver to adjust the sensitivity level.
PROJECT: IR LED
To test our IR obstacle sensor, we will try to turn on an LED when an object is detected and turn it off when no object is detected. For the breadboard circuit, we simply add an LED circuit.
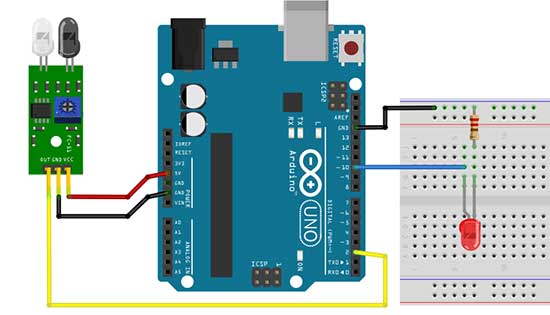
In this project, the LED anode is connected to digital pin 10.
	//Switch an LED using an IR sensor

	int ir = 2;
	int PinLed = 10;
	int val=0;


	void setup()
	{
		pinMode(ir, INPUT);
		pinMode(PinLed, OUTPUT);

	}

	void loop()
	{
		if(digitalRead(ir) == LOW)
		{
			digitalWrite(PinLed, HIGH);
		}
		else
		{
			digitalWrite(PinLed, LOW);
		}
	}
For the code, we declare a variable named ir for digital pin 2, where the obstacle sensor is connected. We will also add another variable for the digital pin used by the LED. In this example, the variable will be called PinLed. Since we connected the LED to pin 10, the value of the PinLed variable will be 10.
		pinMode(ir, INPUT);
		pinMode(PinLed, OUTPUT);
In the setup function, we set the ir variable as INPUT and the PinLed as OUTPUT.
In the loop function, we just want to check if an object was detected. A simple if-else statement will do the job. You will notice that we can write the digitalRead function inside the condition part of the if statement. Instead of writing a separate digitalRead statement just before the if statement, we can actually use this shortcut method. Take note of the double equal symbol (==), this is how we compare two expressions if they are equal. A single equal sign will simply assign a value to a variable or another expression.
If the answer to the condition is true, then the code block under the if statement will be executed and the code block under the else statement will just be ignored. If the answer to the condition is false, then the code block under the if statement will be ignored while the code block inside the else statement will be executed. In this case, if an object is detected, then the LED is turned ON. You can, of course, modify this behavior if you want. Otherwise, when there is no object, then the LED is turned OFF.
As useful as the infrared sensor may be, keep in mind that there are some downsides to using the infrared detection method. The following can affect the detection process:
1. There are other external sources of light
2. The reflective nature of the object’s surface
3. The color of the object being detected may interfere with the reading of the sensor.
But even with these downsides, the IR sensor is still one of the most commonly used robotics sensors. It can be modified to any kind of robotics application where detection is involved. A robotics kit is not complete without some type of proximity sensor such as the infrared sensor.